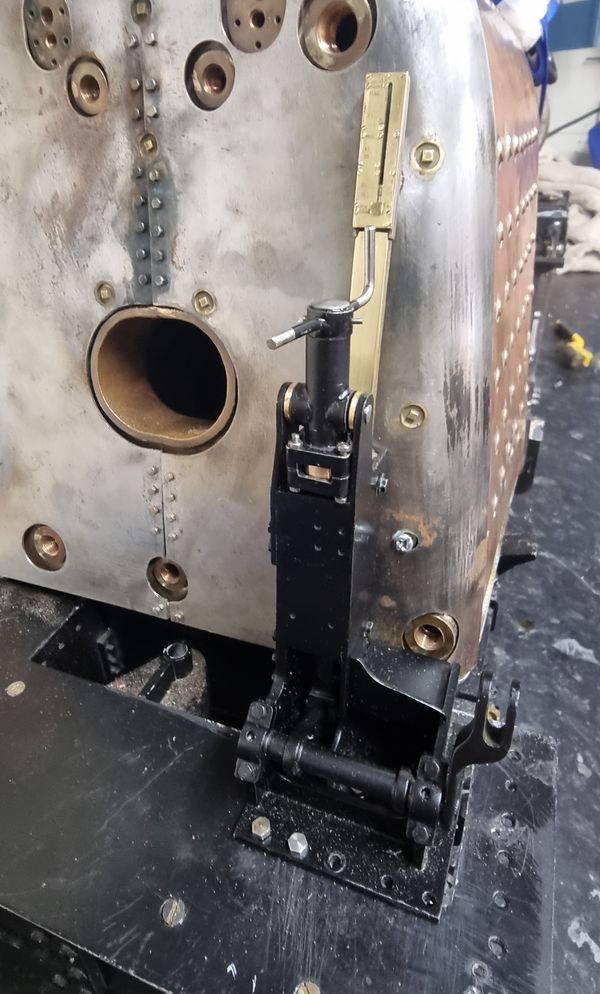
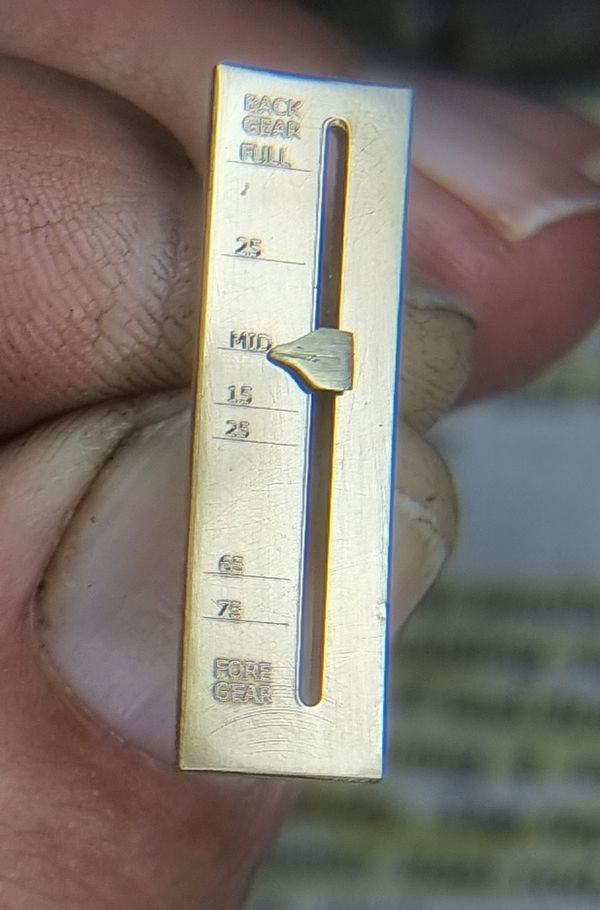
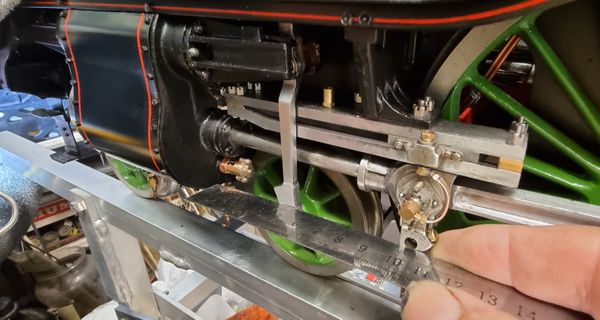
Flying Scotsman Reverser dial gauge completion. With the cleading nearing completion I felt confident enough to finish off the reverser dial gauge and its track which in part is connected or, in my case, leaning to
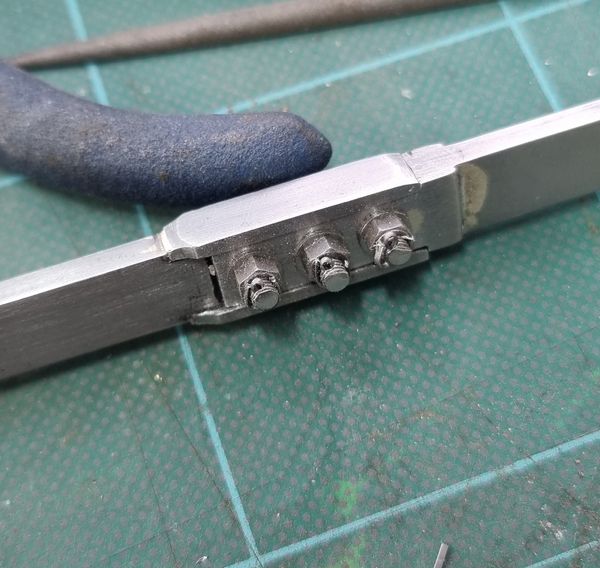
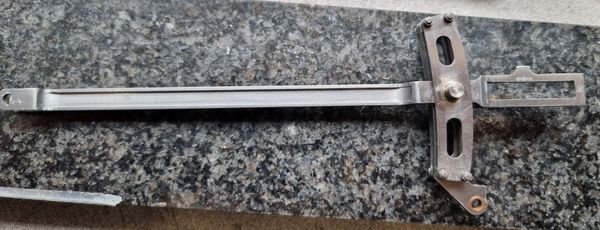
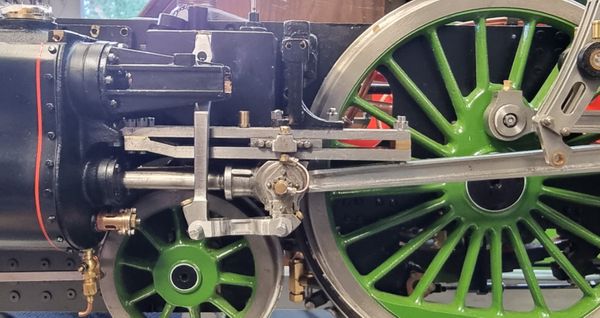
Flying Scotsman Reach Rod part 3 Last time we built the the front section of the reach rod, this time we shall tackle the rear section and the two pins required for fitting of said reach
Flying Scotsman Reach Rod part 2 Last time I said that I needed to look into the reach rod joint as Don's drawing wasn't very clear and as it turned out, not to the works drawing
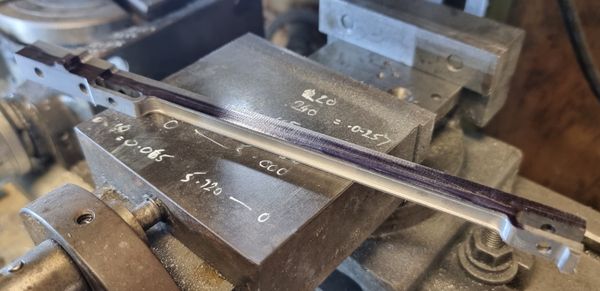
Flying Scotsman Reach Rod Part 1 With the reverser nearing completion it was time to take a look at the reach rod, but before doing so, I decided it would be wise to do some checks
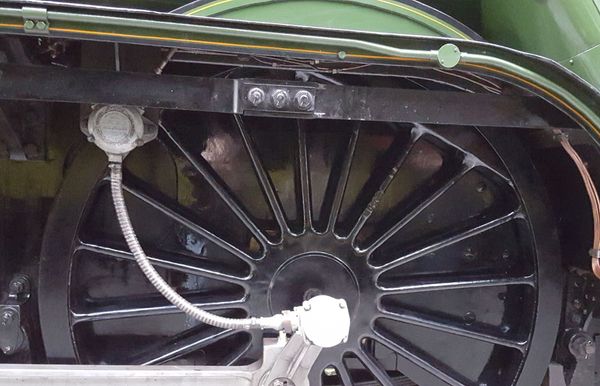
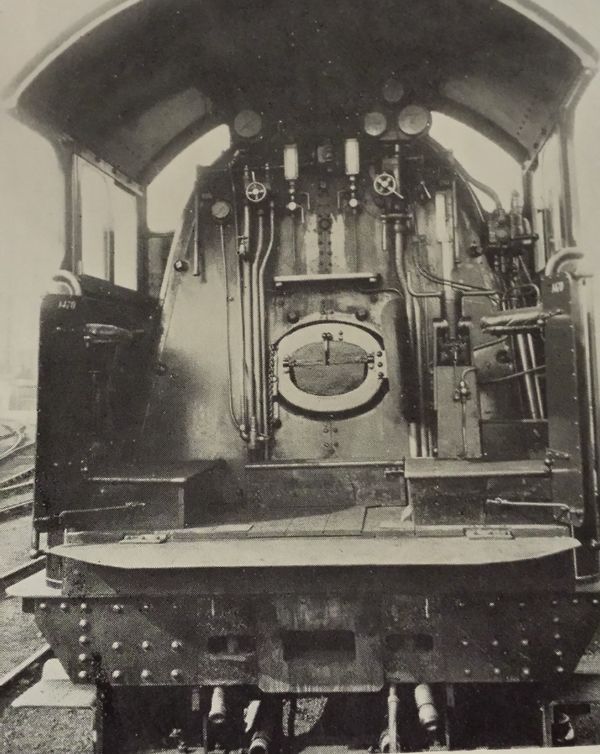
Flying Scotsman Reverser part 7 I shall begin this update with a picture from Sir Nigel Gresley's overhaul images available online, I've probably said this before, but for anyone building a Gresley pacific, A1/3
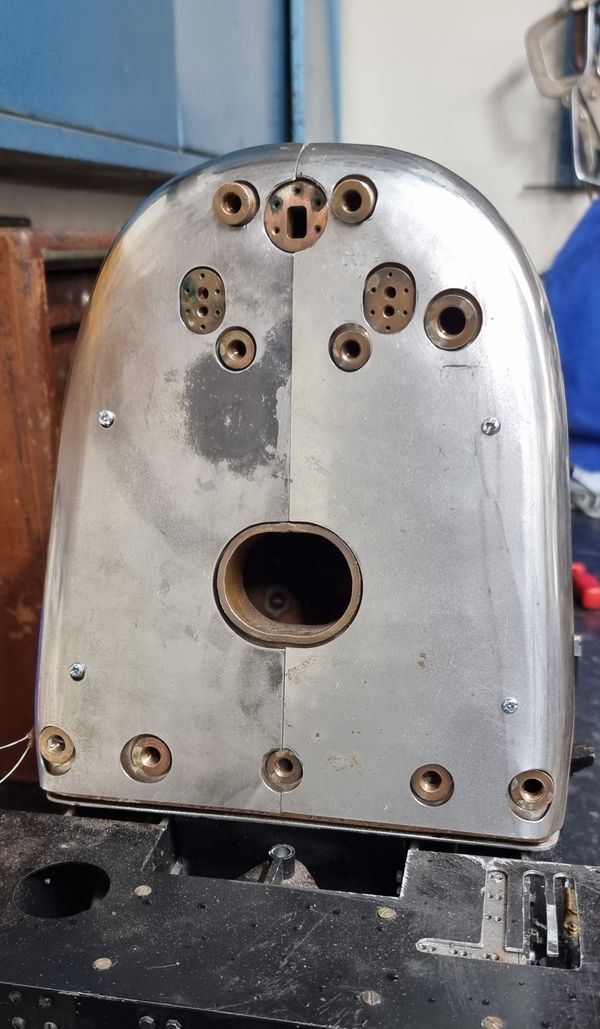
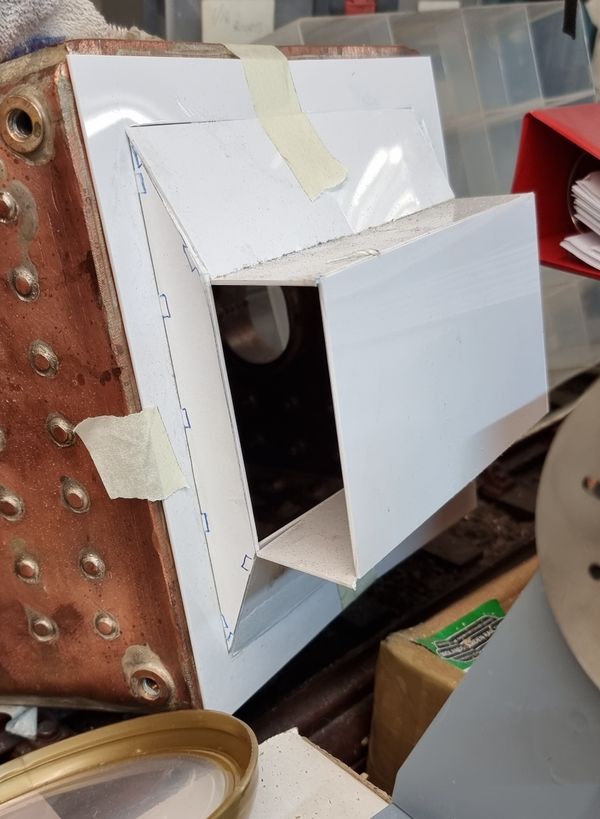
Flying Scotsman BACKHEAD CLEADING 2 Last update I said that the sleeve would be my next job (I have made a start) but forgot to mention that the backhead still needed some details so will
Flying Scotsman Backhead Cleading This is one of those 'interdependent' parts that need to be taken care of when building the reverser, or to be more precise for working out the brass indicator plate
Flying Scotsman Reverser Part 6 (+brass indicator plate) Don says " We now come to an area where everything is interdependent" Actually he says this later when reaching the construction of the sleeve, thrust plate and nut. Still, the
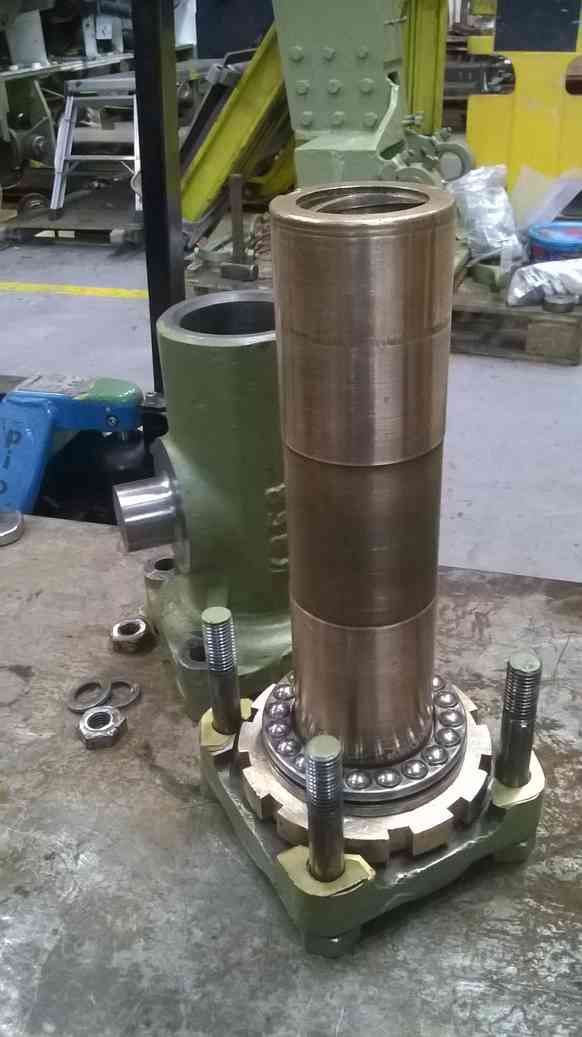
Flying Scotsman Reverser part 5 In this update I'll cover the fabrication of the reverser shaft including the extra checks that I took when assembling the parts thus ensuring no issues further down the line.
Flying Scotsman REVERSER: PART 4 Continuing from part 3 I am finally getting something assembled that looks like a Gresley reverser. I'll give a few details on the extra detail items covered in this article
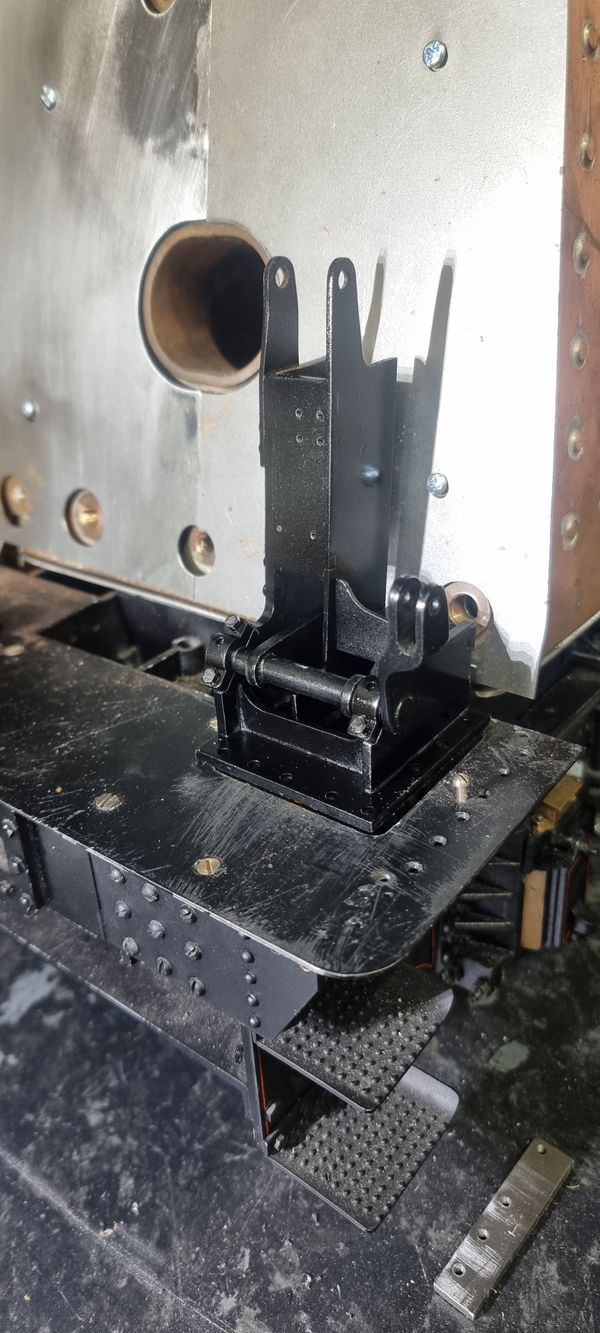
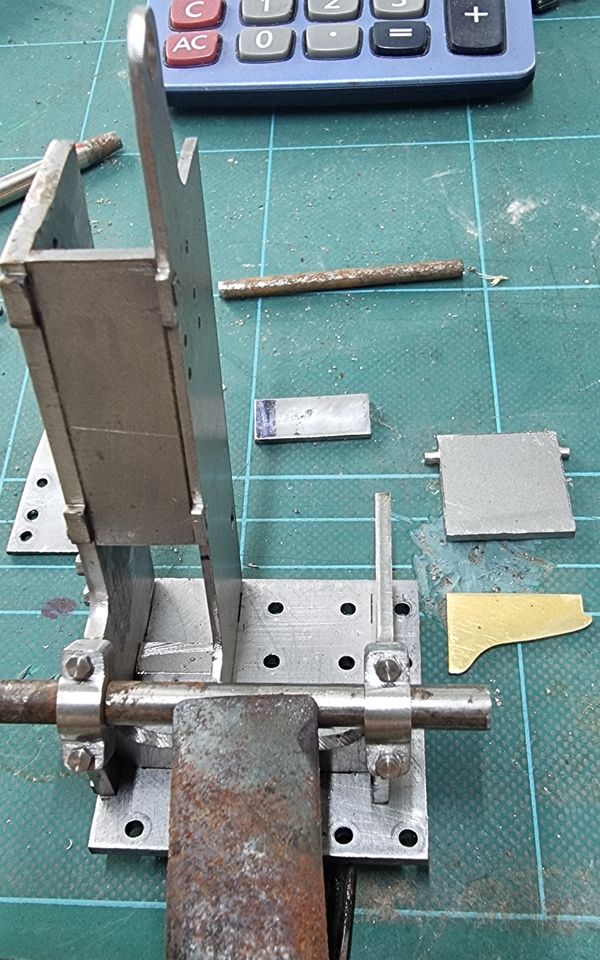
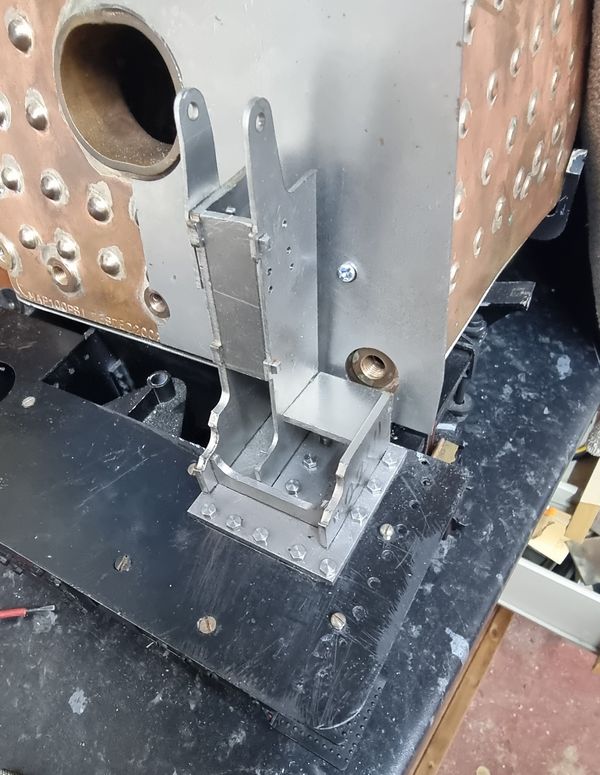
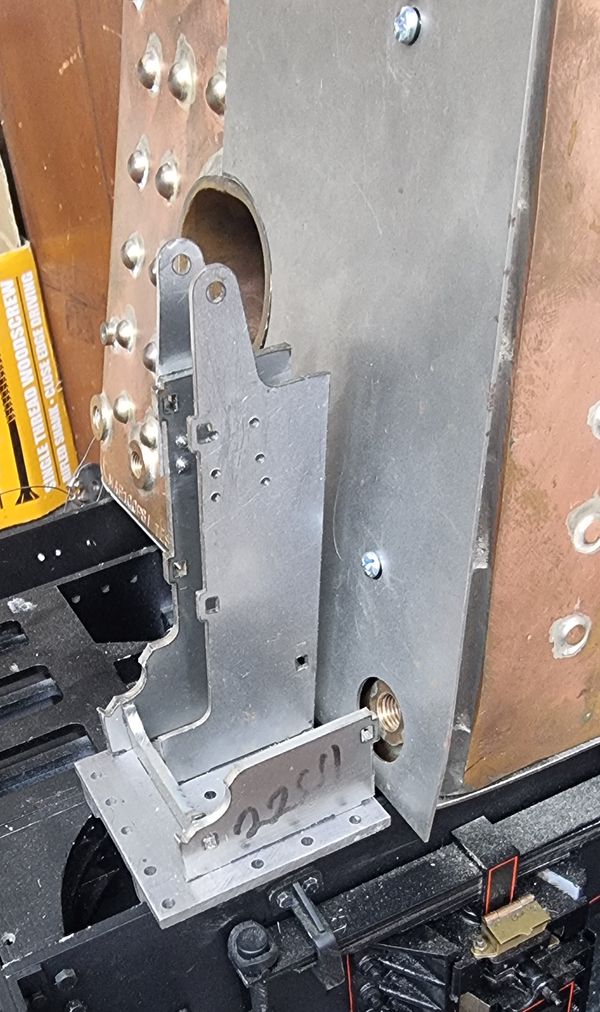
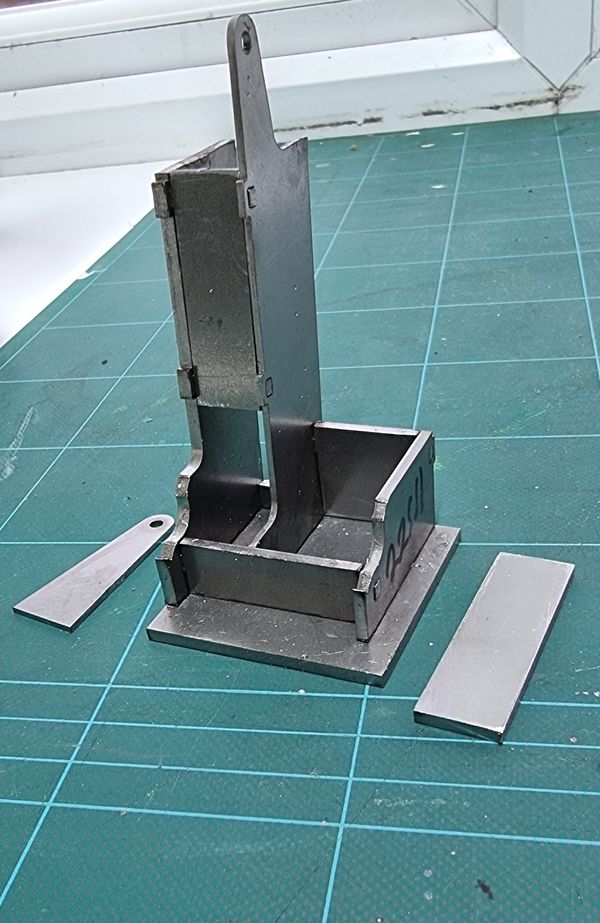
Flying Scotsman REVERSER: Part 3 STAND ASSEMBLY To Quote the great Don Young, "The stand will test both our resolve and patience" That may be so but then you add nutter's like me, and many of you
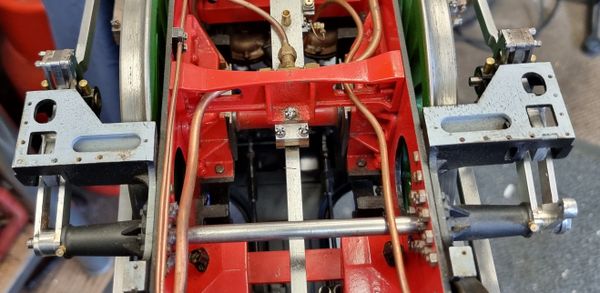
Flying Scotsman REVERSER: Part 2 In the last article, we had the reverser ready for brazing but we're not ready for that stage yet. We first need to transfer the mounting holes to the reverser
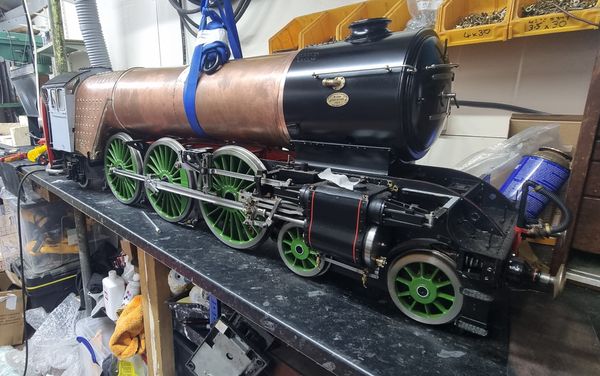
Flying Scotsman REVERSER: Part 1 Yes, I'm back on the loco, It's hard to believe that the last time I worked on the loco itself was June 2022. The workshop still has some way to
Flying Scotsman Ashpan The ashpan is one of those parts that need to be made to fit both the area between the frames and the shape of the foundation ring, Don says as
Flying Scotsman Radius Rod completed/fitted..lifting arms fabricated and fitted This entry sees the completion of the radius rods, the lifting arms and the sliding blocks connecting the two. I have to say that i have been making up these
Flying Scotsman Radius Rods Part 3 With the front face finished it was then time to machine the backs, I mentioned before that I would make a decision on whether to flute the backs later, I
Flying Scotsman Radius Rods part 2 It was now time to create a lot of swarf, I guess there can be a number of ways to tackle this, this is how I did it with the
Flying Scotsman Radius Rods part 1 Although these are a pretty simple part to machine from solid there will be a good few different set-ups involved, plus added complications of changing the design to be more
Flying Scotsman Union Links Once these are made and fitted I'll for the first time have the 2:1 conjugated valve gear working, exciting times ahead. The union links are pretty straightforward machining but
Flying Scotsman Combination Lever Today I begin some of the more interesting parts to the motion, I say 'interesting' in as far as they take a little more thought in the setup. There aren't
Flying Scotsman Locomotive Weighbridge A good working steam locomotive needs to be set up balanced on it’s axles for best tractive effort, something that I have been working on for my model of
Flying Scotsman Valves: spindles cross-drilled to fit valve crossheads, valve guides painted and temporarily fitted. I decided that now was a good time to revisit the valves to finish off the spindles and fit their crossheads. 2 each for the left and right cylinders but
Flying Scotsman Final fitting of pistons, dummy cotter joints, cylinder covers, front relief valves, and the stainless cover plates trimmed and fitted. I have a fair bit to cover in this entry, so here goes... First up is making the gaskets for the cylinder covers, Don states to fit these dry, I
Flying Scotsman Rod and Slidebar oiling pots I have revisited the coupling/connecting rod oiling pots, they are the same design but the material has been changed from steel to brass. I had tried to find bronze
Flying Scotsman Inside Connecting Rod and Piston/crosshead fitting With the outside connecting rods and pistons now fitted and working in their cylinders, it was time to do the same for the middle cylinder. The connecting rod itself was