
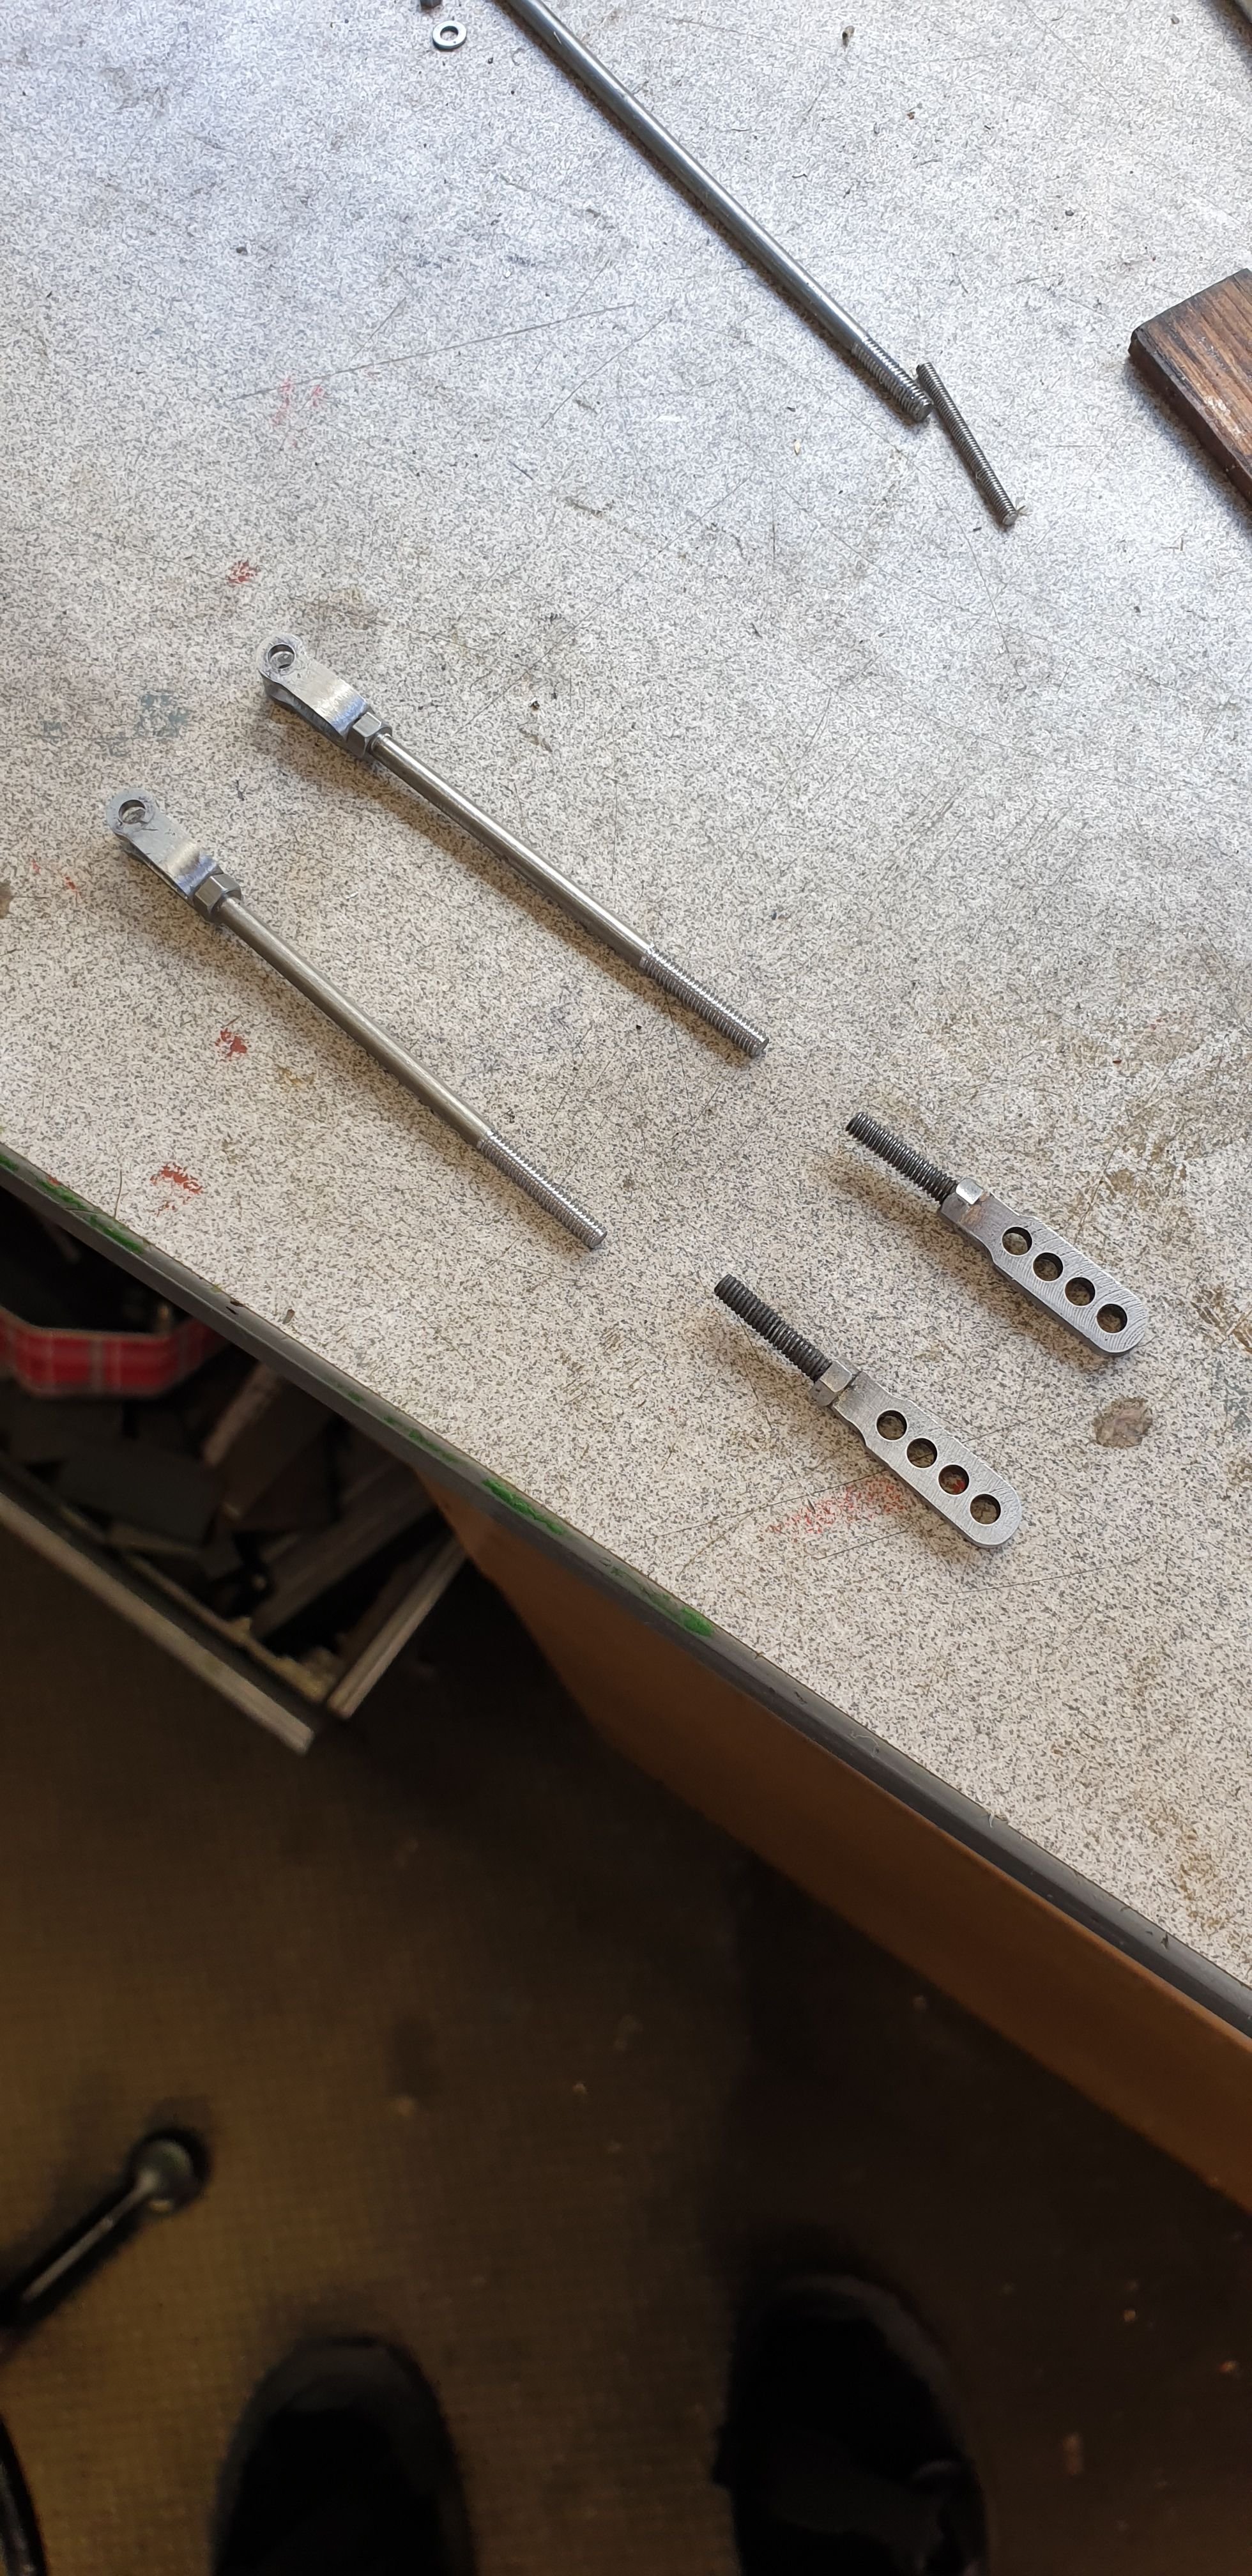
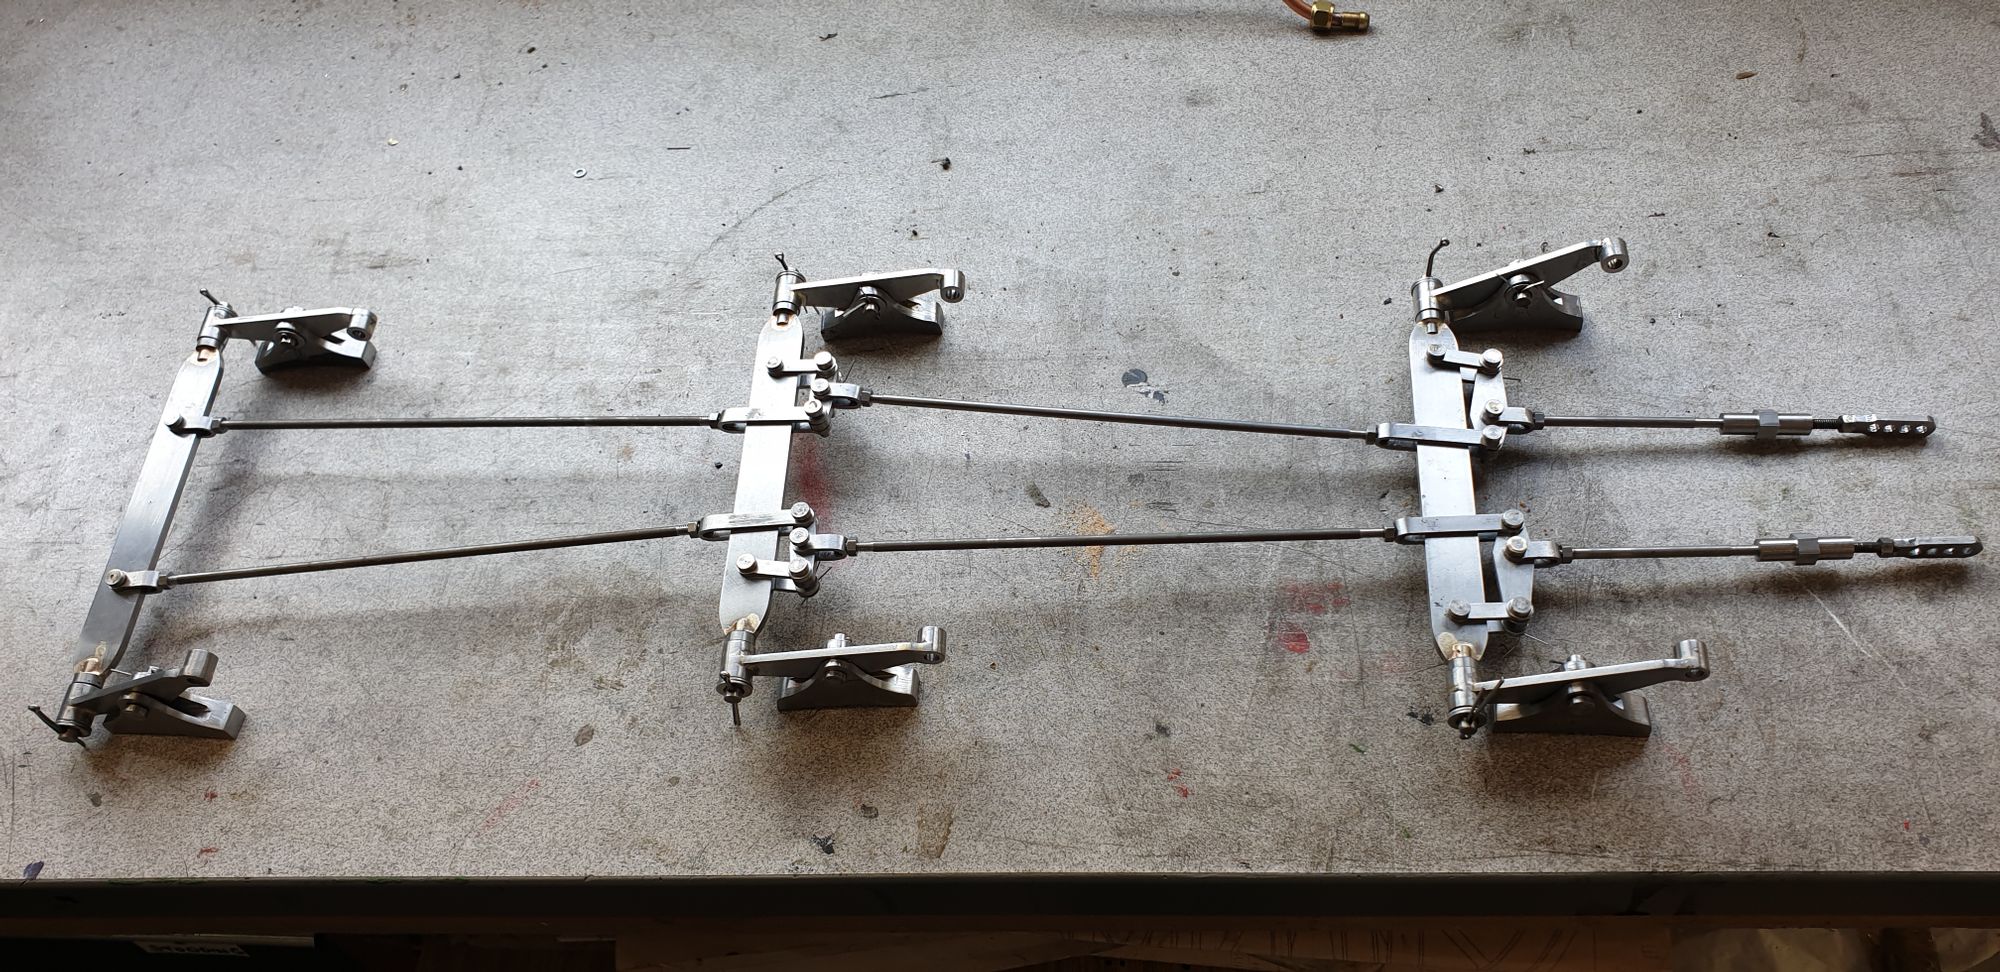
The brake shaft pull rods, adjusters and leading pull rods are the last parts required to complete the brake gear. I haven't taken pictures during their manufacturer as they are very similar to the other pull rods, the exception being the adjuster. This begins life as Hex BMS, two lengths cut to 15/16 and drilled/tapped 5BA, this thread is smaller than on the drawing, I have taken the lazy route and just threaded the 1/8th rods. Once the adjuster was threaded I then turned down each end to 3/8 long and 1/4 dia leaving a small section of hex in the middle for a spanner to adjust.
As with the other pull rods a 5BA nut has been added to tighten the rods to their respective 'U' shackles. The shaft pull rods have the same but in their case the parts were silver soldered together.
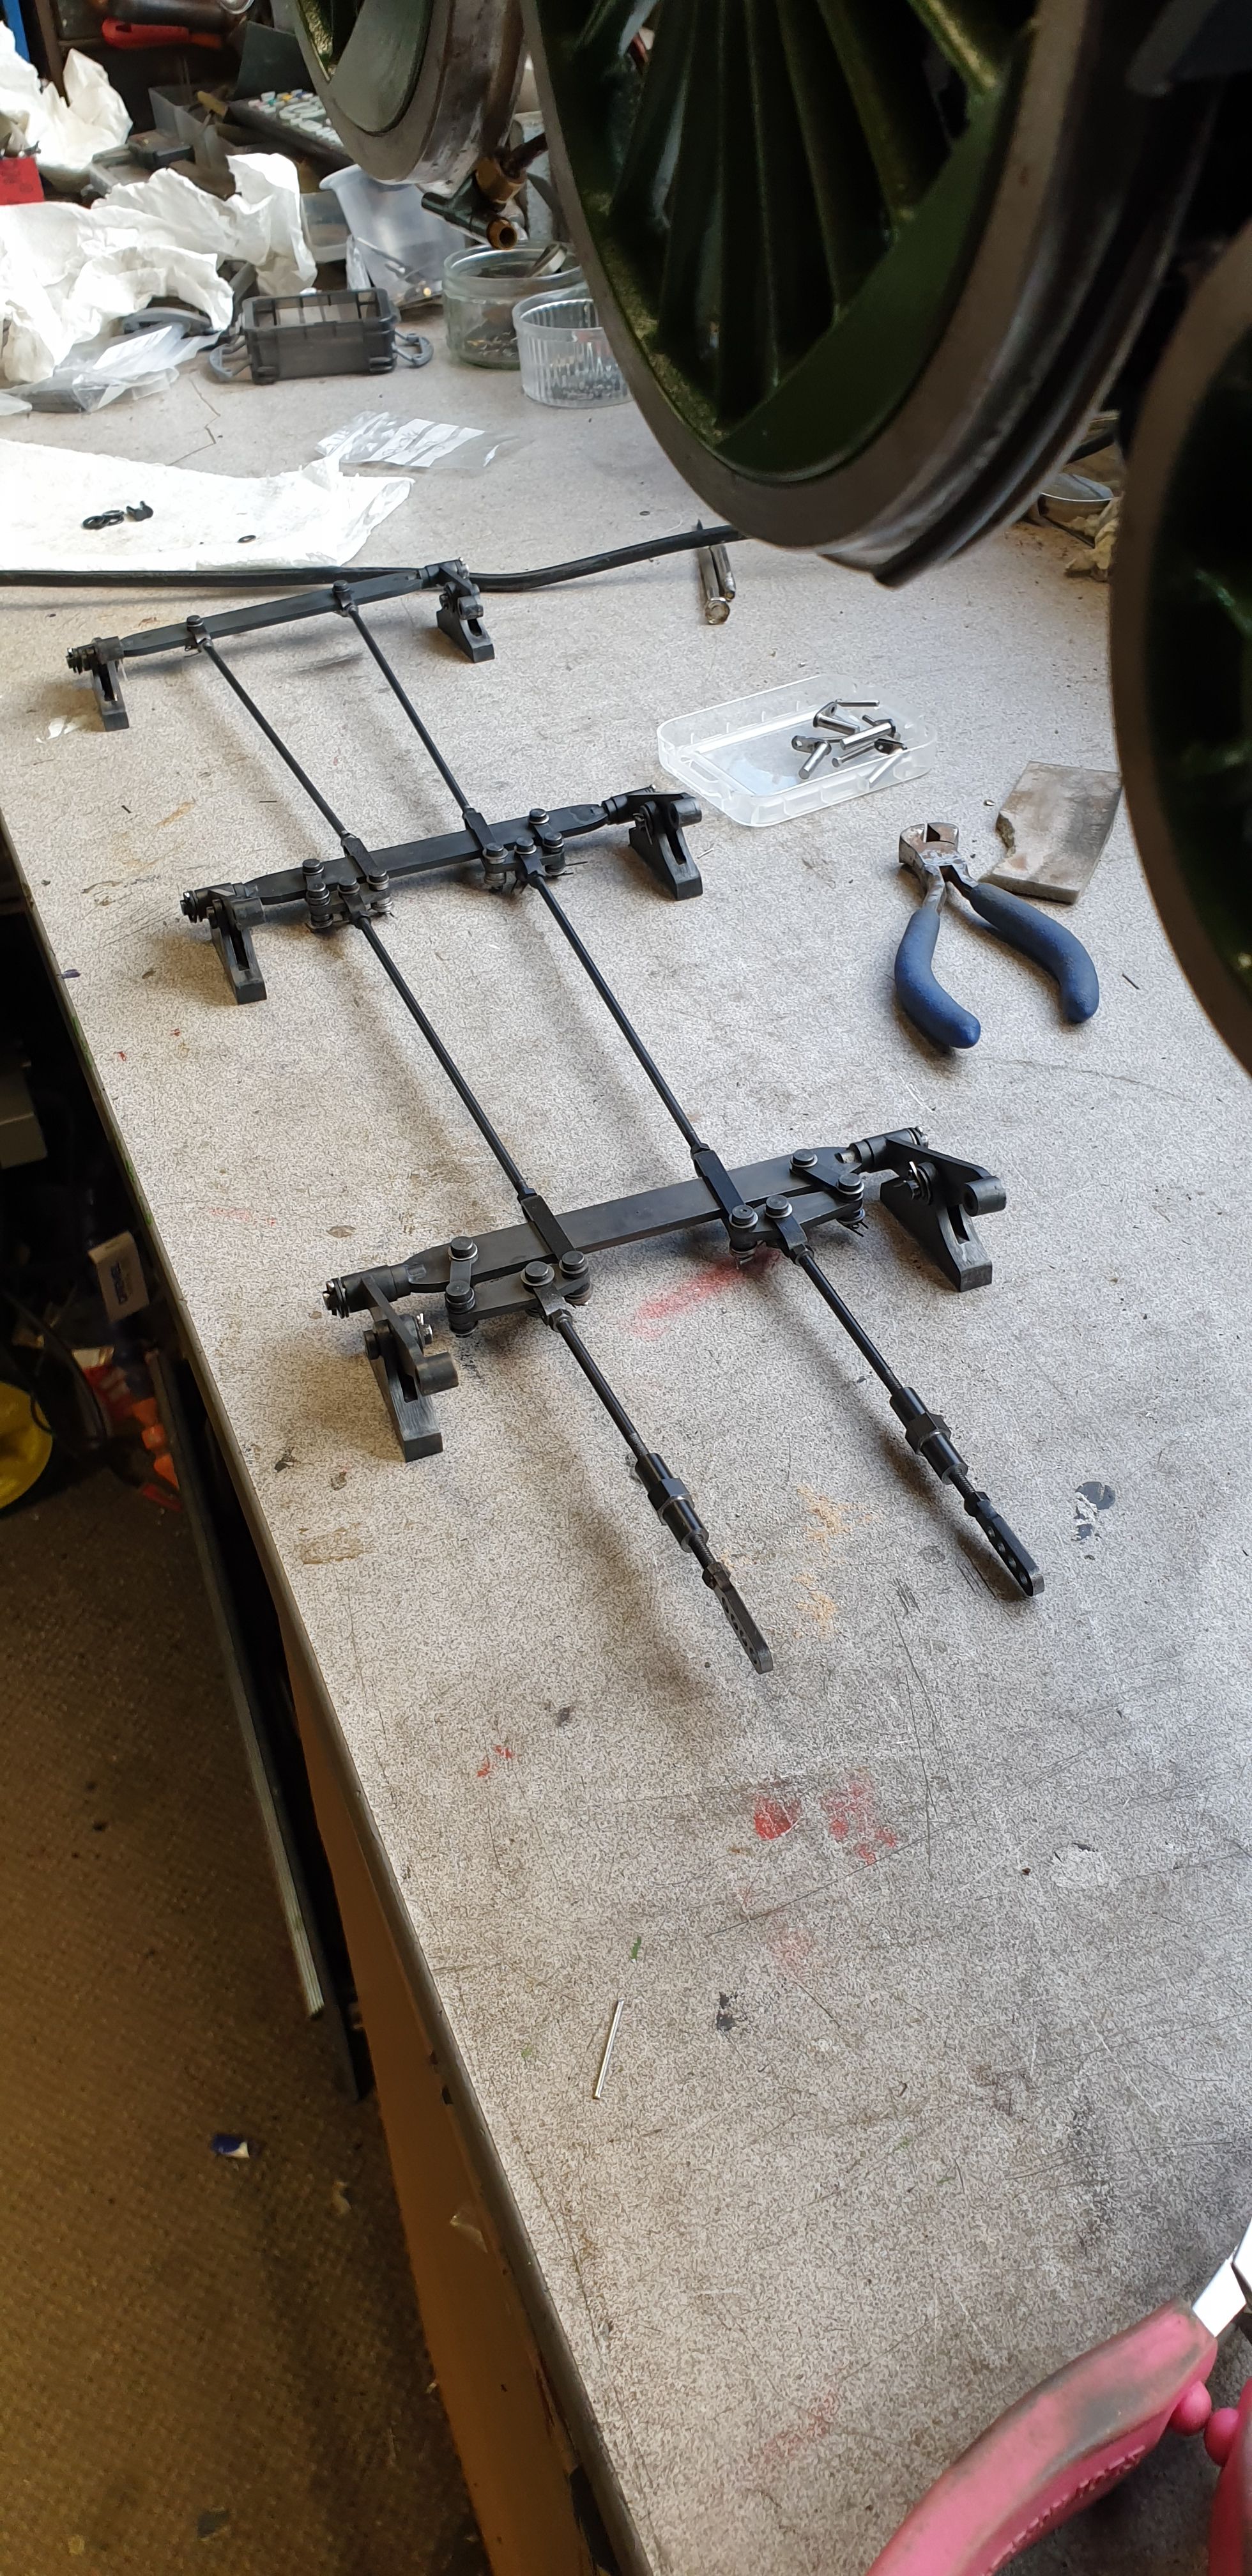
The next picture shows the shaft and leading pull rods awaiting their adjusters.
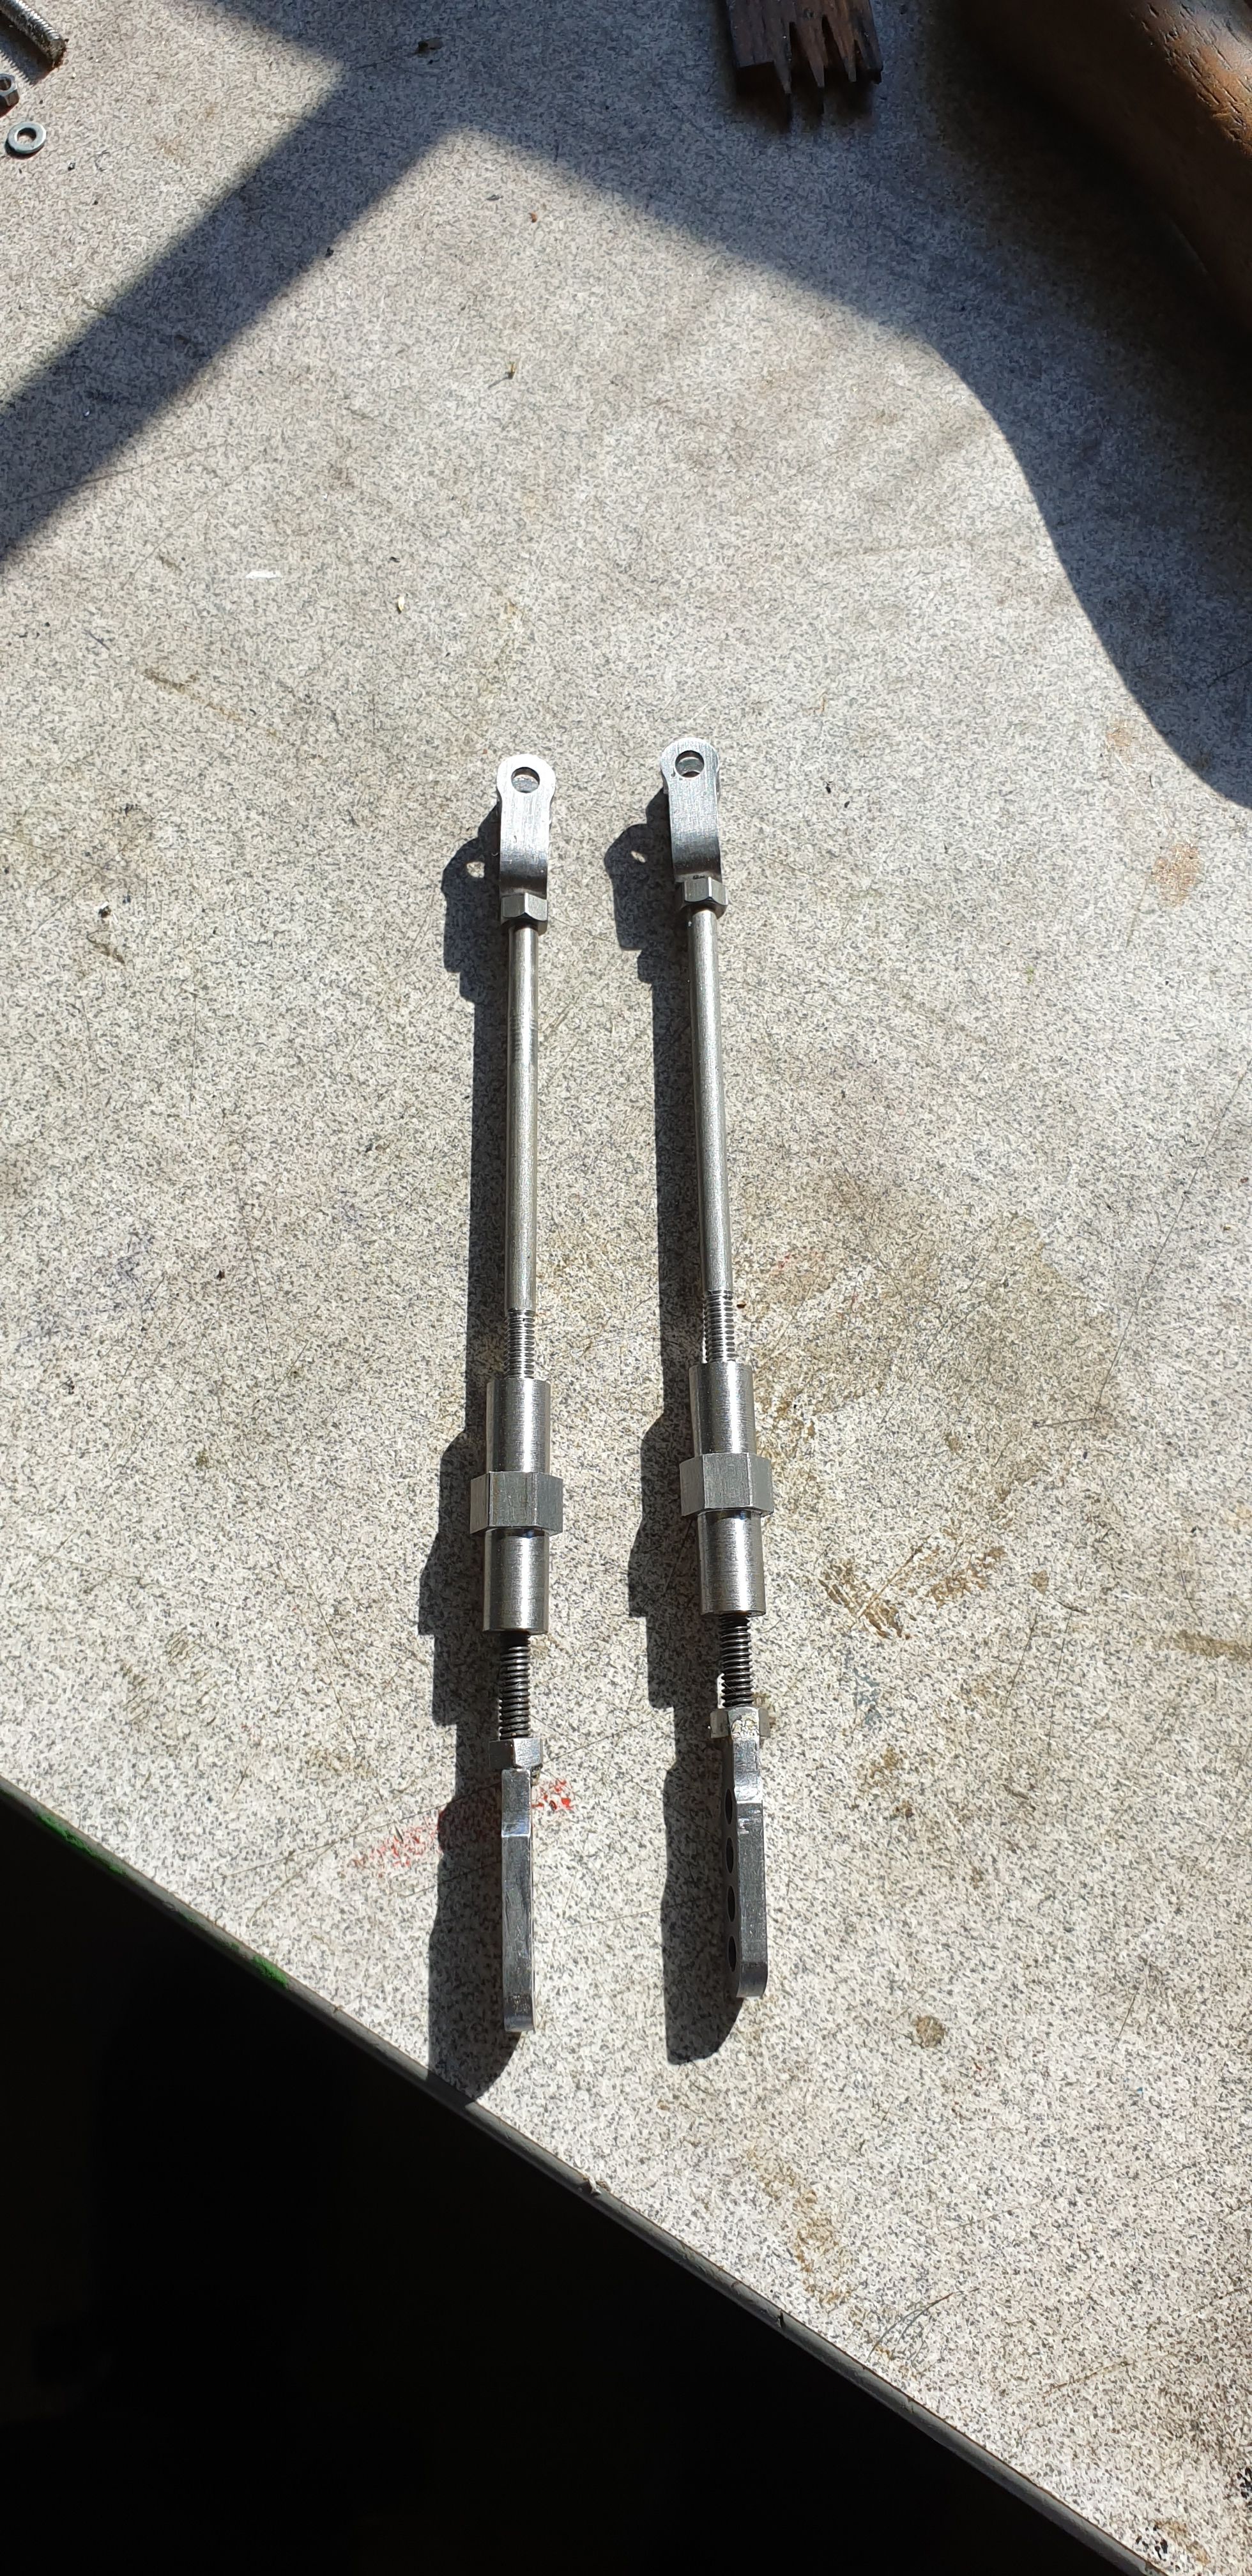
And here we have the parts assembled...
The next job was to get the various parts coloured black, i say 'coloured' as not all are painted, I'll explain that shortly. Before doing so the pull rods were fitted and everything was adjusted so that it looked right, I was glad that I had taken the extra time to make the pull rods adjustable. Here we have a view showing all of the components assembled on the chassis.
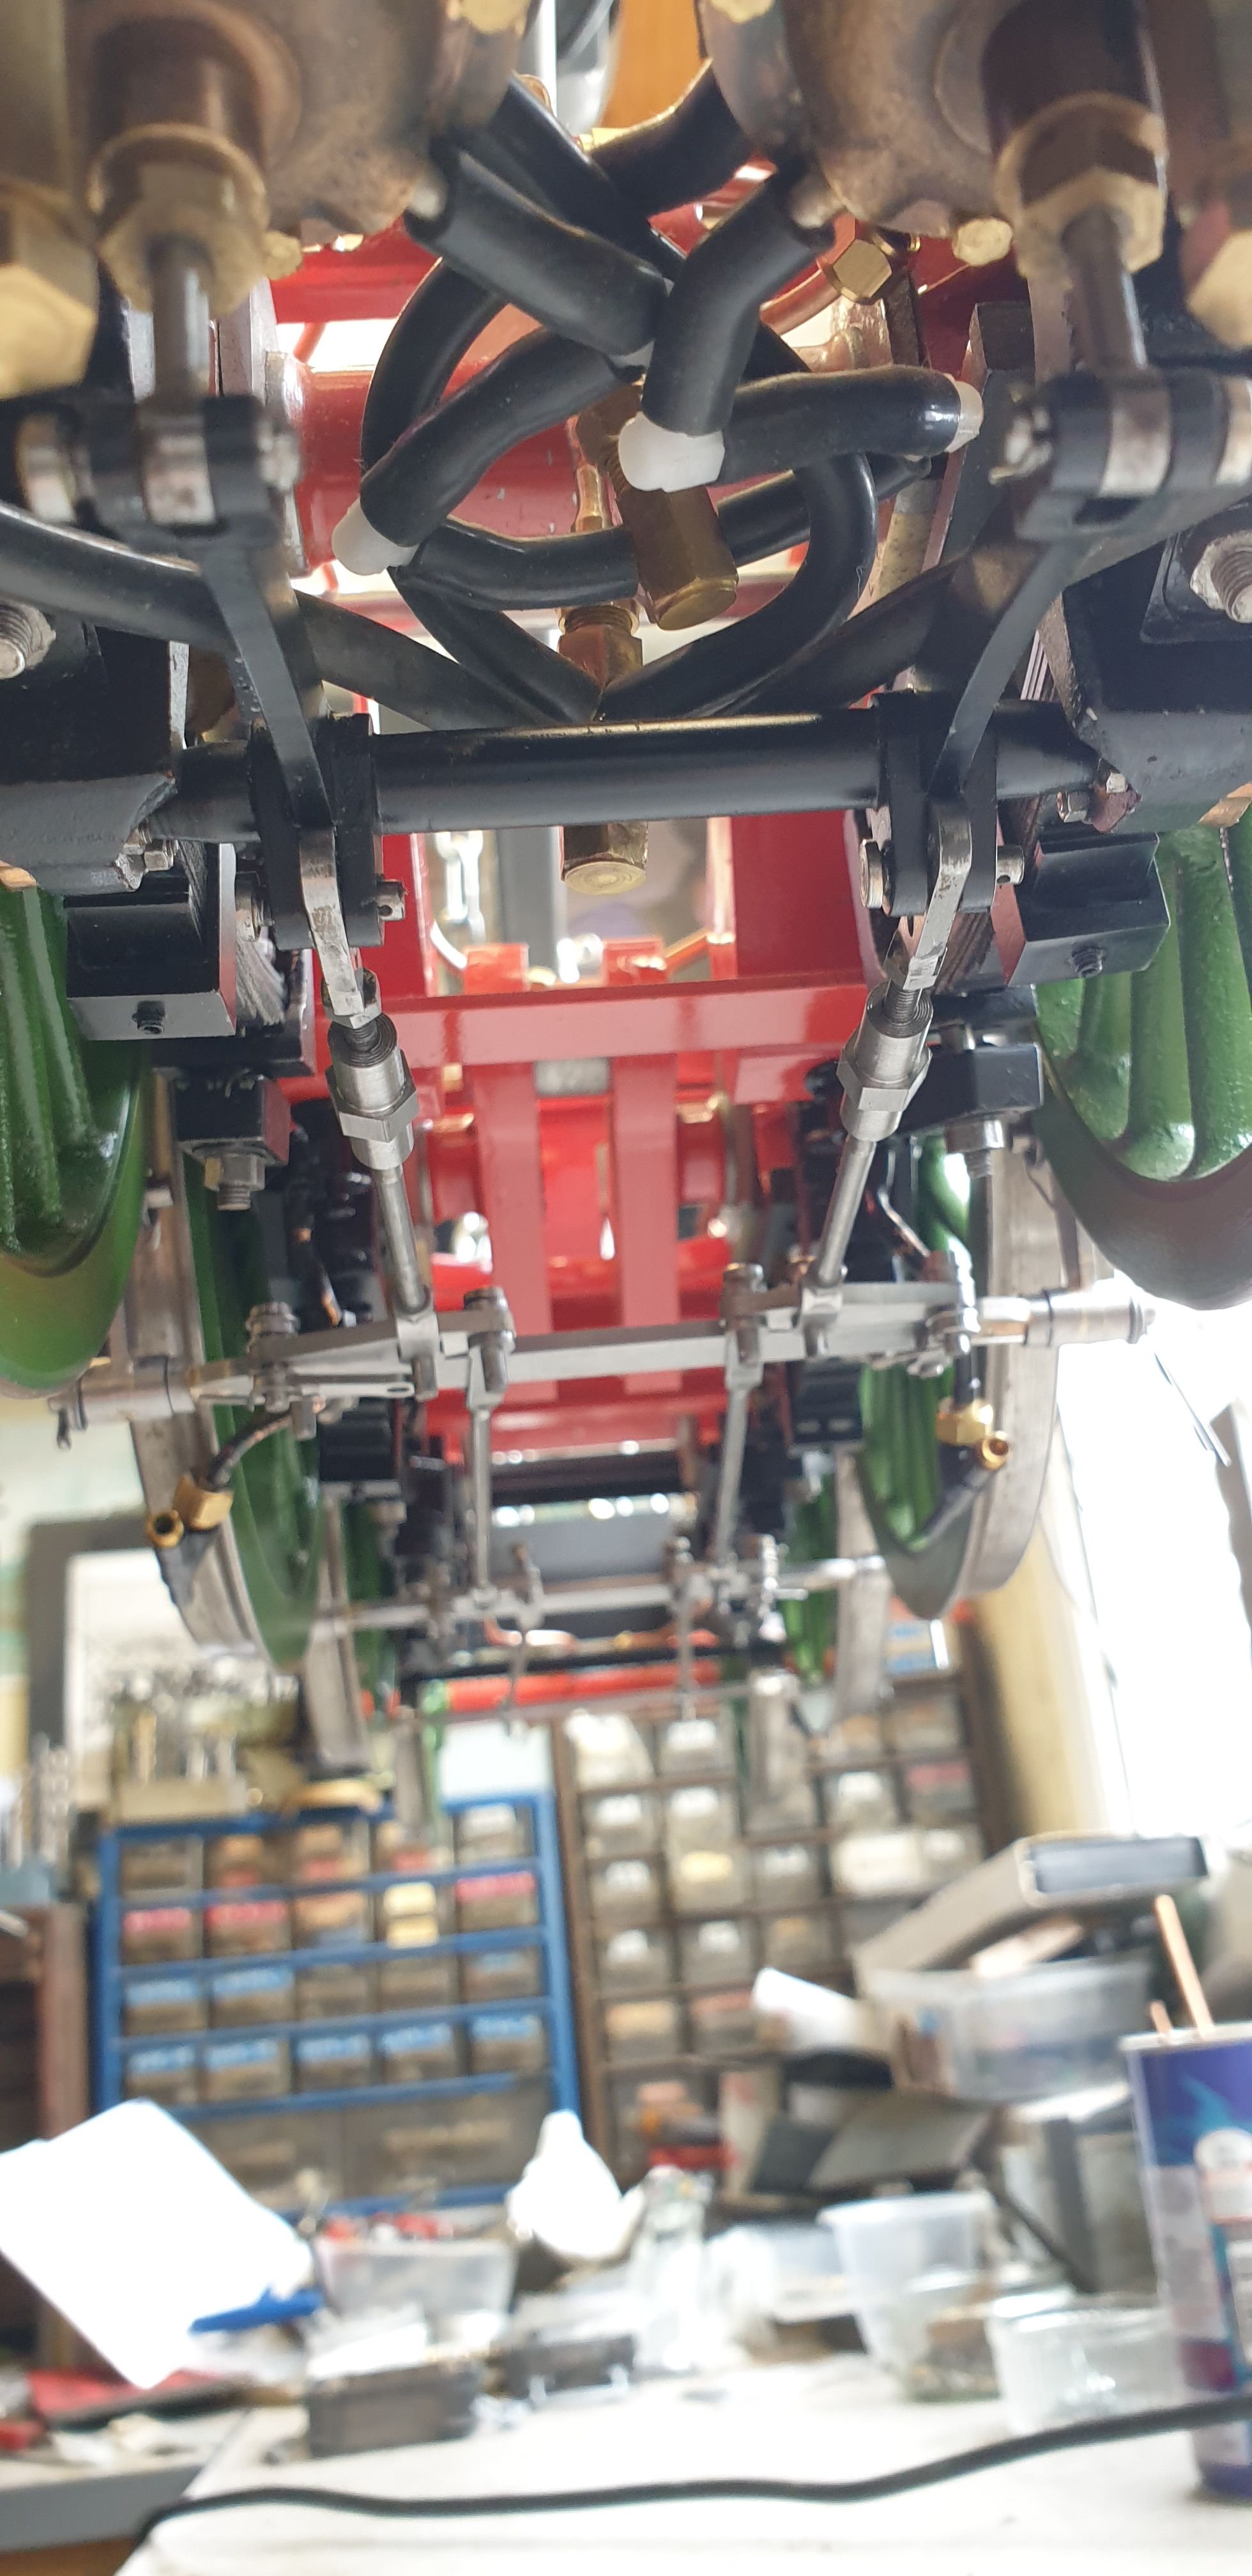
I then removed the brakes from the chassis in preparation for painting. A few words on this, as with the tender I have chosen for most of the parts to chemically change their colour to black rather than use paint. This is to give a free'r operation of the parts without paint affecting said operation. The 6 'pull rods' are painted, that's because other than the front of the pull rods where they attach to the brake shaft the parts will not bond those that they are attached too. All other parts have been chemically changed to black. For example, if the rods and the beams were both painted black the paint on the beams could foul with the rods as the 'U' shaped ends are a close fit over the beams.
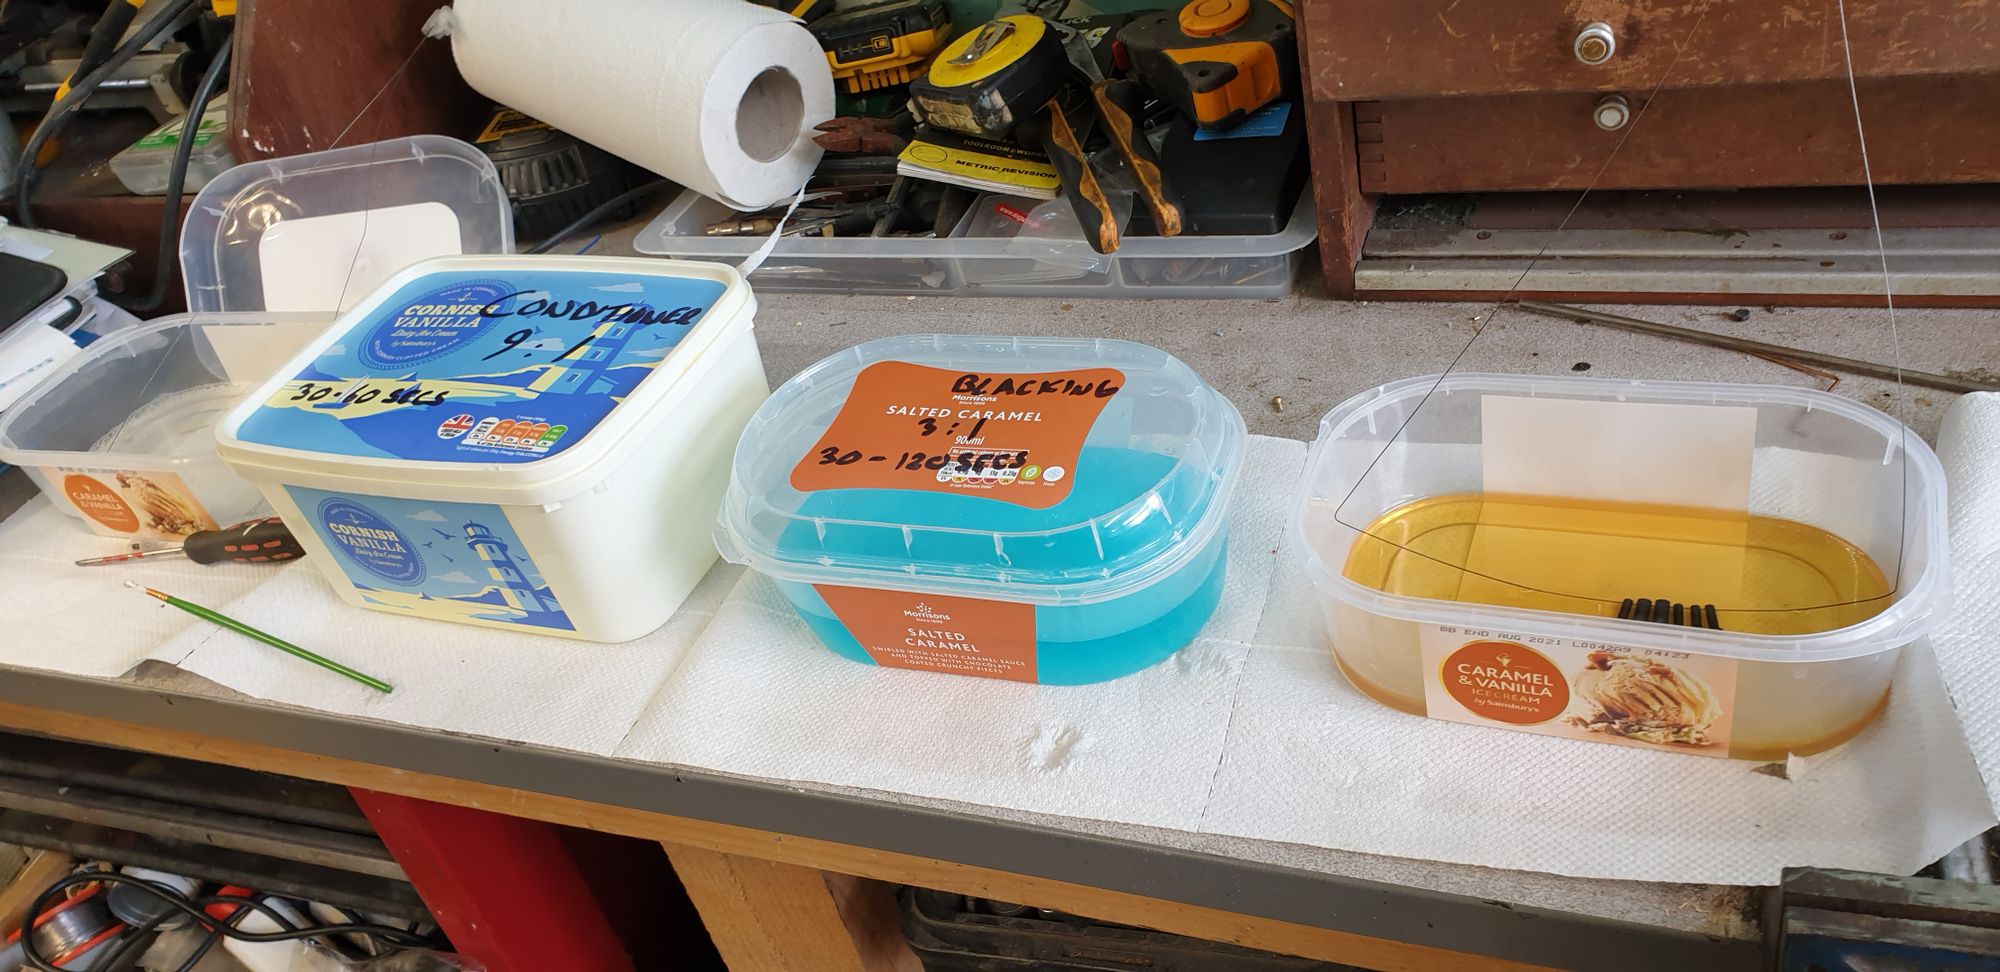
A picture of the setup with the chemical blacking, it's a four bath process, the tubs in the picture are laid out in order starting from the left. First is the degreaser solution, here the parts are dipped for ten minutes and then rinsed for 1 minute. Next is the conditioner dip, here they are left for 30-60 secs and rinsed for 1 minute, next is the blacking solution, dipping here takes 30 -120 secs and rinsed. Final application is the oiling solution, here the parts are dipped for 10 minutes and then left to dry for 45 minutes. As you can see I have used some old ice cream tubs for doing this, the numbers written on the lids are those of the mixing ratio to water, so the blacking solution for example which shows 3:1 is 3 parts water to one part chemical solution. The oiling solution is neat.
It took some time to do the entire brake rig, mainly as I chose to do it in small sections rather than dismantle the entire rig and treat in one go so that it was easier for me to reassemble. I'm happy with the end result, the chemical black isn't as strong a black as the paint but it will all become one colour once in service for a short while.

I need to tidy the split pin ends up a little and then refit to the chassis ready for testing..