
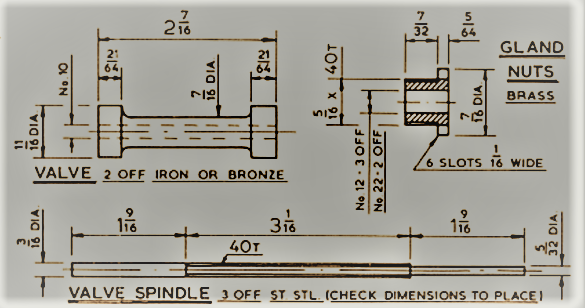
First I'll share the drawing to Don's design, the spindle will of course be the same but the bobbin will be updated to what I believe was first drawn by Jim Ewins in the 80's. I thank all those who have shared their own versions of Jim's design and will now follow their lead. The main reason for doing so is the fact that Jim's design makes life much easier when setting the valve events, only requiring the removal of one guide cover rather than both. I see this as a big step forward in making life just that little bit easier in getting 4472 running smoothly, first on air and then in steam, I can't wait...:)
Ok, so I'll begin with the spindles, these are really just plain turning but being in stainless and of such a long narrow length I though it best to show How I made them in a little more detail.
We start with some lengths of 3/16 stainless steel, the length shown on Don's drawing is overlength and why I think he notes to (check dimensions in place). At first I was going to make them to their proper length which can be worked out as Don gives the dimension between the two crosshead inner edges of 5 19/32. I know that the crossheads are accurately made and that the various center's are spot on so the 5 19/32 should be right but I was advised it best to leave them overlength for now until the other parts of the motion are made nd that this is probably why Don made his note. So for now, they are 5/32 overlength, if all works out well, I'll need to remove 5/64 from each end on final assembly. Getting back on track, I have set the bar up between Centre's after first center drilling what will be the narrow 5/32 end.
The first picture shows the piece held between center's using both chuck and live centre. With a little manipulation of the cross-slide and taper attachment I was set for machining this end.
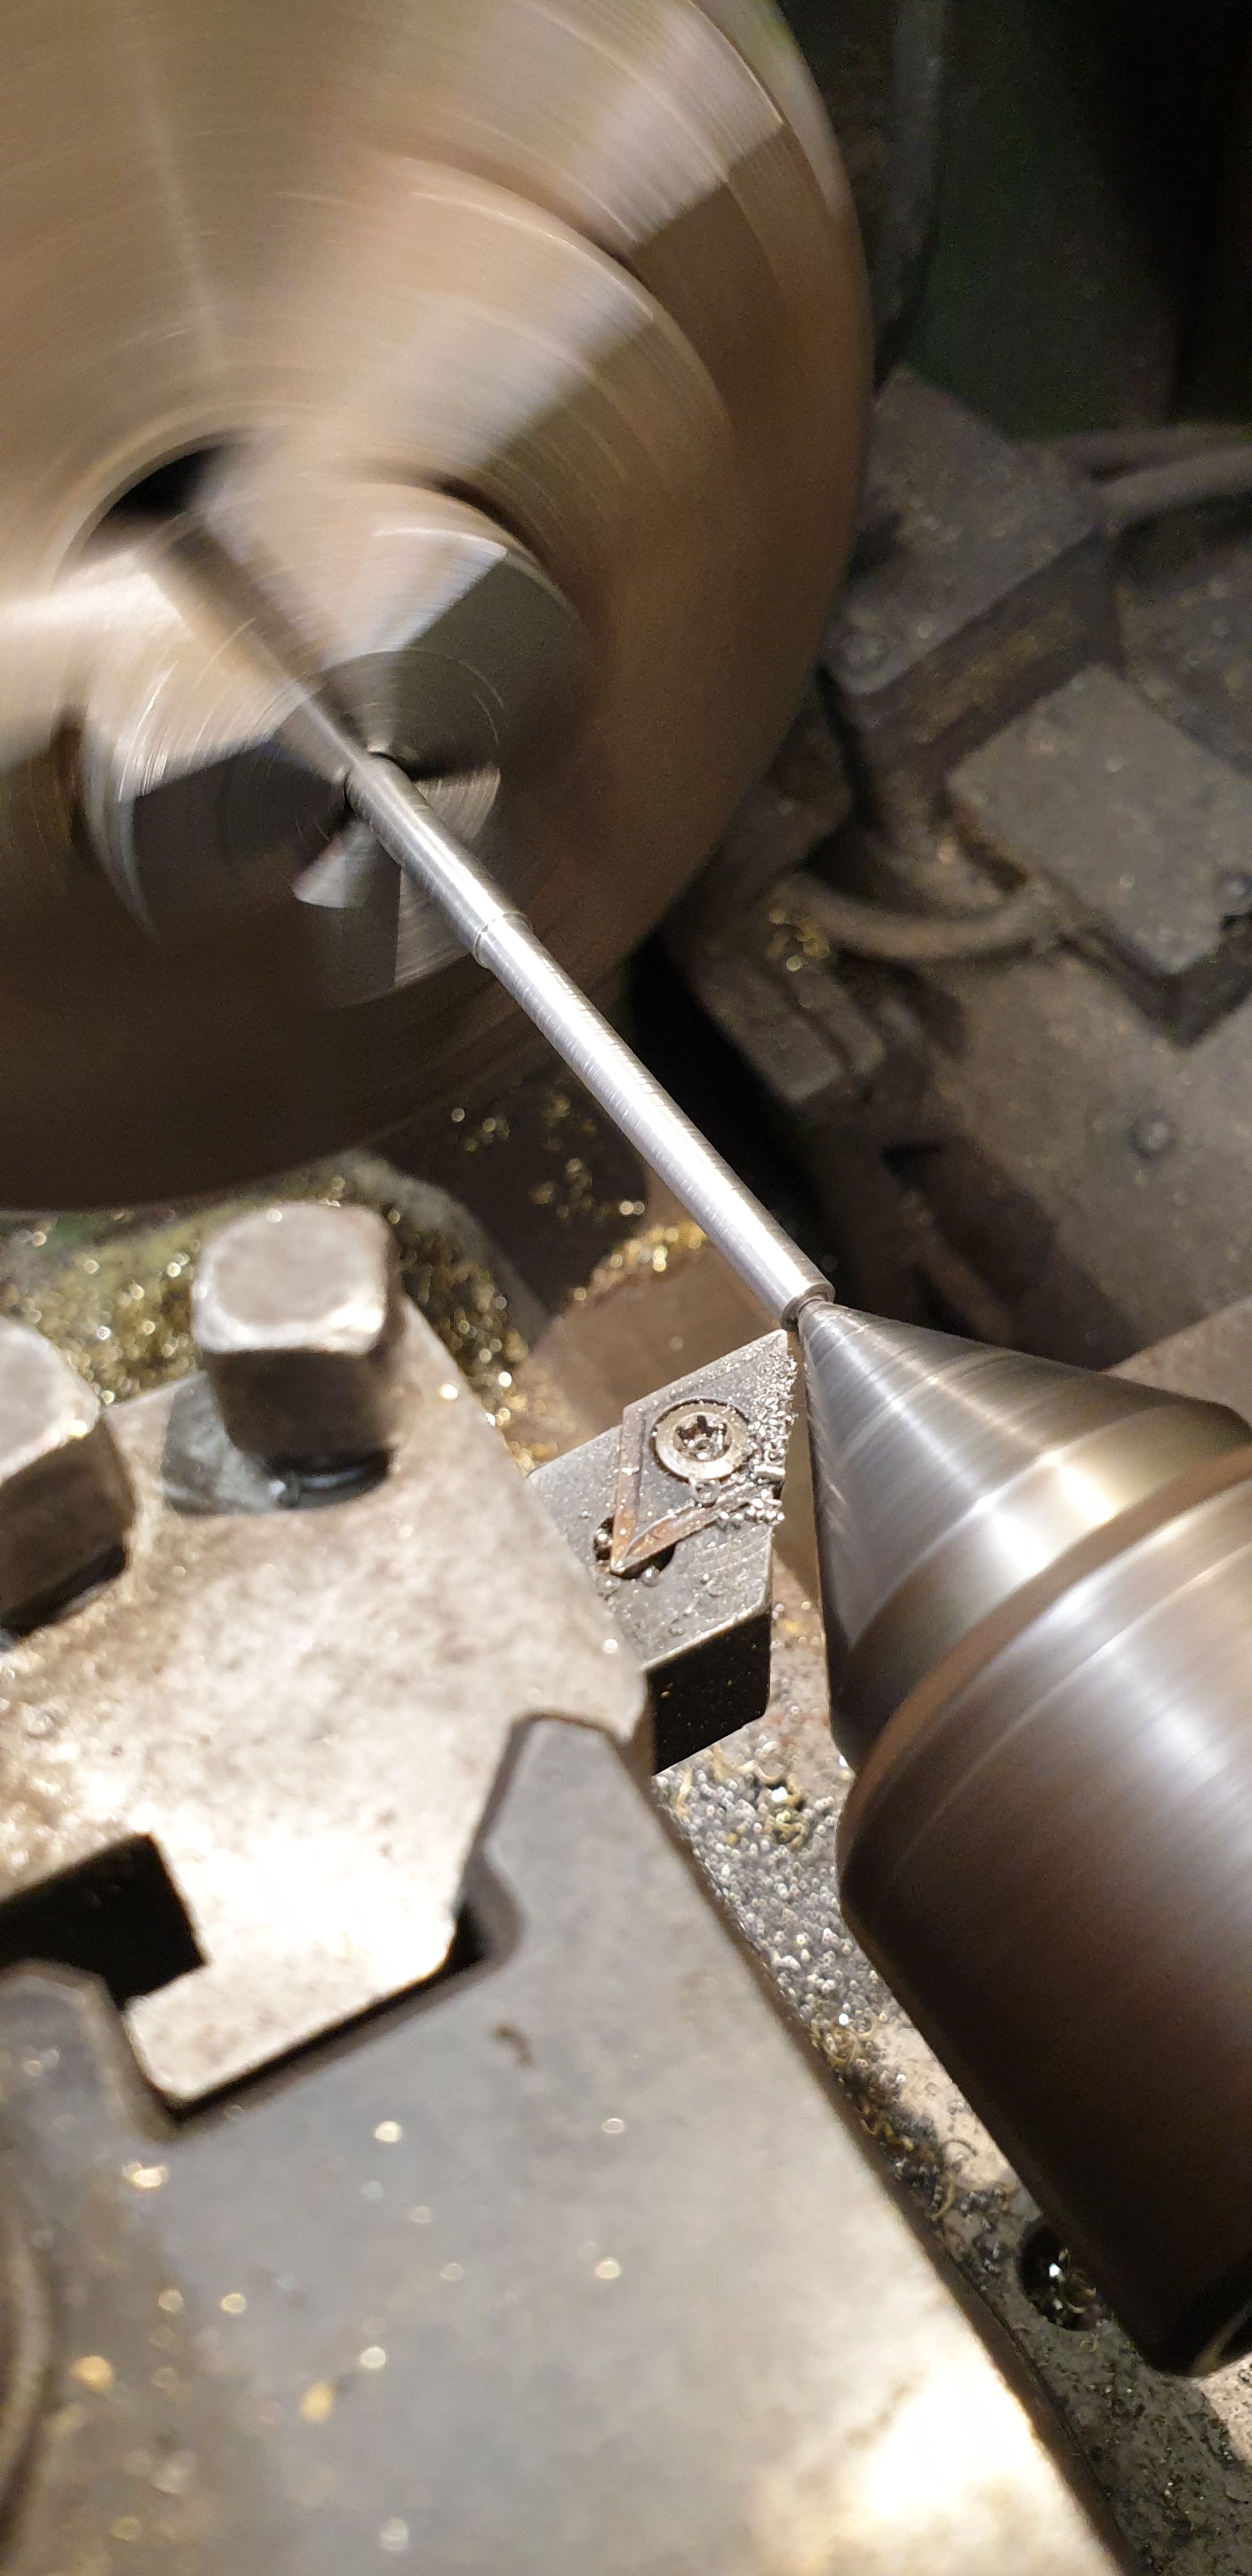
With that done this only left cutting the 3/16 x 40 tpi thread and parting off. Now this was a bit of a challenge, at 3 1/16 long thread on a lathe that isn't really suitable for screw cutting, or should I say that I haven't tried as there is no real manual with the machine for gear settings etc.
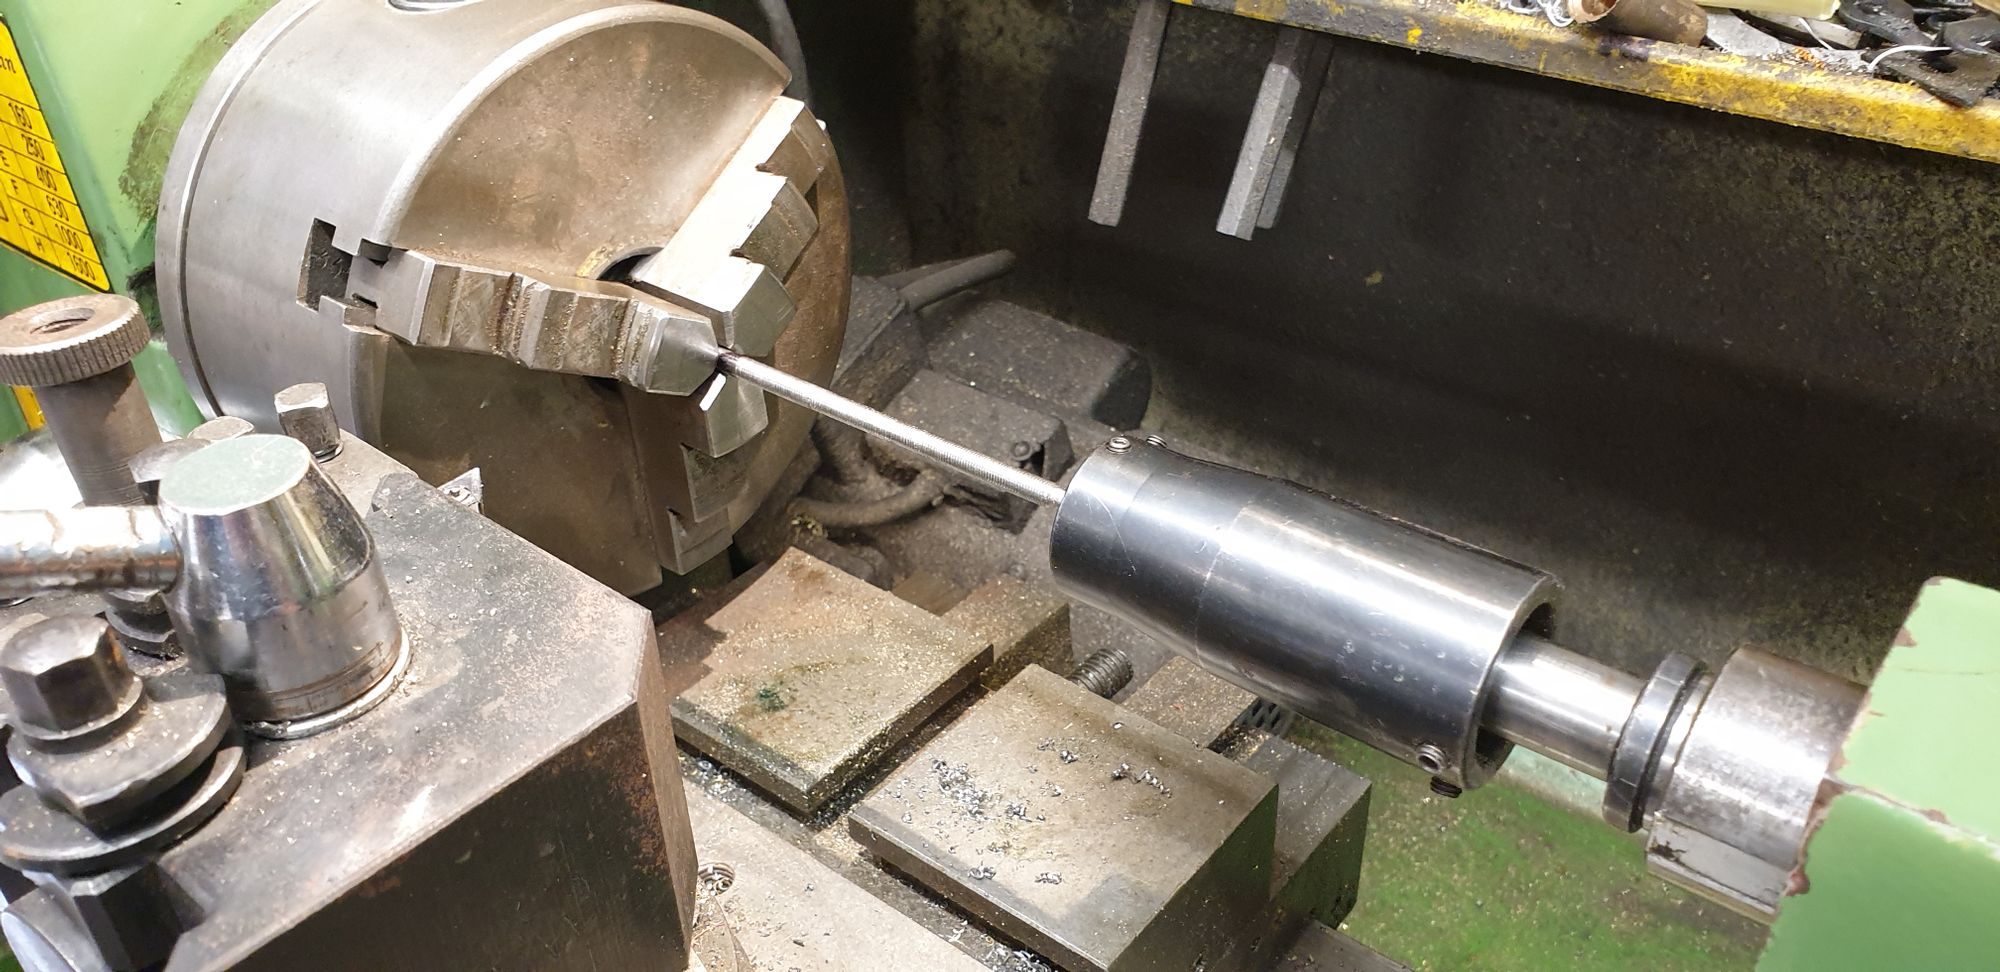
This meant I needed to use the tailstock die holder which could not be done in one go as the die holder shaft wasn't hollow and nor was it long enough. I therefore cut the thread until the holder reached the end of the shaft, removed the holder shaft from the tailstock, refitted the live center and placed it back in contact with the end of the spindle. I found that this worked well if brave enough to cut the thread under power, this removes any rocking motion when doing it by hand, remembering that the rear of the holder is now floating. Hope that makes sense, the end result is good and so I got past what could have been a hurdle.
The picture shows the holder still on its support shaft before replacing with the live center.
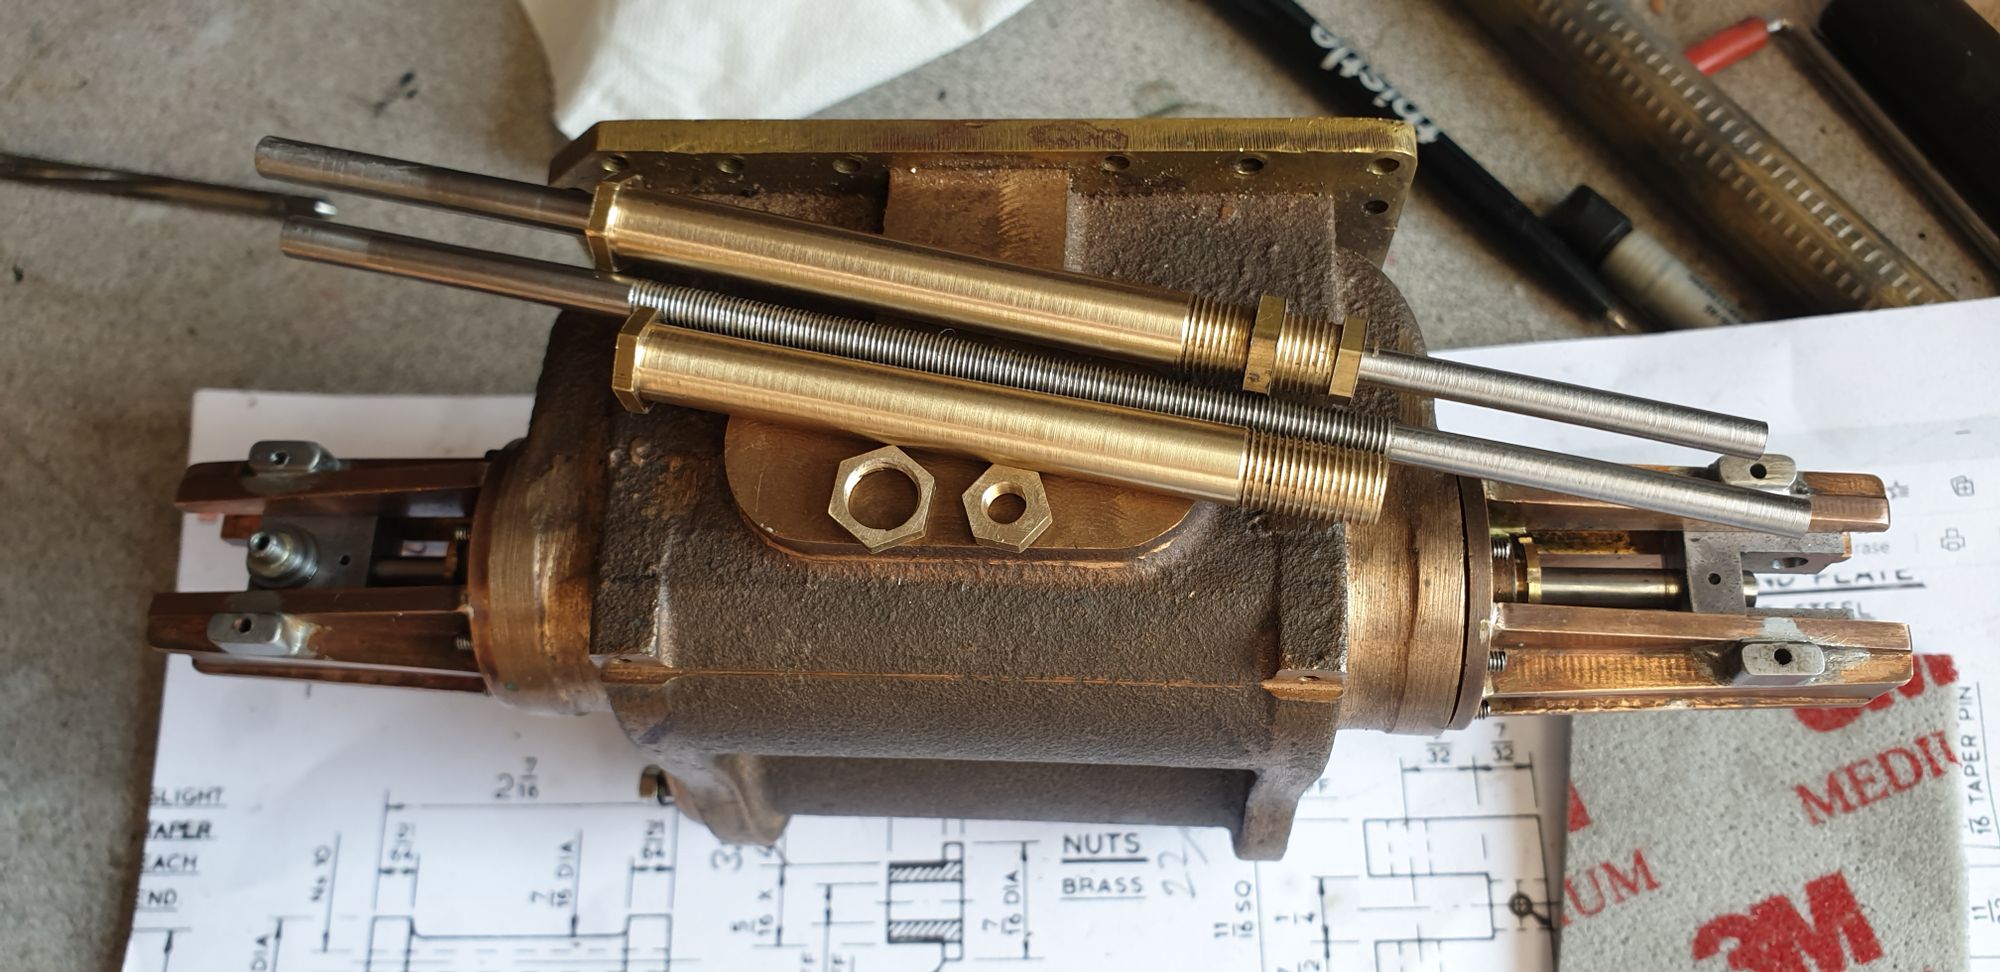
With the spindles finished for now, I checked one in a steam chest with covers fitted and crossheads slide on. The spindles will most certainly need shortening and it's so tempting to do so now but I'll follow the advice given and leave until the other parts are made. The picture shows two of the spindles sitting on top of a cylinder with the 3rd spindle placed inside and engaged with the crossheads.

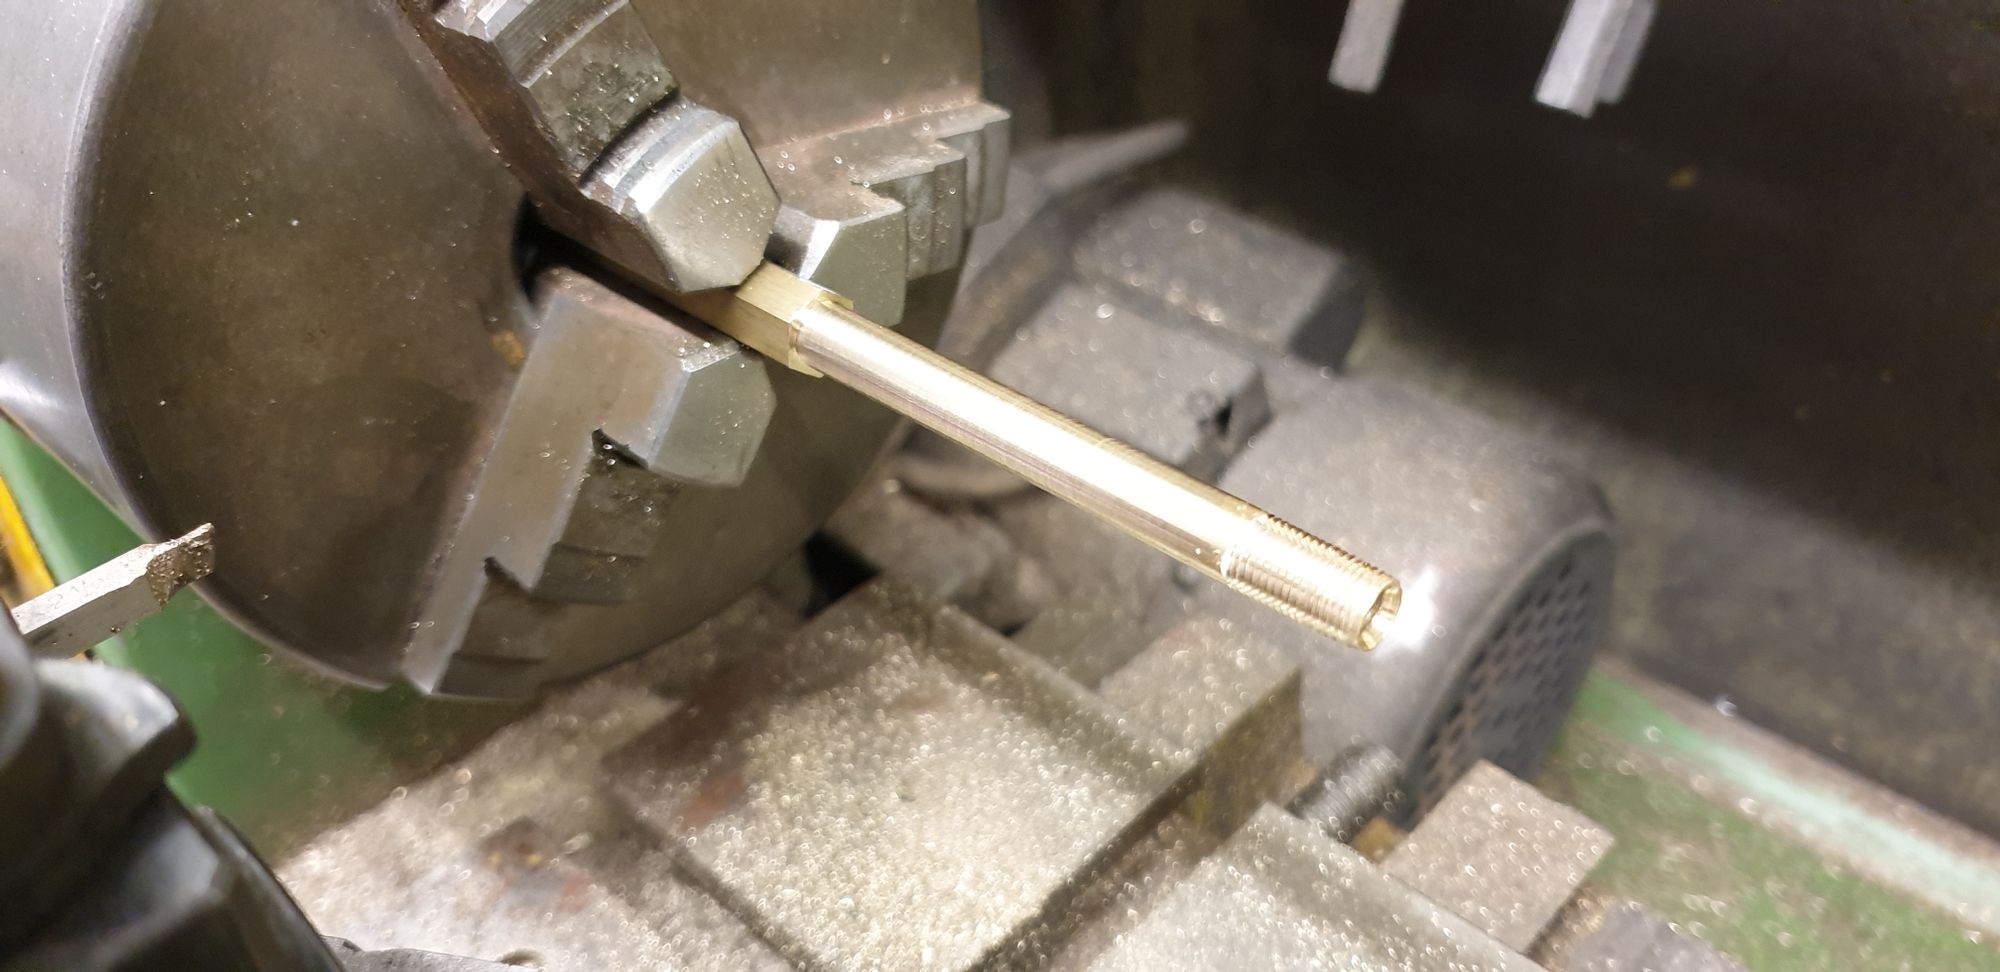
I now moved onto the valve bobbin following Jim's design, the clever bit is the long bolt that the bobbin slides over. I have made mine from 3/8 brass hex, first I center drilled what is the front end and drilled a 4.1 mm hole, this was opened up to 5 mm to clear the 3/16 spindle, the 5 mm section is only drilled approx 2 1/2 inches into the hex bar, I'll explain why in the following picture. With the hole drilled, I then pulled the bar out far enough to machine and part off at just over 3 inch. I then needed to turn down most of the hex to 5/16 but couldn't use the live center as it prohibited me from machining the 5/16 length as one. I therefore used the dead centre that I made for when finishing the wheels once fitted to their axles. Now due to me only having a dead centre that fits, (live centre is too bulky) I made the bolts overlength as I knew that the hardened end of the centre would wear into the brass bar. This isn't a problem if you keep adjusting the tailstock lock and make regular checks on the machining, two machined dead parallel, one had a little taper which was removed by tightening the tailstock a little, all eventually came out at the required 5/16 (0.312) Hopefully the picture shows what I have described, you can see how much wear has occurred in the hole opening. The plain shank is approx 2 1/4 inches long, slightly shorter than the bobbin will be so that I know it will be held tight lengthways once fitted. The bobbin hole will be slightly larger than 5/16 shank to allow for a little co-axial play. again taken from advice given and greatly received. The threaded section is 5/16 x 32 tpi, another reason for leaving the bolt overlength is I haven't made a final decision on the bobbin design yet, that is it's overall length, not the valve events which of course are set in stone.
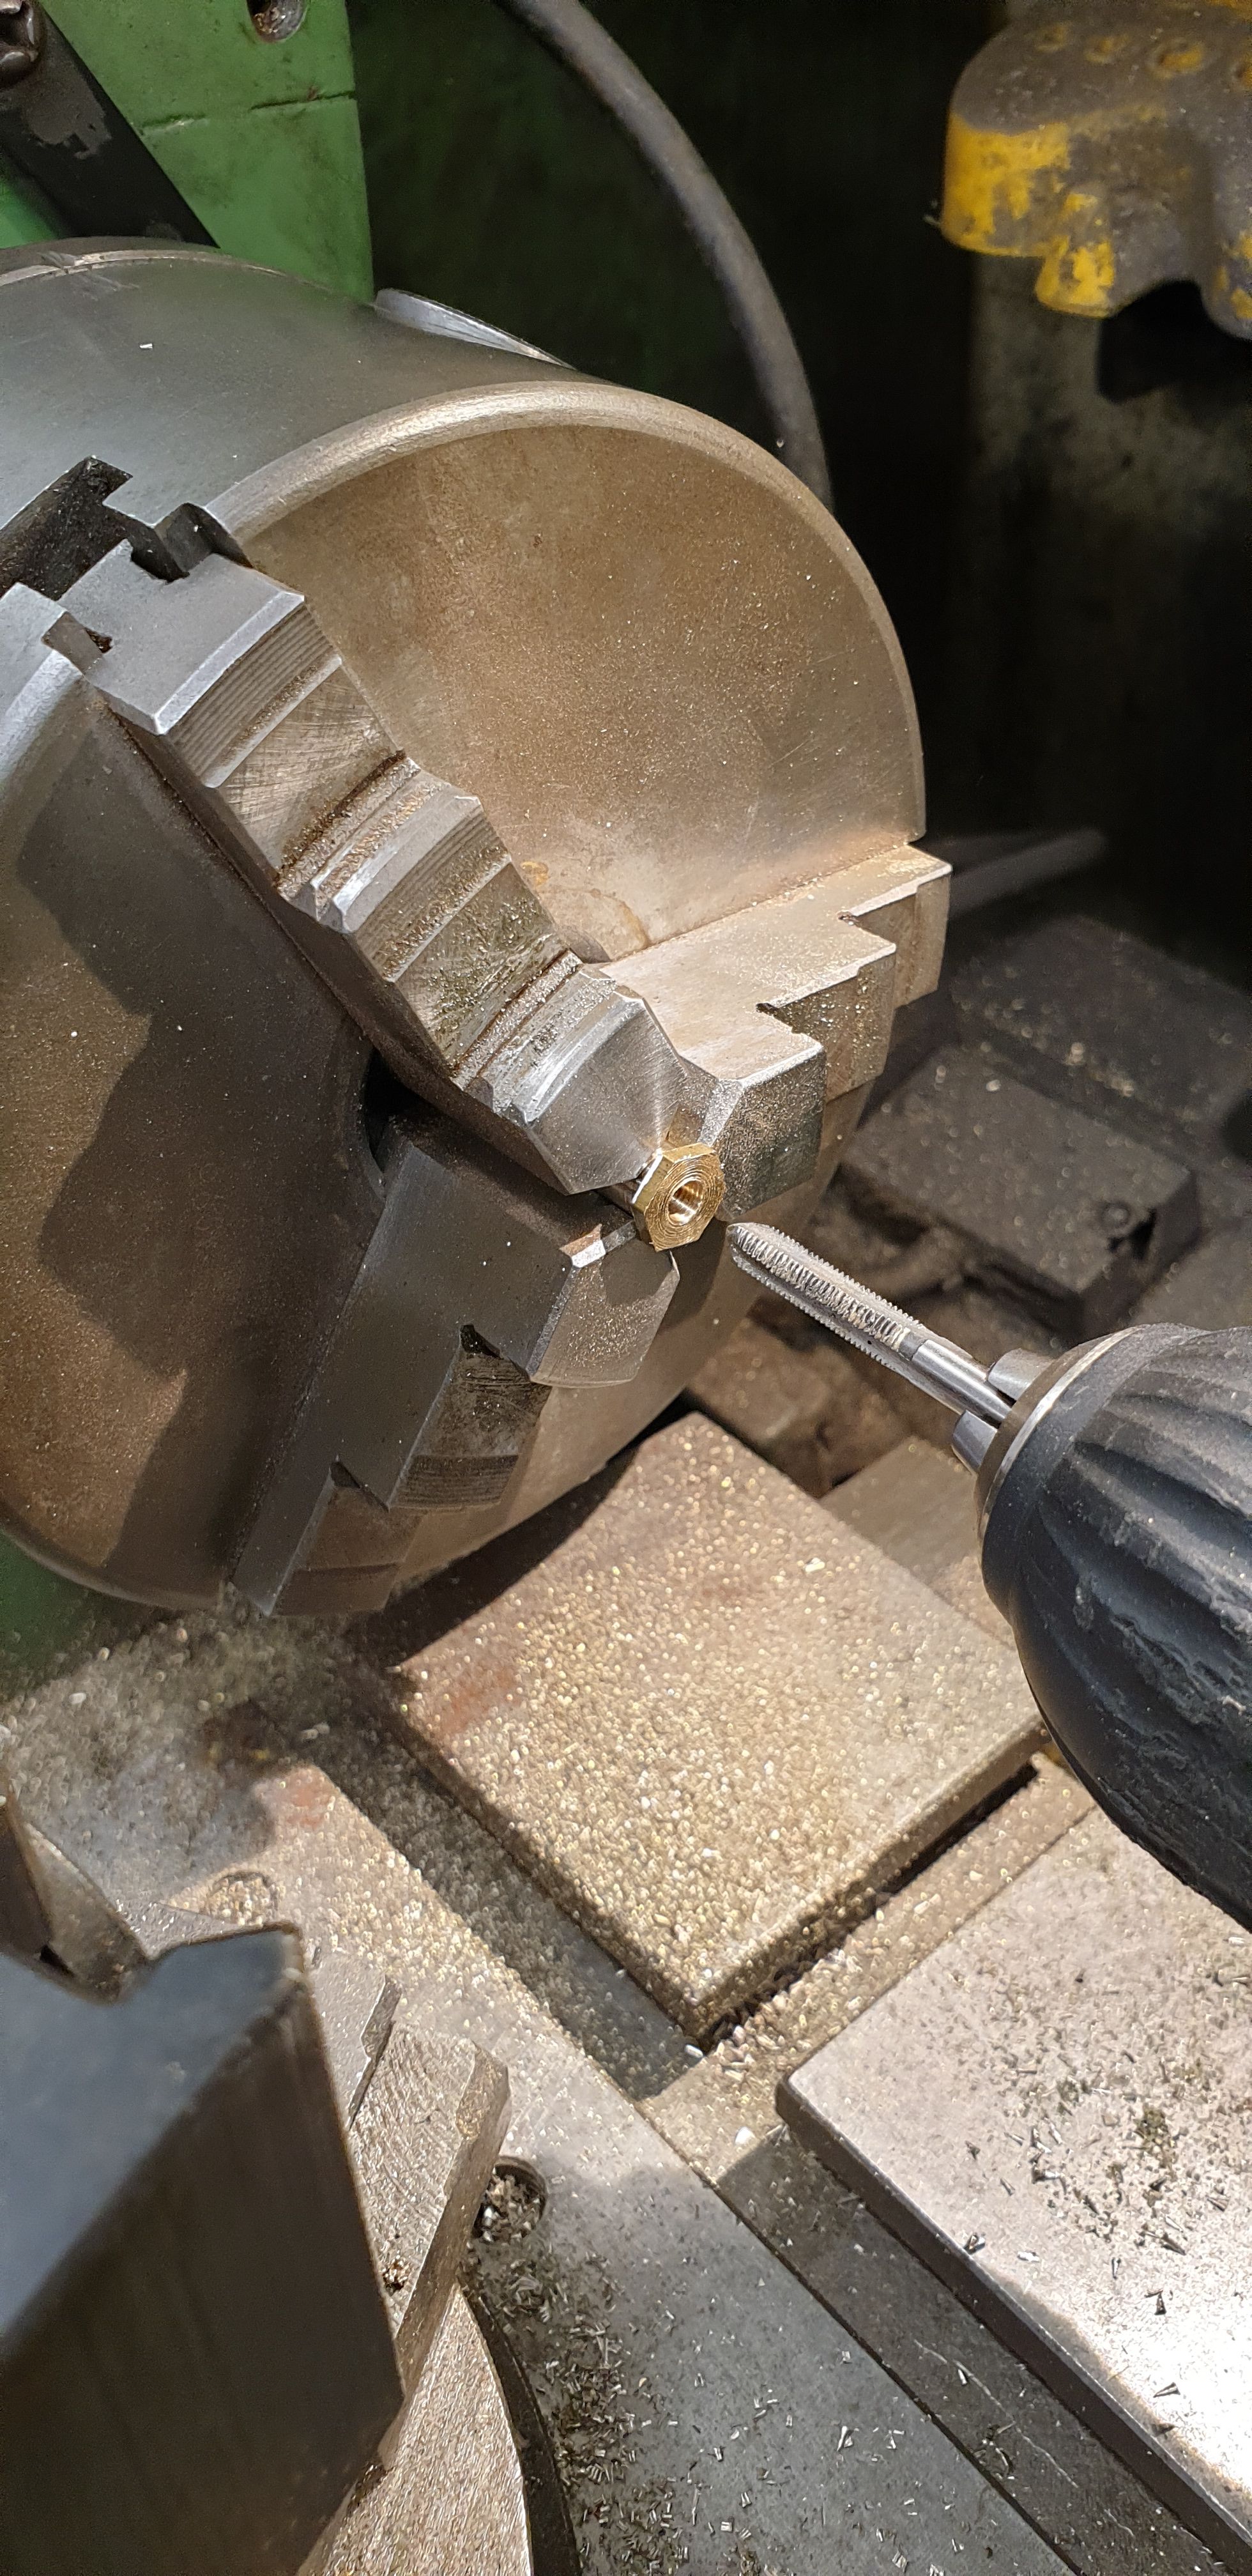
I then parted the bolt off and reversed in the 3 jaw, when parting I was mindful on the restrictions within the steam chest between covers and so cut the bolt head section as narrow as possible. With the bolt reversed I finished drilling the 4.1 mm hole to then be tapped 3/16 x 40 TPI which is the other end of Jim's clever design in allowing the valve to be adjusted from one end.
And this is where I am as off tonight, there were two other parts to make, those being 3 of each size nuts, one size from 3/8 hex and drilled/tapped 5/16 x 32 tpi to fit the bolt and the other from 5/16 hex and drilled/tapped 3/16 x 40 tpi to lock the bobbin bolt to the spindle. The picture shows all three made, one is in the steam chest, one complete and the other to show the parts involved.

Other than the spindle, all measurements for the bobbin parts are what I have chosen to suit the spindle and allow for using Jim's design within the steam chest confines for the model. Next entry will cover the bobbin construction, I've still to draw this up but think it's clear in my mind and ready to go.