

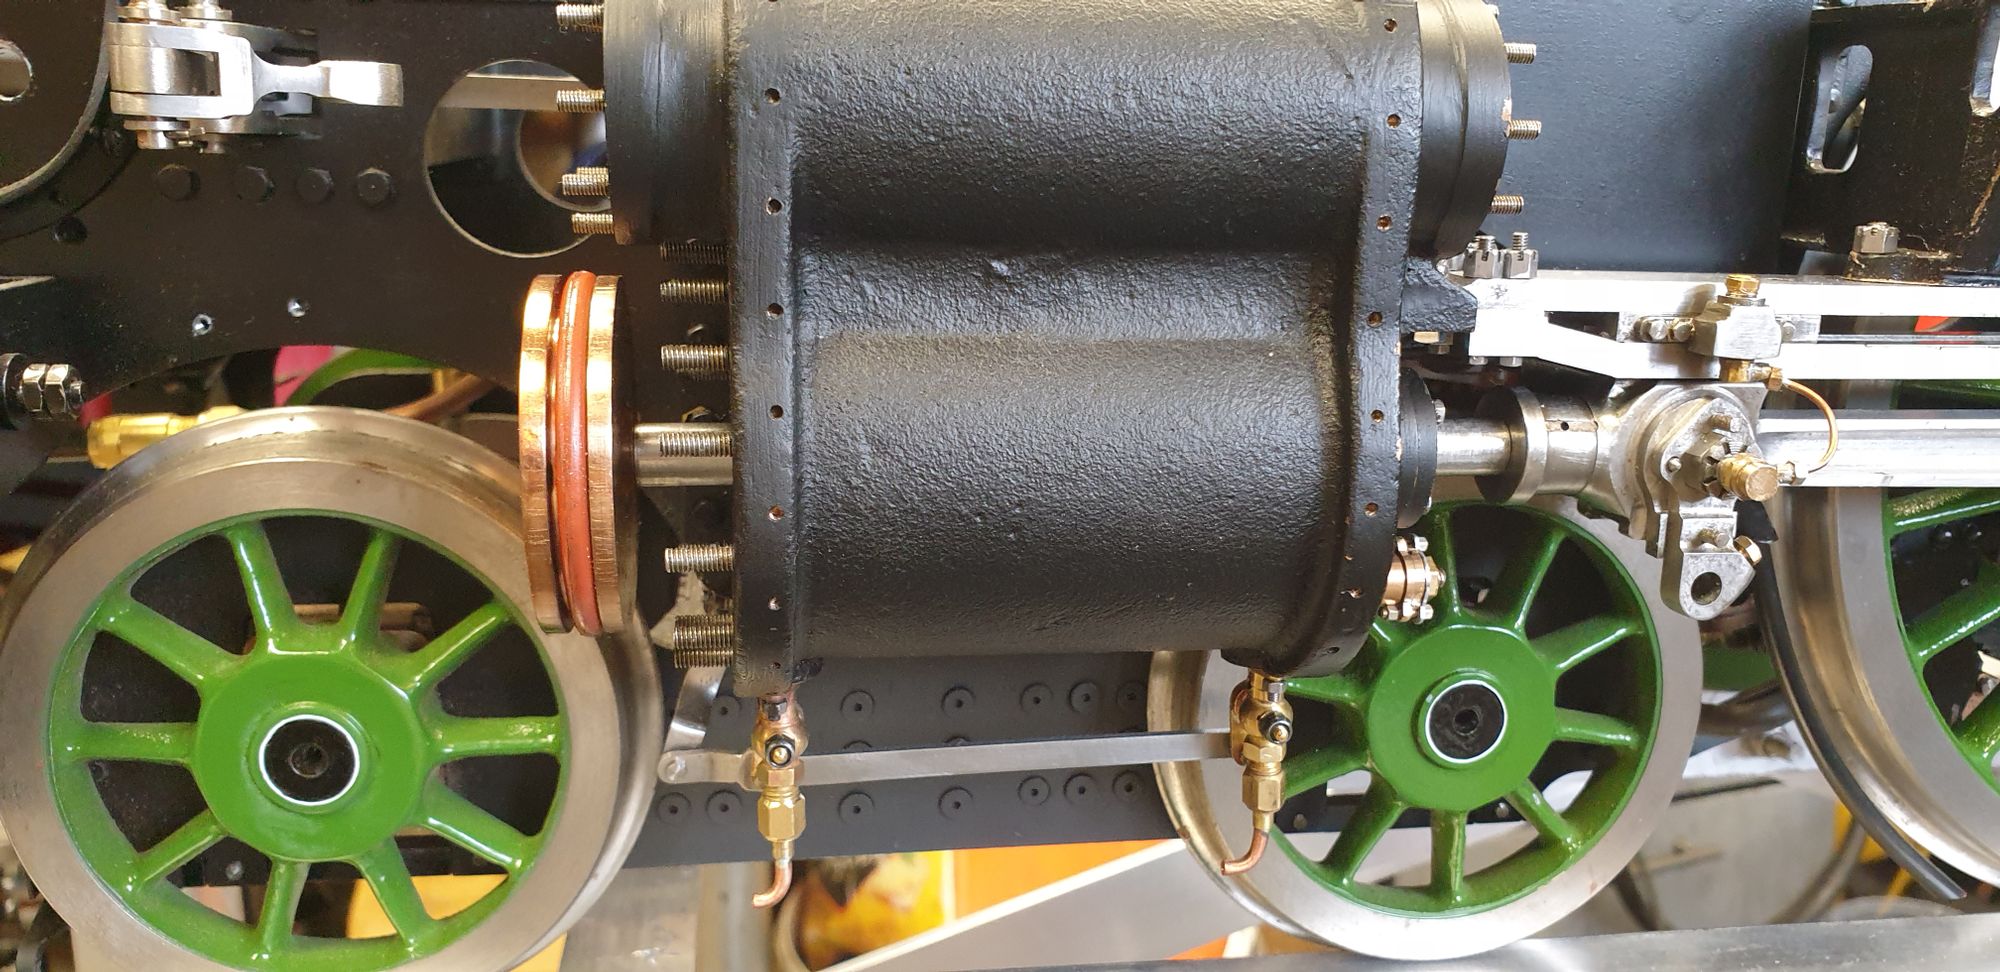
This is another of those small milestones, that is, to fit the pistons and still have the wheels go around, any errors in the build will show up here.
As has been shown in earlier posts I have deviated on Don's drawings to make life a little easier in both setting up the piston throw and also for future maintenance procedures.
One such change was in threading the end of the piston rod so that I can fine tune the fitting of said rods easily. This threw a spanner at me which i have now sorted and will show in today's entry. One other thing to note, I accidently got my measurements mixed up in threading the first rod resulting in a little more thread than required which can be seen, I'll sort this out later. Now that I know the dimensions the others should be as planned.
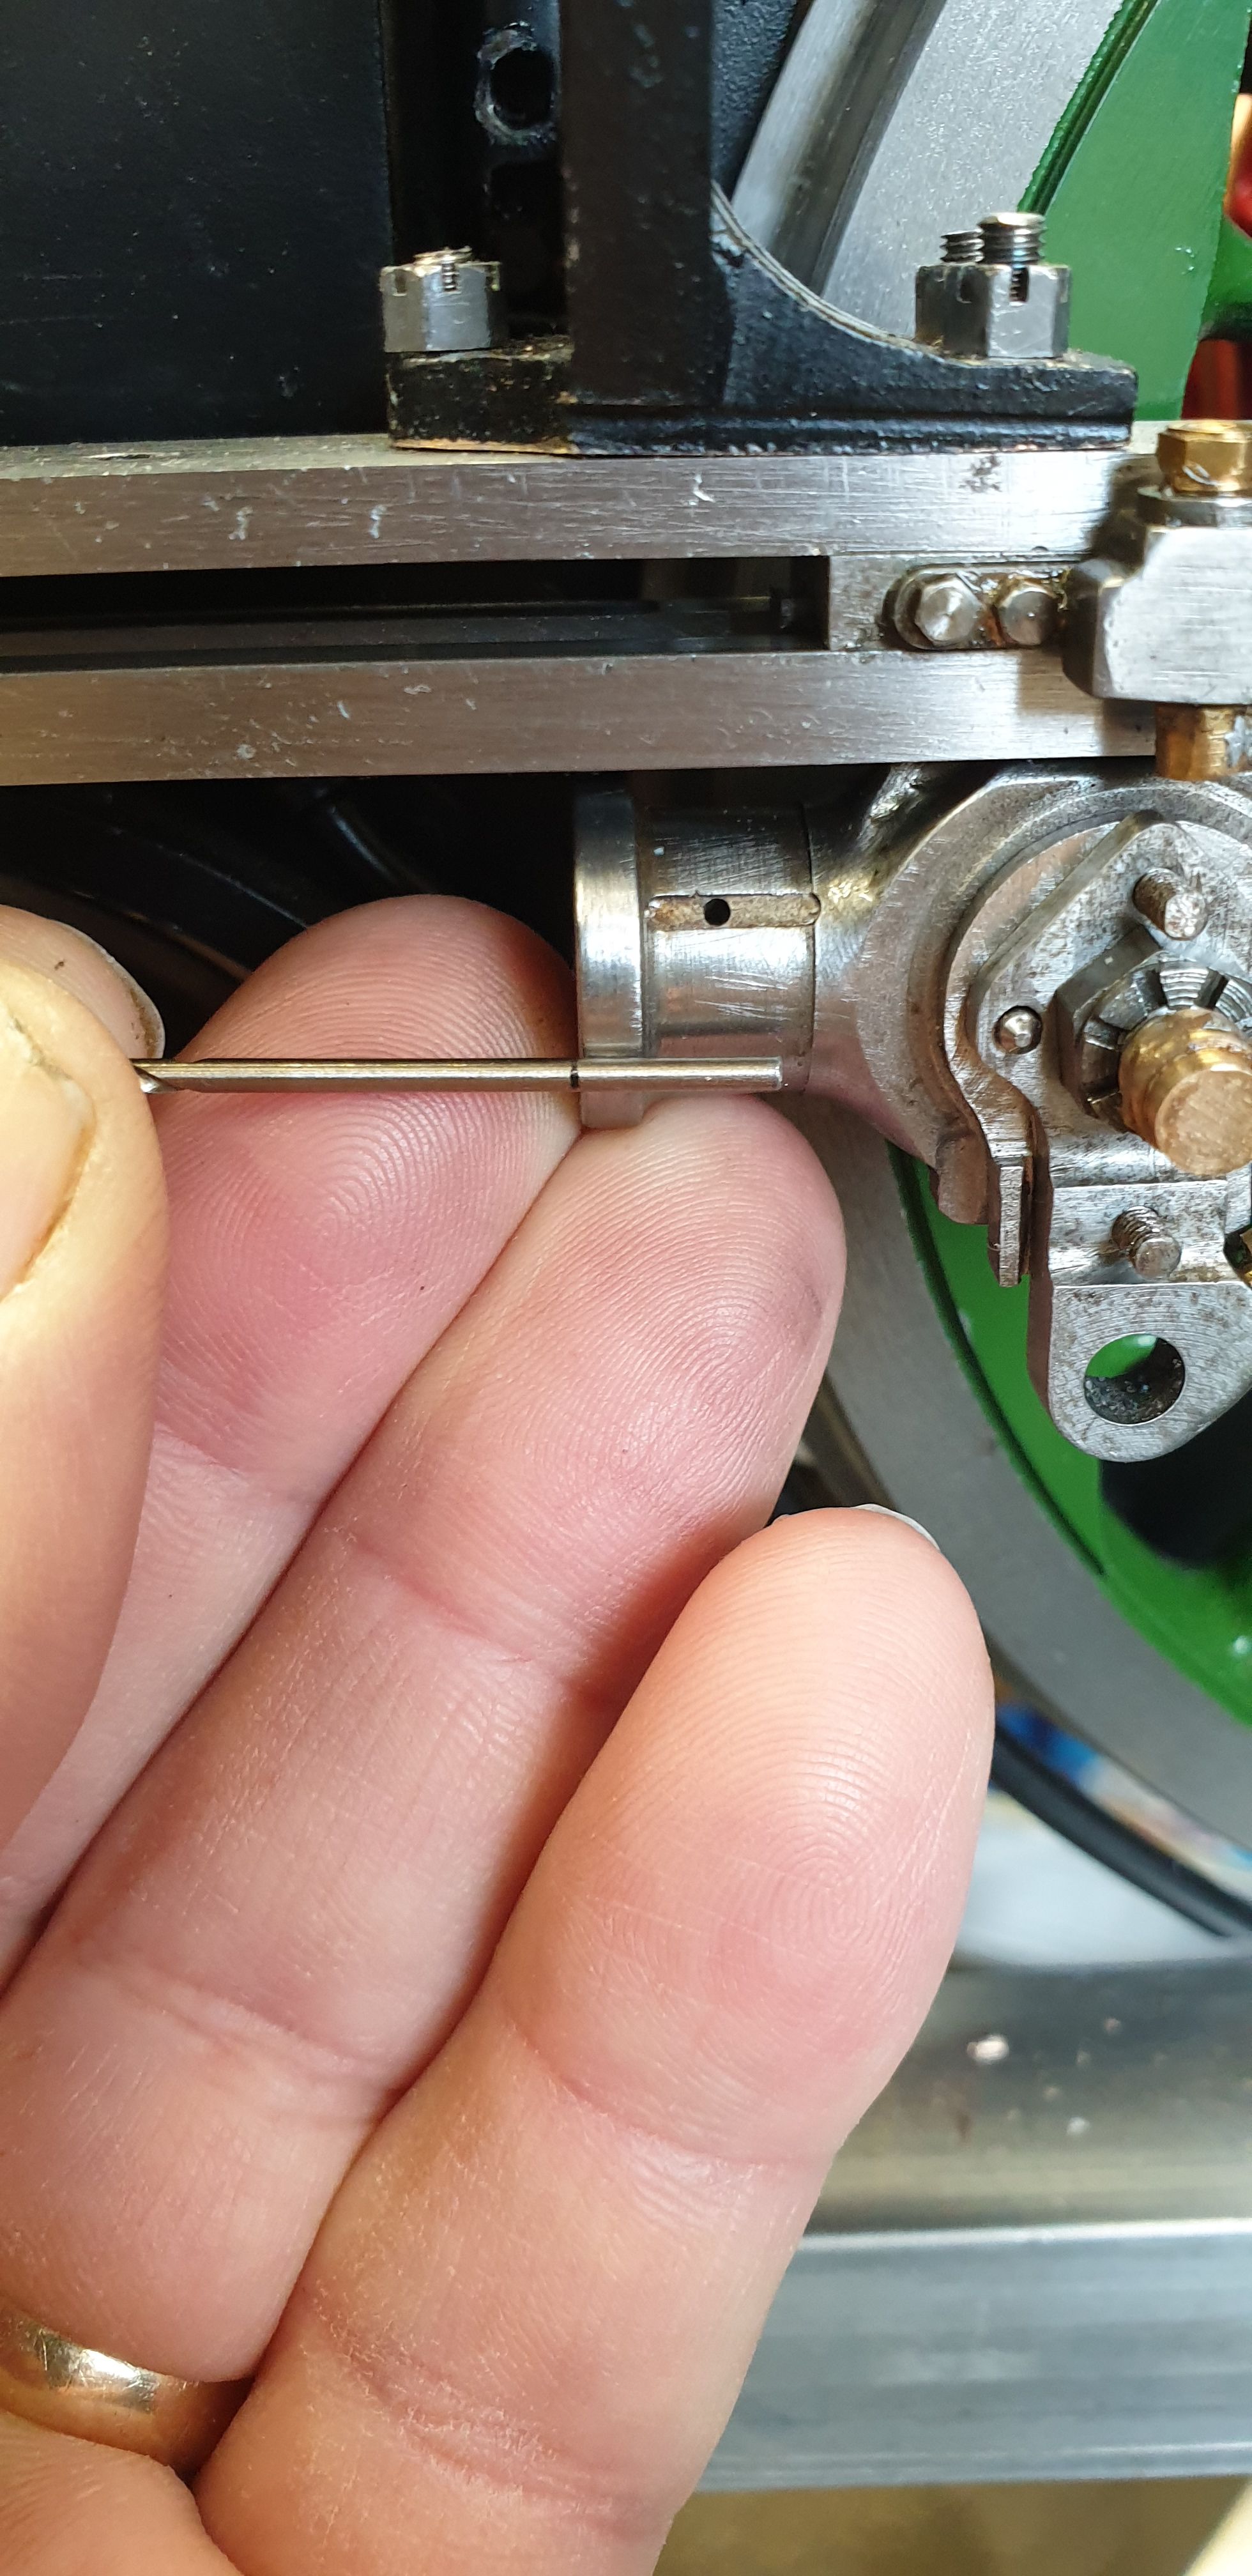
The first thing to check was how much of the rod needed to be removed, here we see the piston pushed back until it touches the crosshead which is as far forward as it's stroke allows.
Ok, so let me begin to explain the process, when fitting the crossheads I positioned the internal grub screw (details given the the crosshead entries) to both clear the connecting rod and also leave plenty of the piston rod being past where the dummy cotter joint will be placed later. I used the end of a small drill to give me a guide as to how much depth I had to play with as shown in the first picture. As you can see the rod will have enough metal past the taper pin ( disguised as a cotter pin) when fitted.
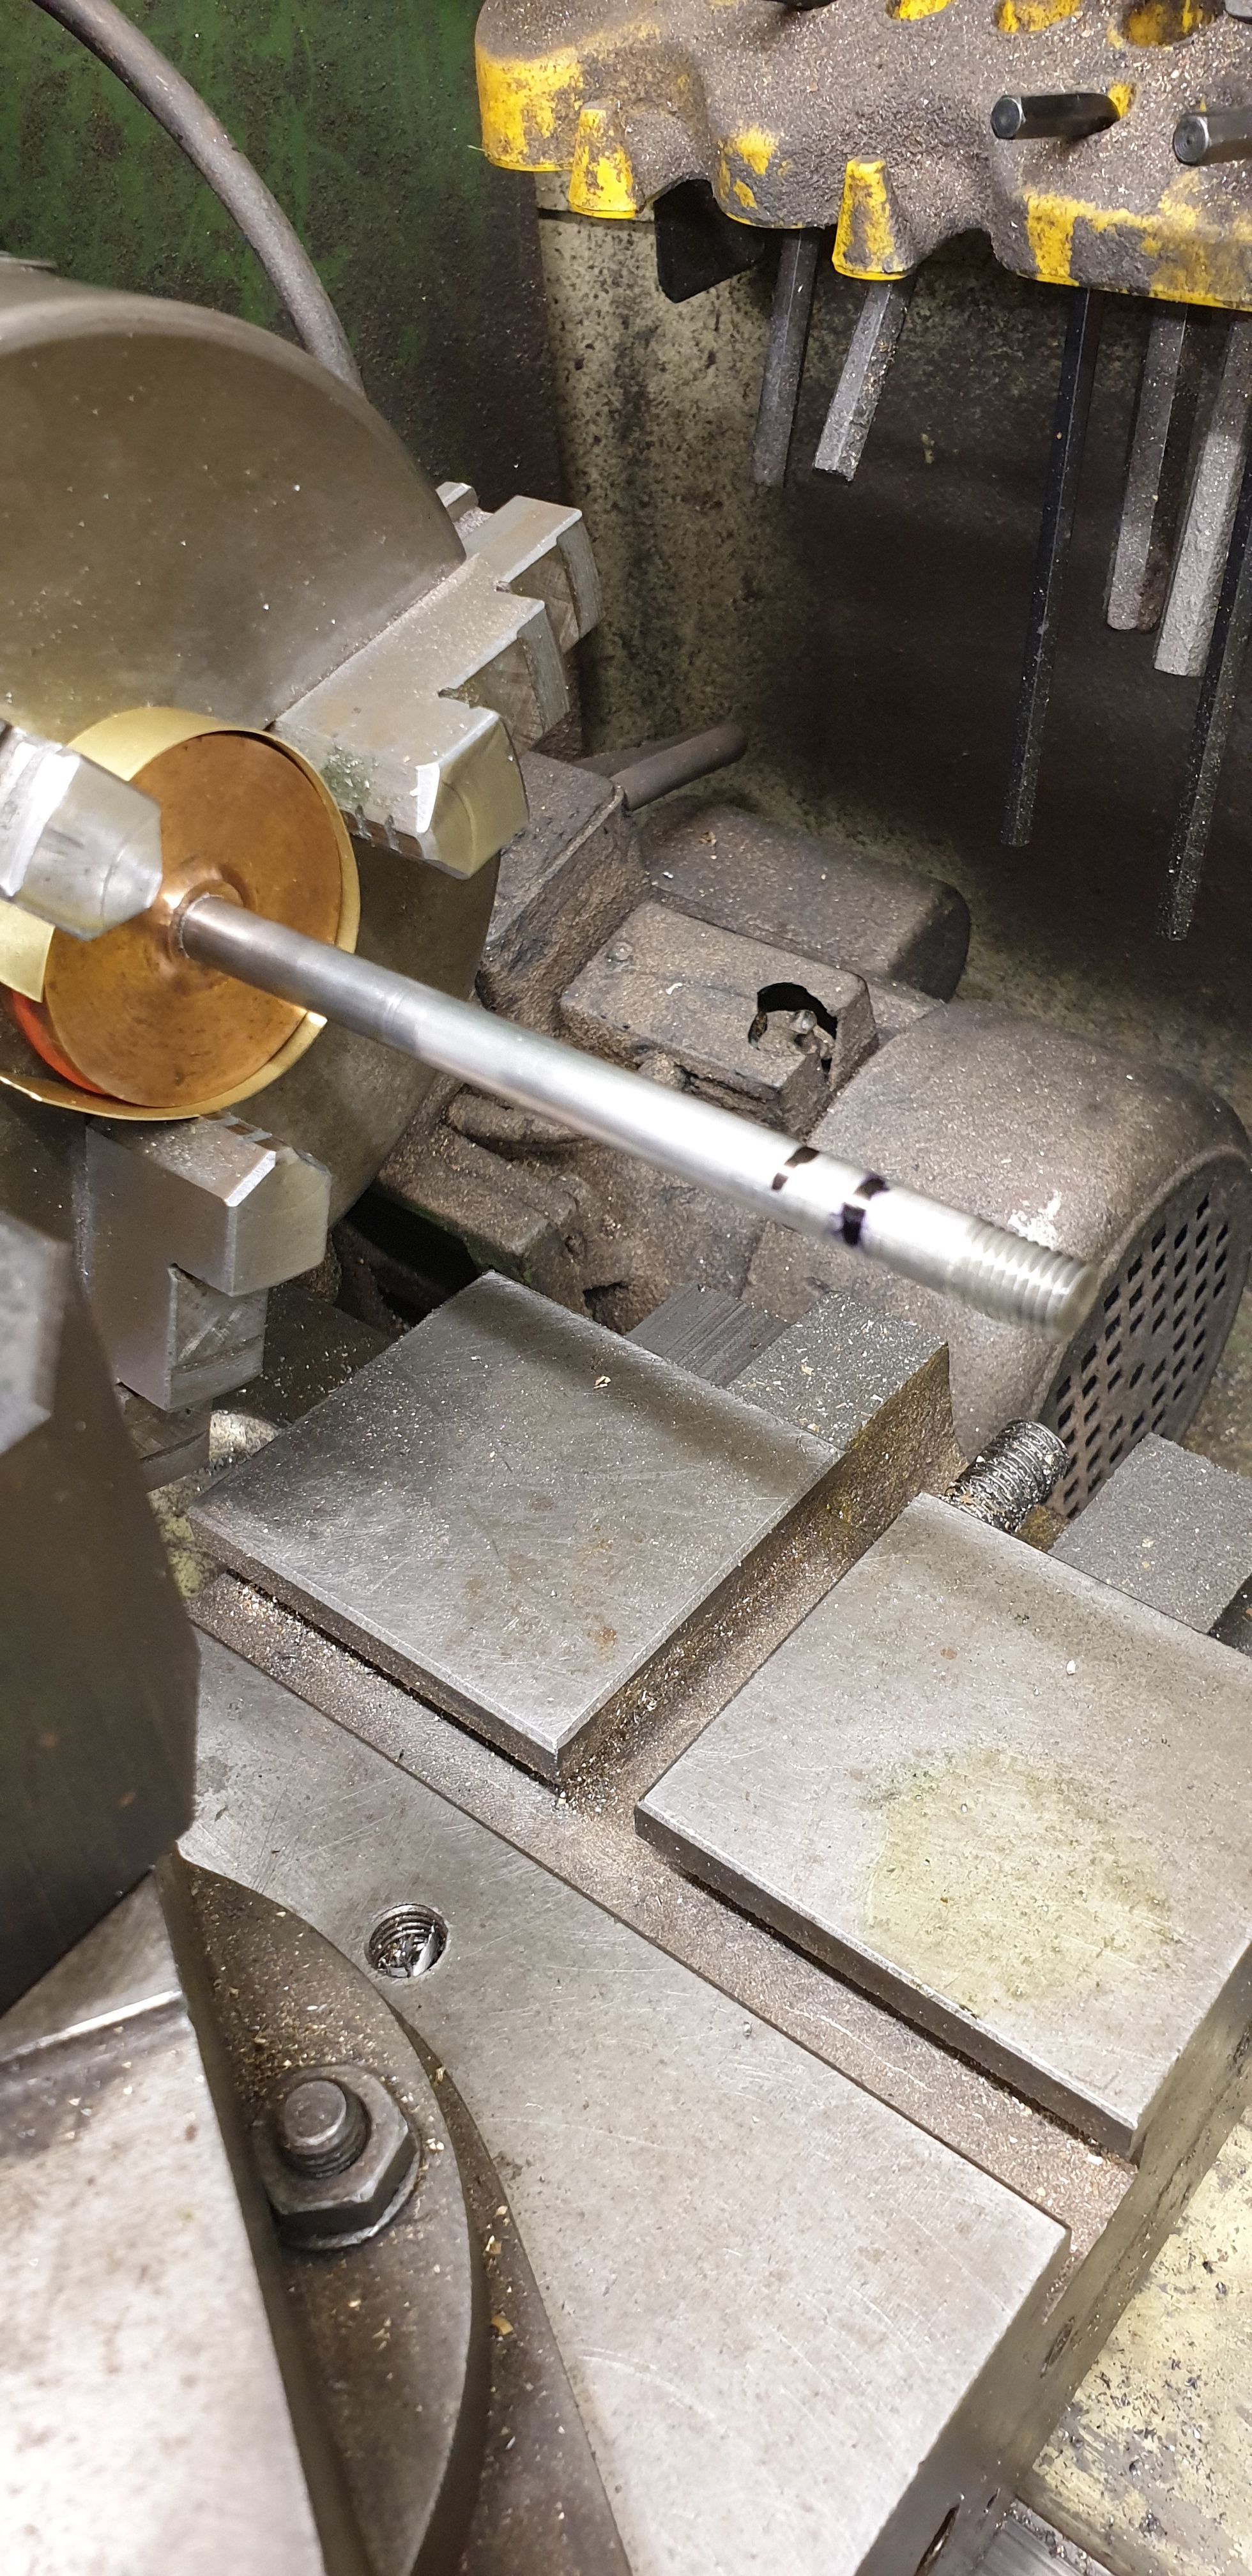
Next job was to shorten the piston rod and thread it 5/16 x 22 BSF, the thread that I have chosen to use. This was done by hand, not under power so I was happy to just hold the piston in the 3 Jaw using some brass shim for protection. At first I had planned to thread the rod before shortening to allow me to slowly thread it in to get the length right. I changed this due to how hard it was to cut the thread in stainless and it's probably here where i got mixed up with my dimensions and cut the thread too long.... as said, i'll sort this out later.
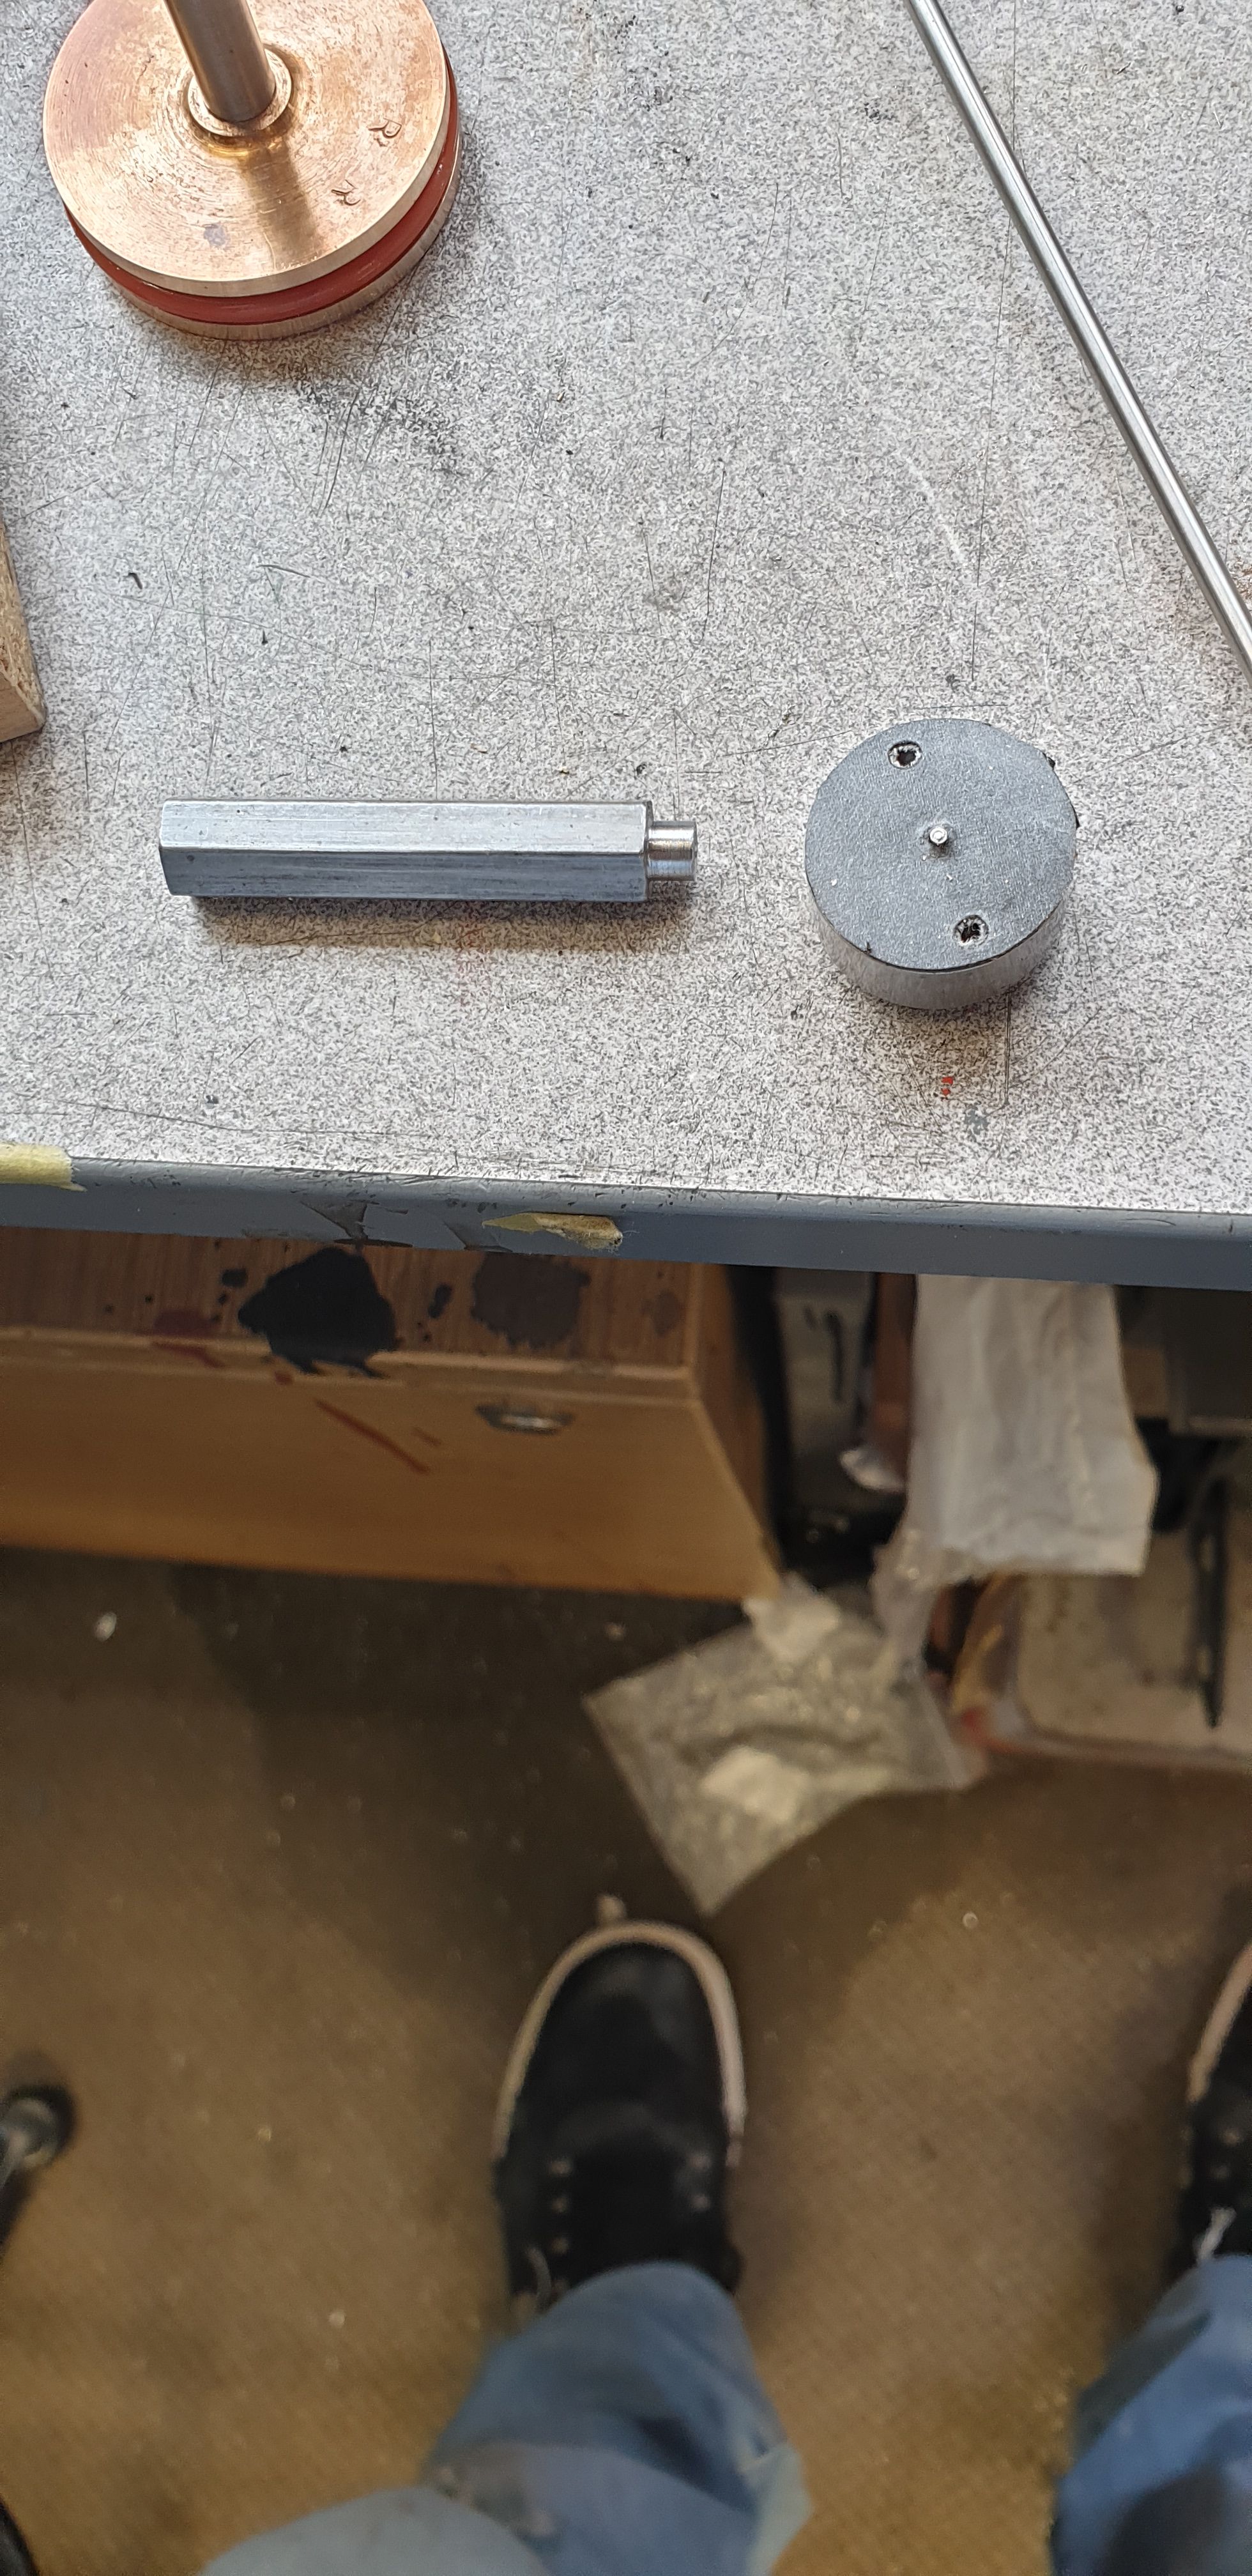
With the rod cut and threaded it was time to look at fitting the piston. i first tried to do this using jewelers pliers with nylon grips so as not to mark the rods but this wasn't going to work, I just couldn't get enough grip. So, on to plan two which involved making yet another tool, the tool chest for servicing this model is growing. I decided that perhaps the best way to do this was to have a tool that could attach itself to the front of the piston and therefore make up something like a pin spanner but one that could work on a ratchet type system. This would involve a couple of holes being drilled into the front of the piston, no problem I thought, I had forgotten something from when making the pistons, that is, the material is unbelievably tough, some may recall that I had to machine the pistons by hand. More on this later, the tool was made in two parts to be silver soldered together later once the holes had been drilled into the pistons. As can be seen I have used a length of steel hex bar for a socket to fit onto and the other end has 3 holes, one for the hex spigot to be silver soldered into and the other two for 1/8 stainless pins to be silver soldered into.
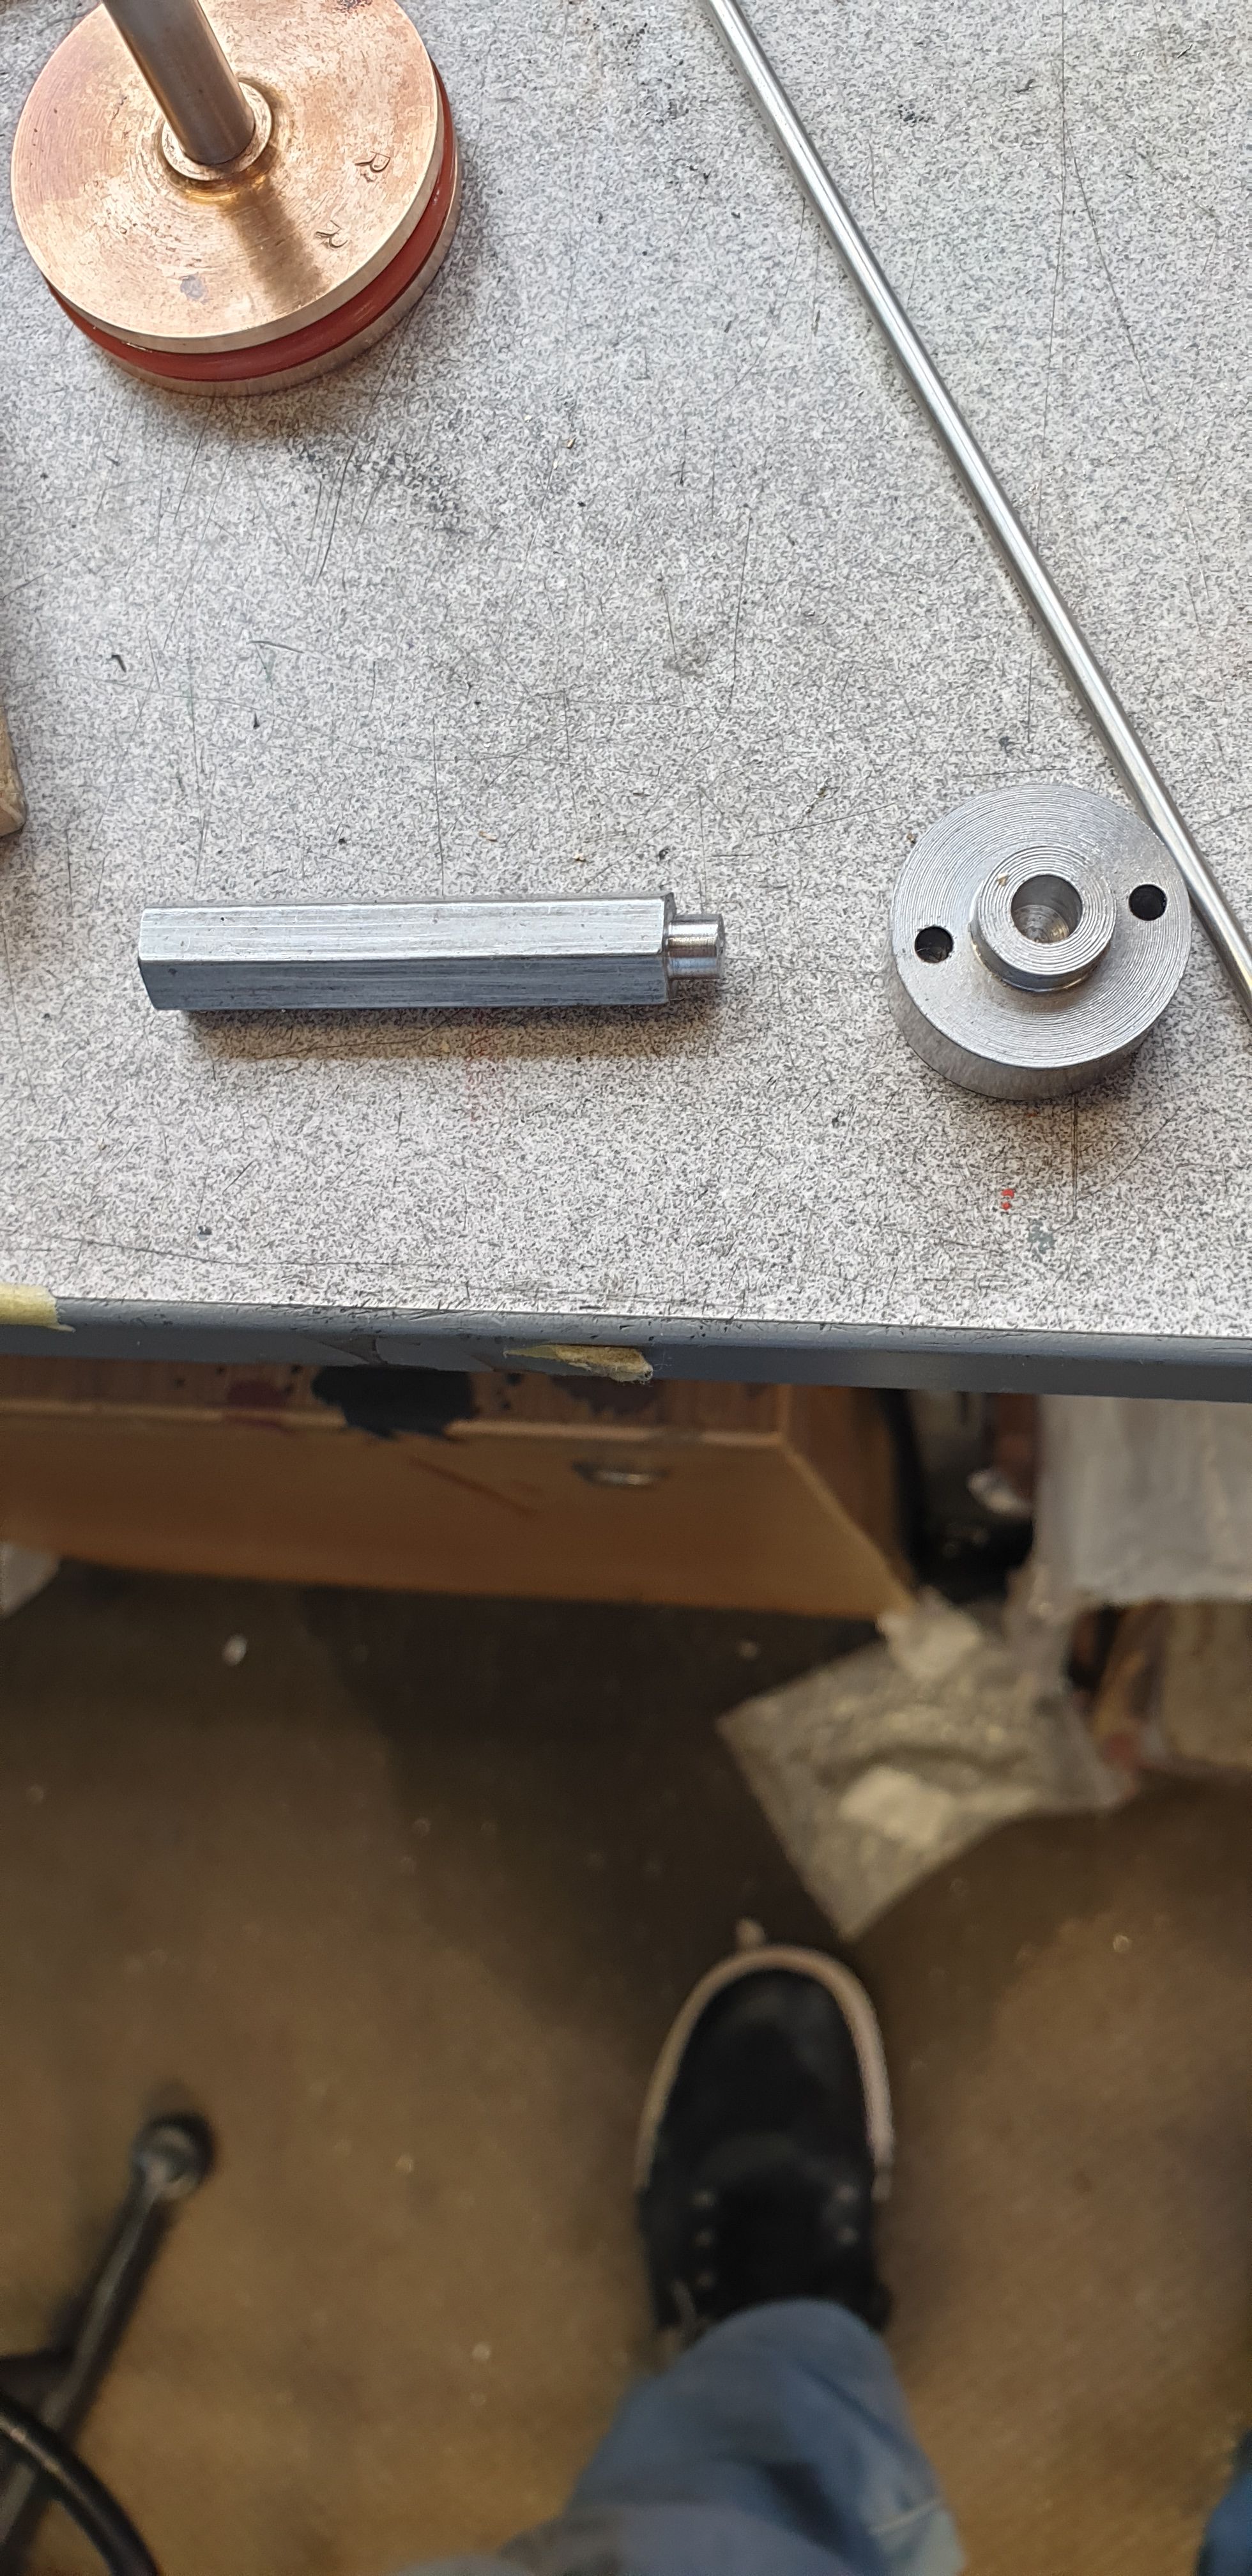
Here's the reverse side of the part that fits into the piston, I have cut a small rubber gasket to protect the front of the piston. also note the small spigot in the centre, this is to fit the hole in the middle of each piston which was used for the later machining operations while holding the piston and rod between center's. You can also see the length of 1/8 stainless steel ready to be cut to length.
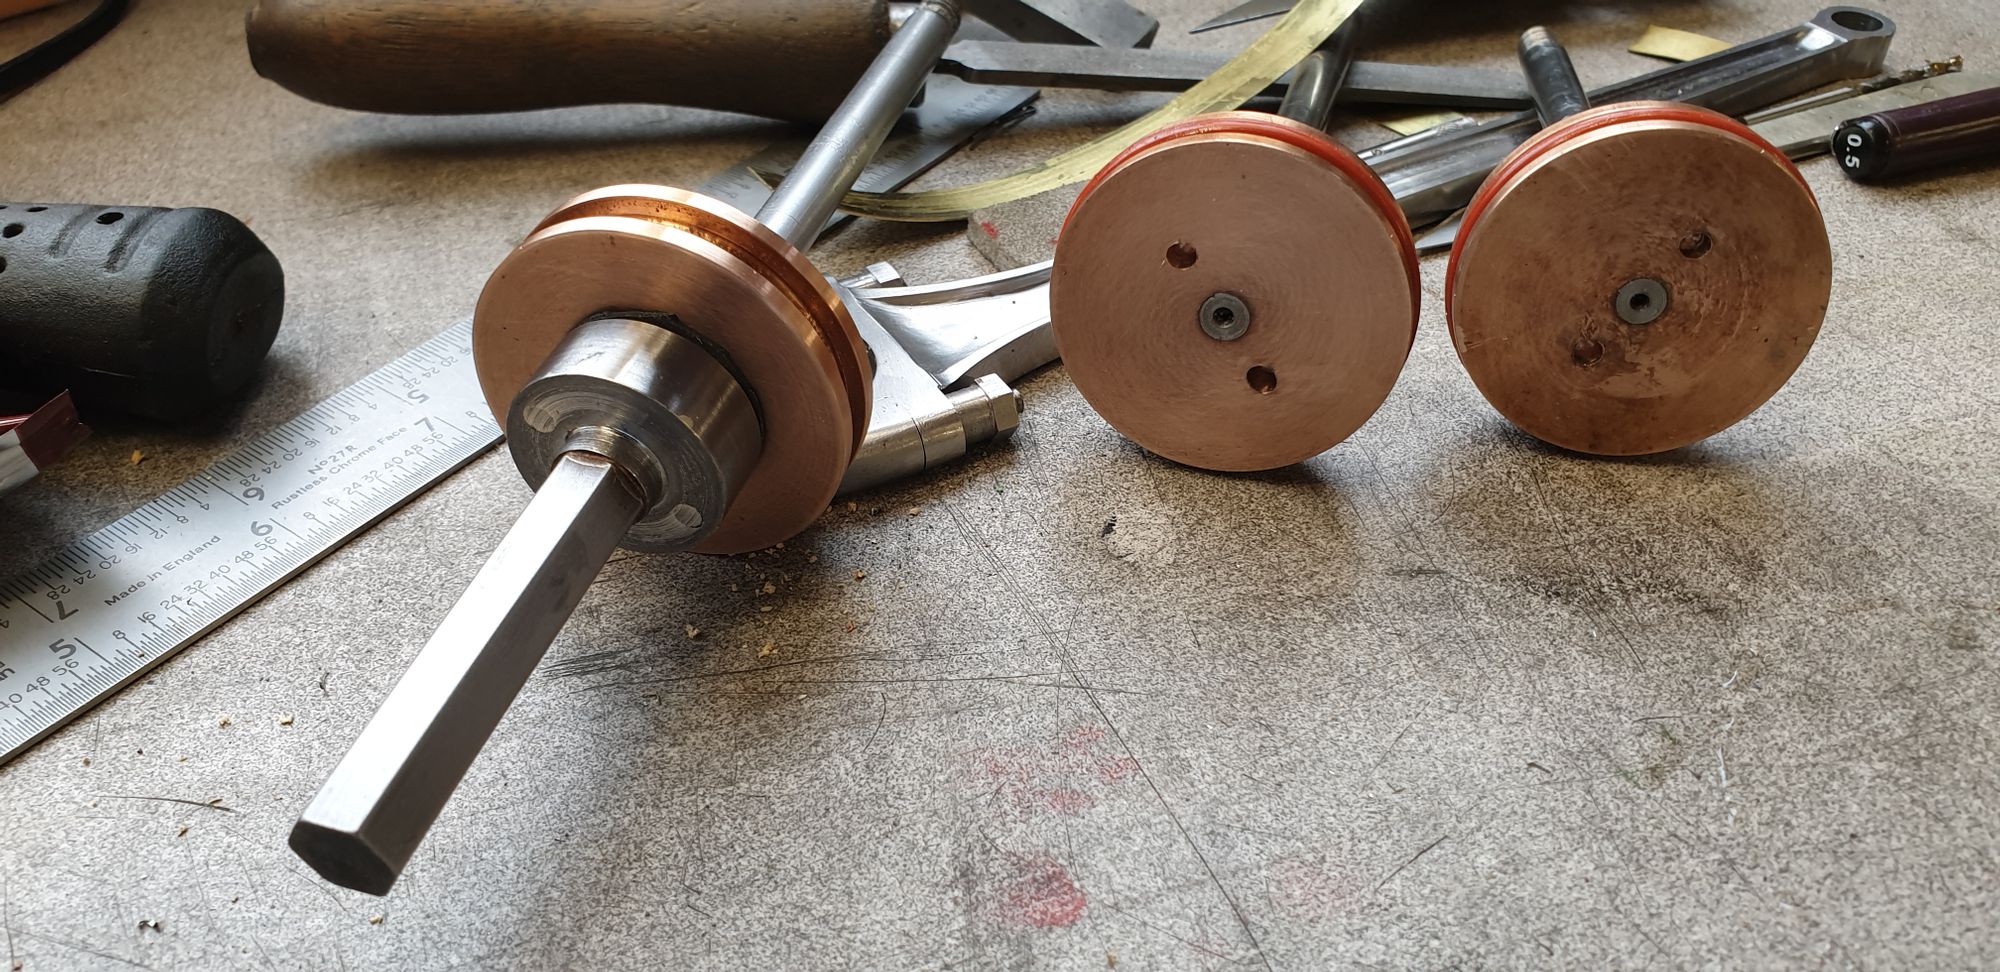
Before I could silver solder the parts together I needed to transfer the holes for the pins into the pistons which was easy to line up centrally thanks to the small spigot and this is where the fun began. I got there in the end with careful drilling and plenty of cutting fluid using a hand drill but did mark one piston face, not a big deal as it will have no effect on the piston itself but it was still annoying. It was at this point that I recalled all the trouble that I had in machining the piston blanks....I'm just happy to not need to do anymore machining on these parts. This picture shows that all 3 pistons have been drilled with the tool fitted to one of them to give some idea of what's going on.
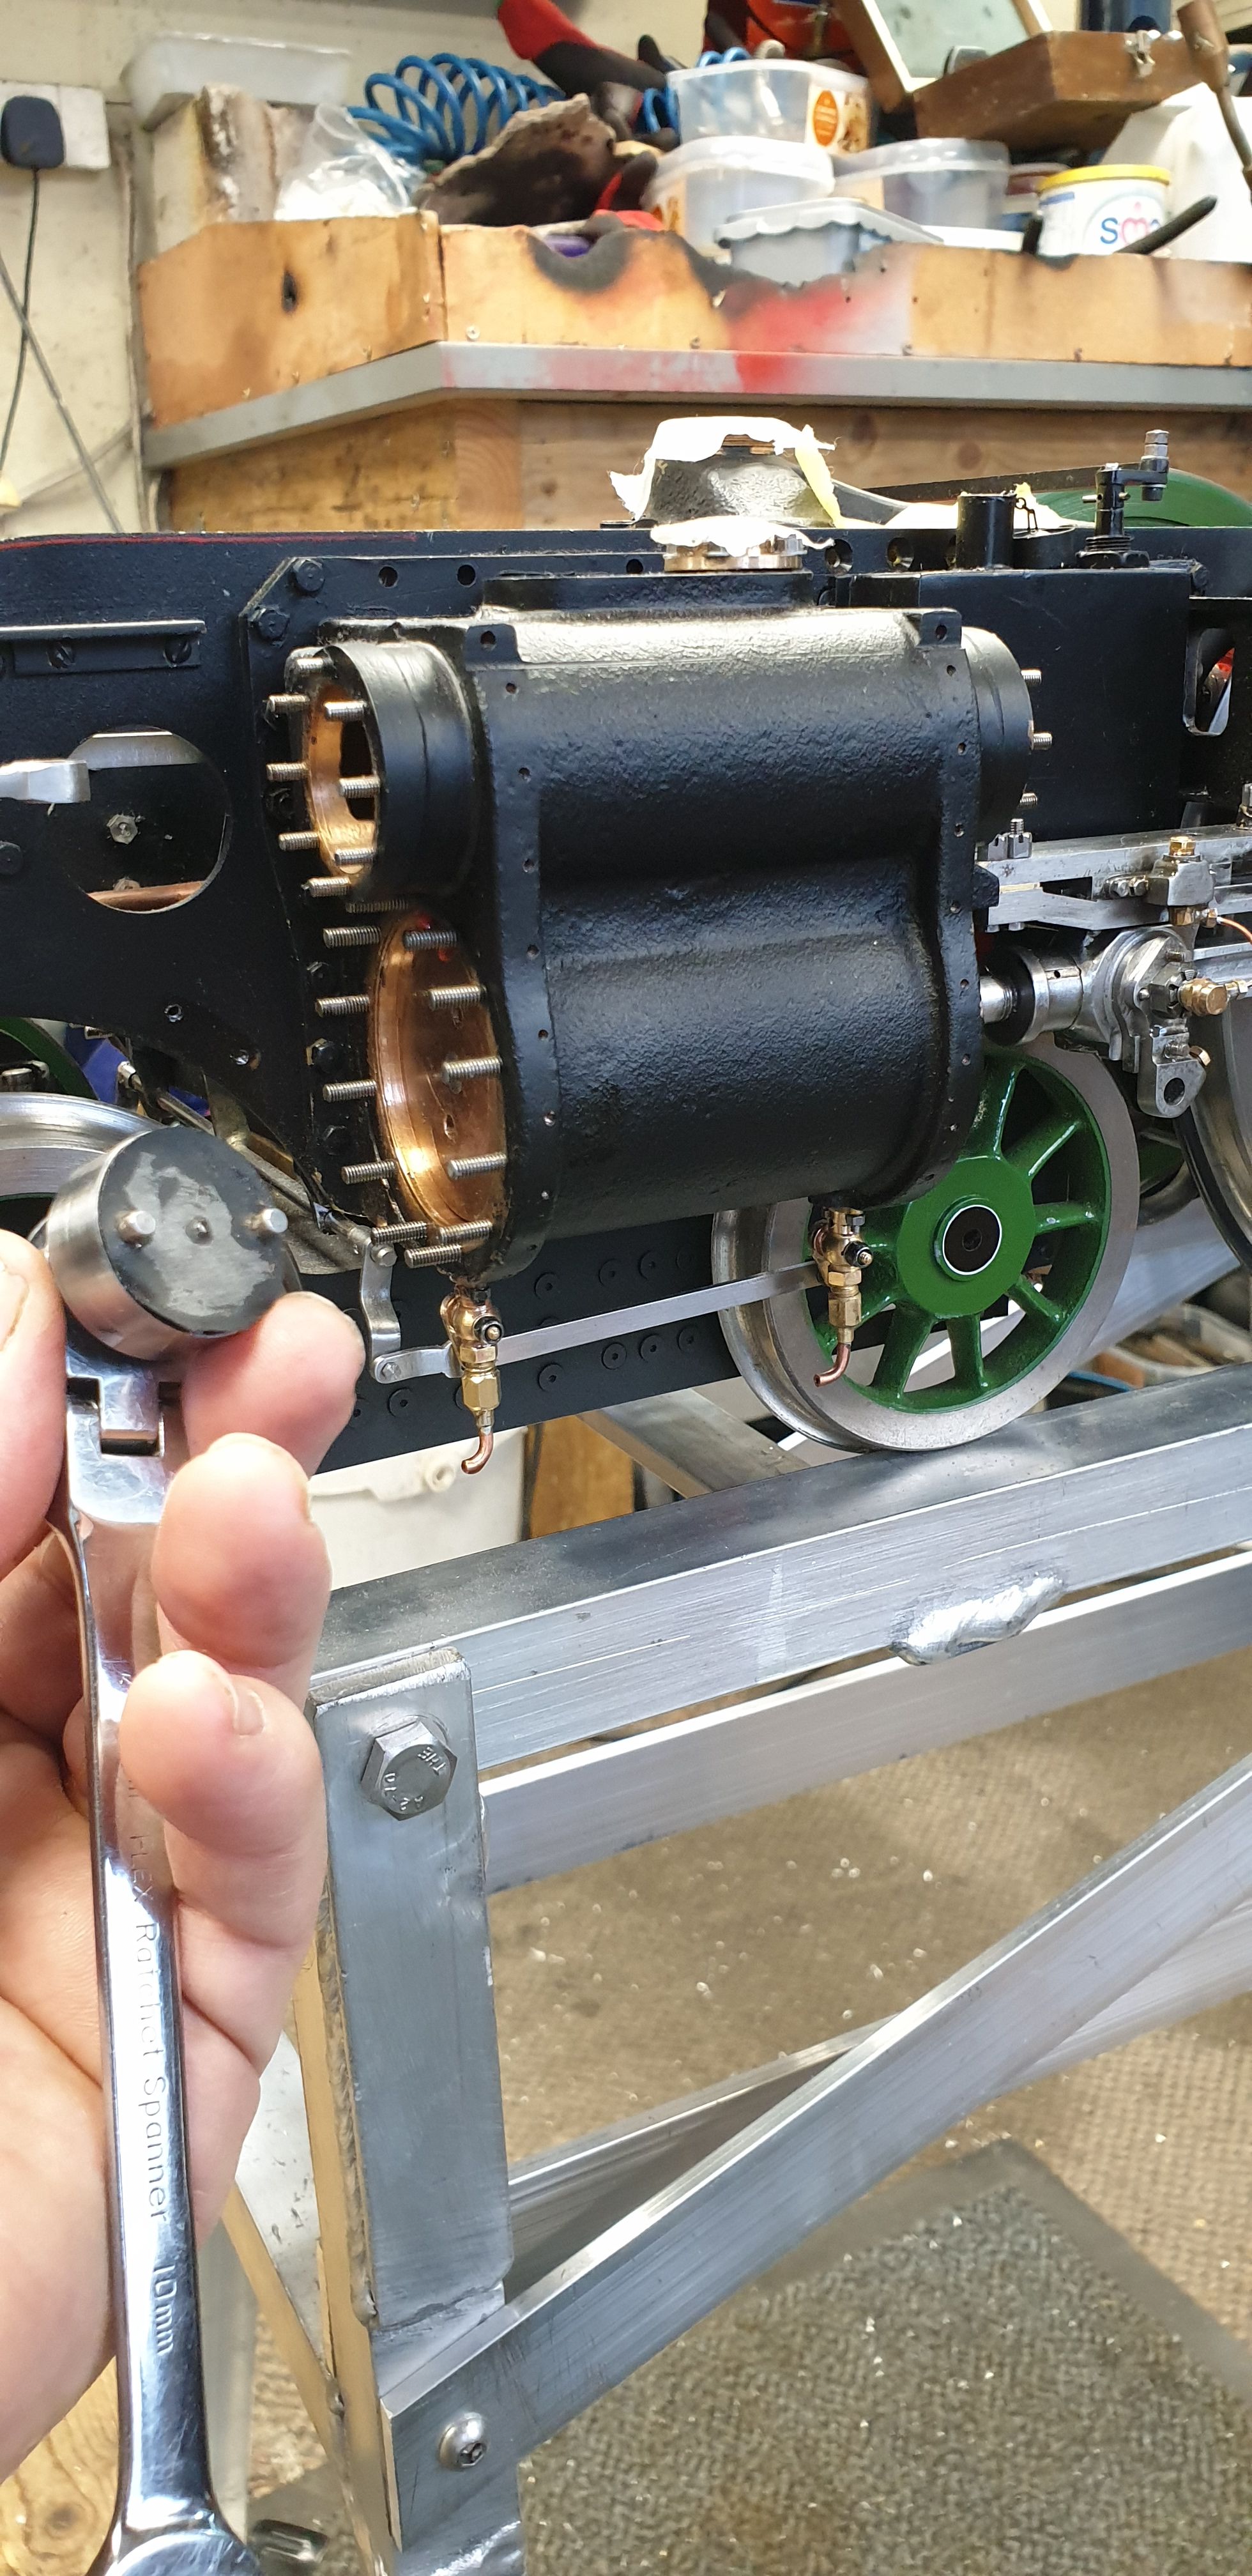
It was then time to fit the first piston and find out if there was enough room in the piston for the stroke, yes I know that on paper all should be fine but it's still a nervous time as there are just so many parts that would only need to be out by a fraction to give problems, well it was a little nerve racking for me, or was it more a big sigh of relief...:) Having struggled previously trying to thread the piston in using the nylon pliers doing it now with the purpose made tool was a breeze. I threaded the rod in as far as it would go, which of course was a little too far due to me cutting the thread to far and thus the wheels locked on the backward stroke. However this was very easy to address by turning the piston out a few turns until all worked smoothly. I'm not going to cross-drill through the piston rod until after the model has been run on air, just in case the length needs fine tuning a little, I can see here that the piston can probably be threaded out a little further still to balance the port openings, I'll work this out later.
Anyway, that's the first piston fitted, it won't take long to fit the other side and then I can take a look at the middle cylinder for which I have now received the bronze for making the split big end brass.
To follow on from the video posted earlier of the chassis being pushed along the track after first fitting the outside rods. I did the same test with this first piston fitted. this time though I oiled the coupling and connecting rods, along with the crosshead big and little ends, this made a big difference on being able to roll the chassis. They weren't dry before, having been assembled using engine assembly lube but that's pretty thick and designed to protect car engine bearings when first started after a rebuild. It's a little thick for our purpose but does a good job in protecting the parts until run in.
I'll make another video soon going over the chassis oiling points etc to give some idea of what's going to be involved in oiling this model before steaming, pretty much the same as full size, think I might need to write up a check list...:)