
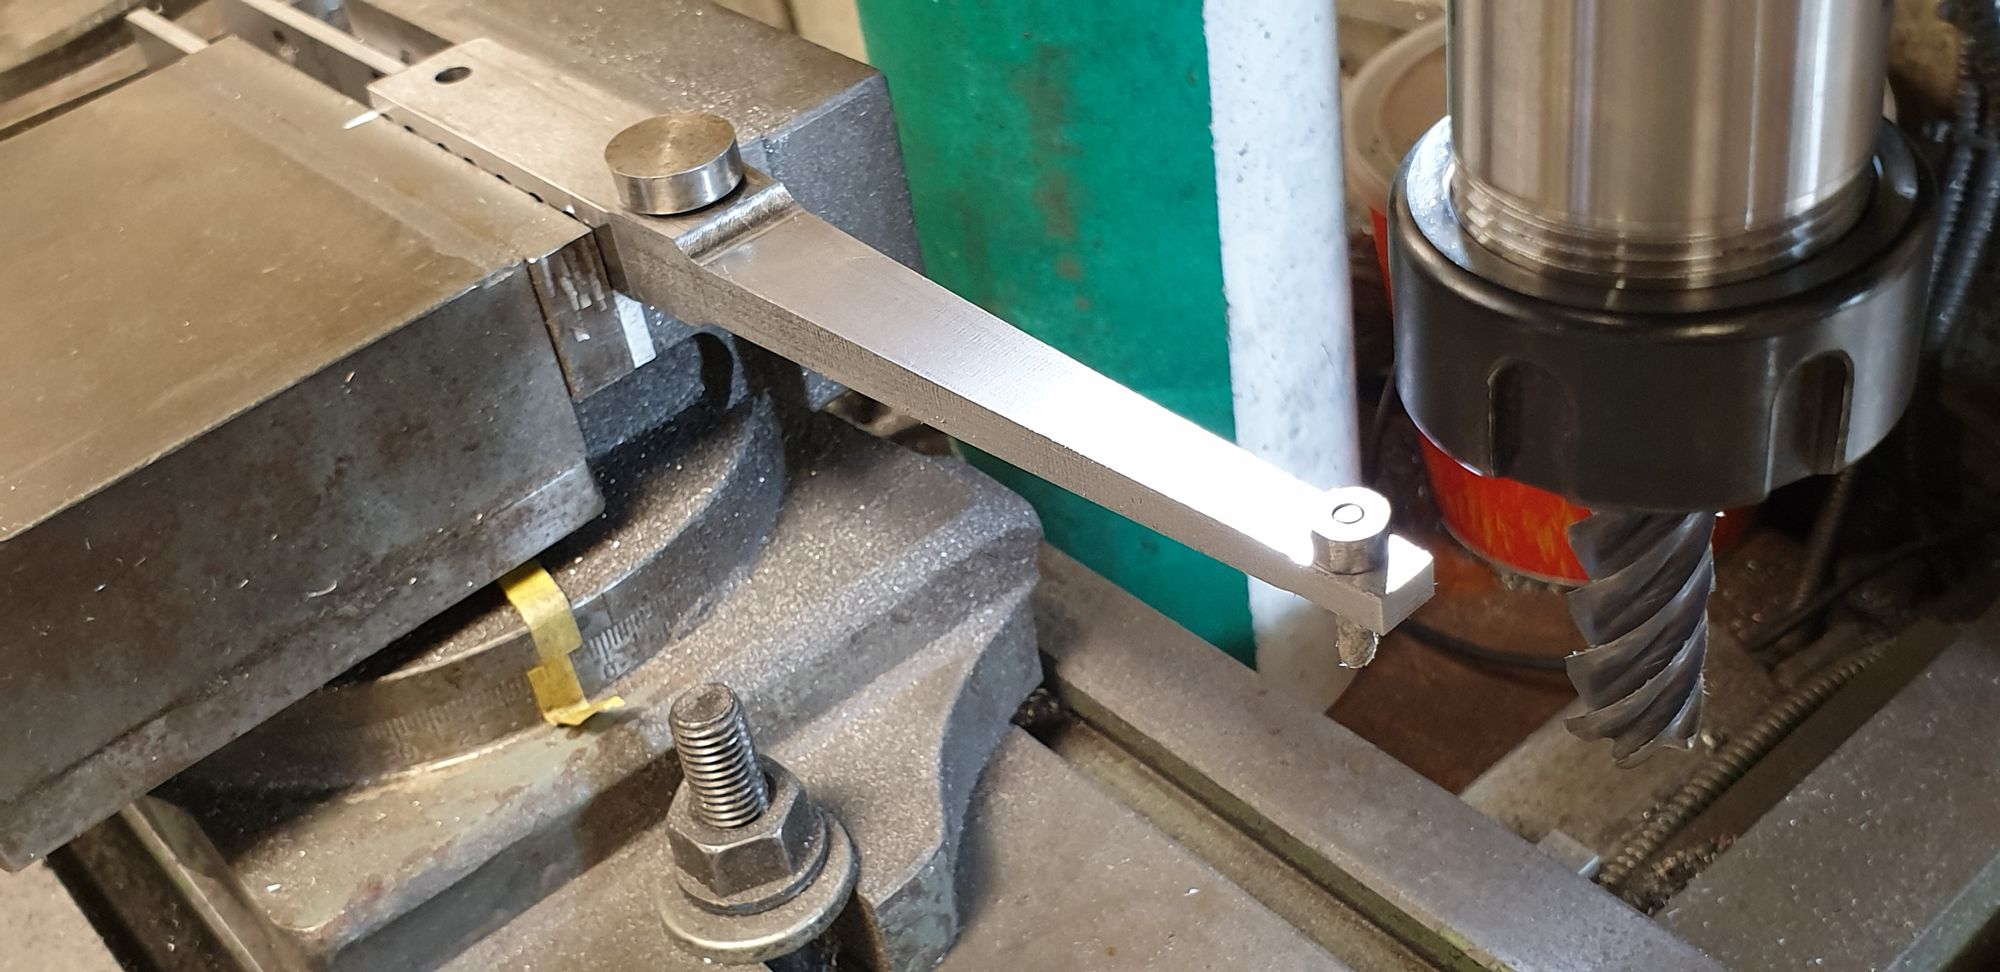
With the mill repaired (the inverter/speed controller was the guilty party) I could return to the lever. At the time of failure I was in the middle of machining the long section down to 3/8 wide, this is the widest part of the taper. A few things to point out here, I have tackled this part in the machine vice with a fairly long overhang, I wouldn't attempt this with mild steel as it's likely to twist/warp which could then entice the cutter to dig in with disastrous results, I was confident that with using gauge plate this wouldn't be a problem, I'll let the pictures talk to show that it wasn't.
In this picture we can see that the tongue has now been machined down to 3/8th " and that as stated there's a fairly long overhang. I best mention here that the part that is held at the nearest end of the vice also needs to be reduced in width to 7/16th but I won't do that until after I have machined the slot, I'll explain why in a few pictures time.
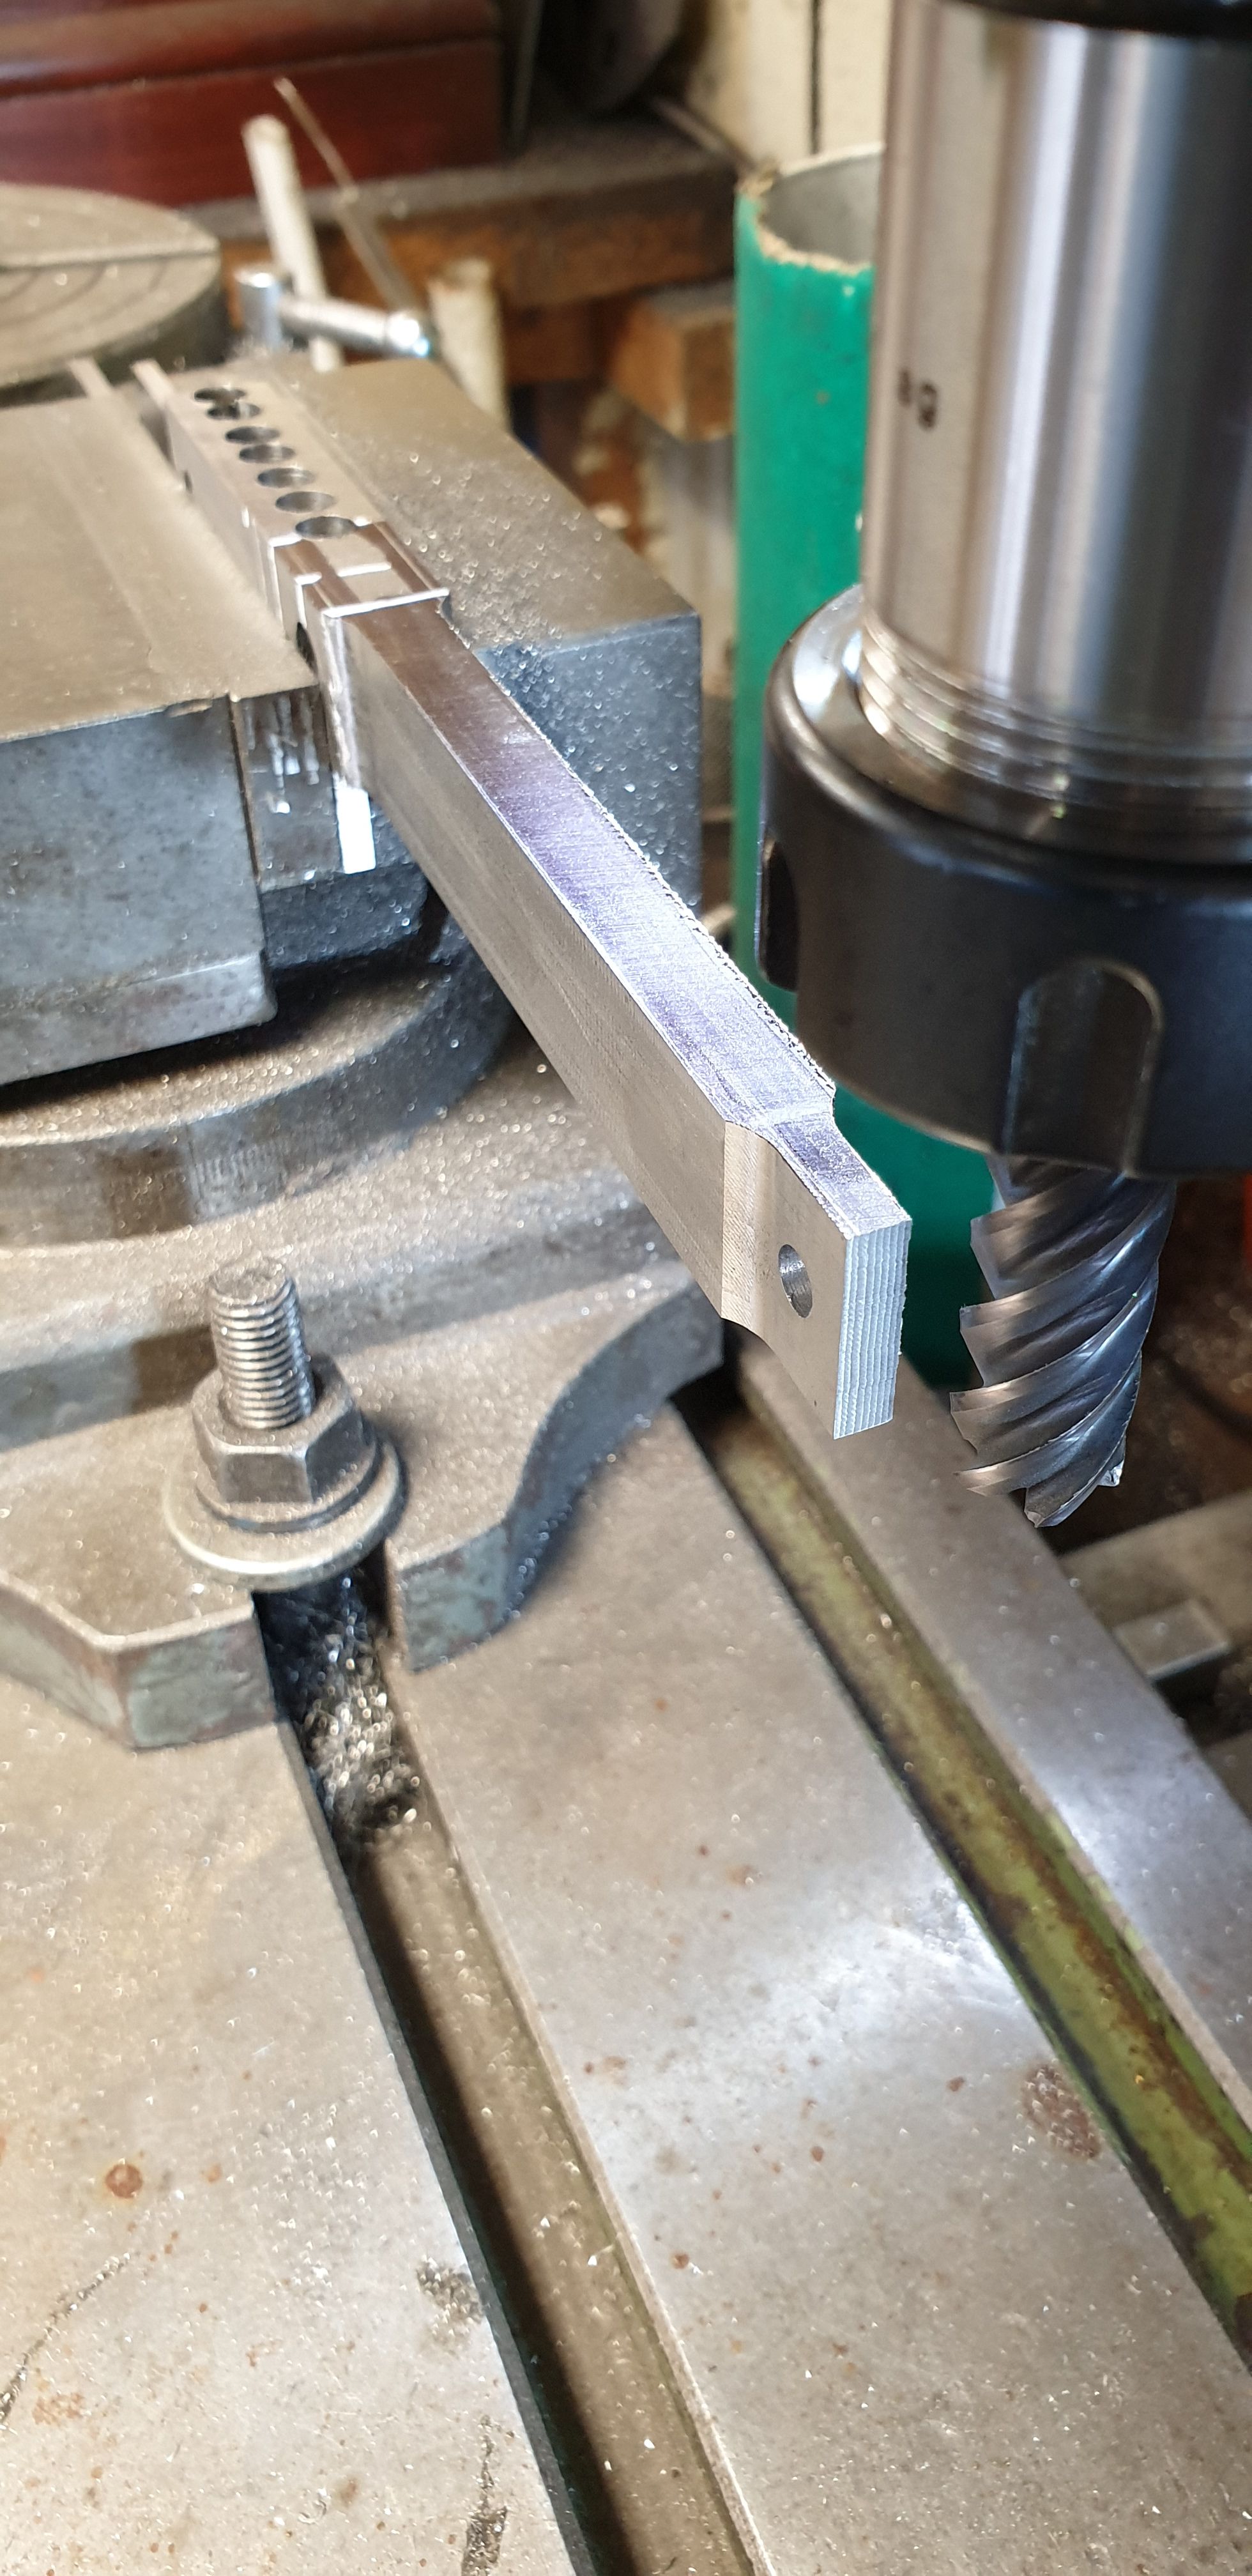
The next job was to machine the taper on the same axis, both axis do have a taper, for this I simply set the swivel on the vice to give me the required taper. I set this by eye, placing the cutter over the job and moving it along 'X' axis until I was happy that it would give me the correct taper which IIRC , worked out just over 1 degree. To speed things up later I placed some tape on the index and cut it so that I could both easily see how much it had moved and also give me a ball park position to put it back later, the dials aren't that easy for my poor eyes to see. Here we can see that the taper has been cut on both sides. Once I had done the first, I flipped the part over and did the other side to the same settings, thus ensuring an equal taper on both sides. The narrow part is 3/16 although I have left it a fraction wider to avoid marking the end bearing tab.
I then needed to turn the part 90 degrees and machine the taper on the other axis. first I machined two bobbins of the required size and again set the angle by eye. This time though there is more overhang as the taper needs to reach the centre of the fulcrum pin, again, being it's gauge plate this exercise was achieved without issue. As with the first taper I turned the part over to ensure both were the same, the white pen mark shows me where to place the part so that both tapers stop at the same point.

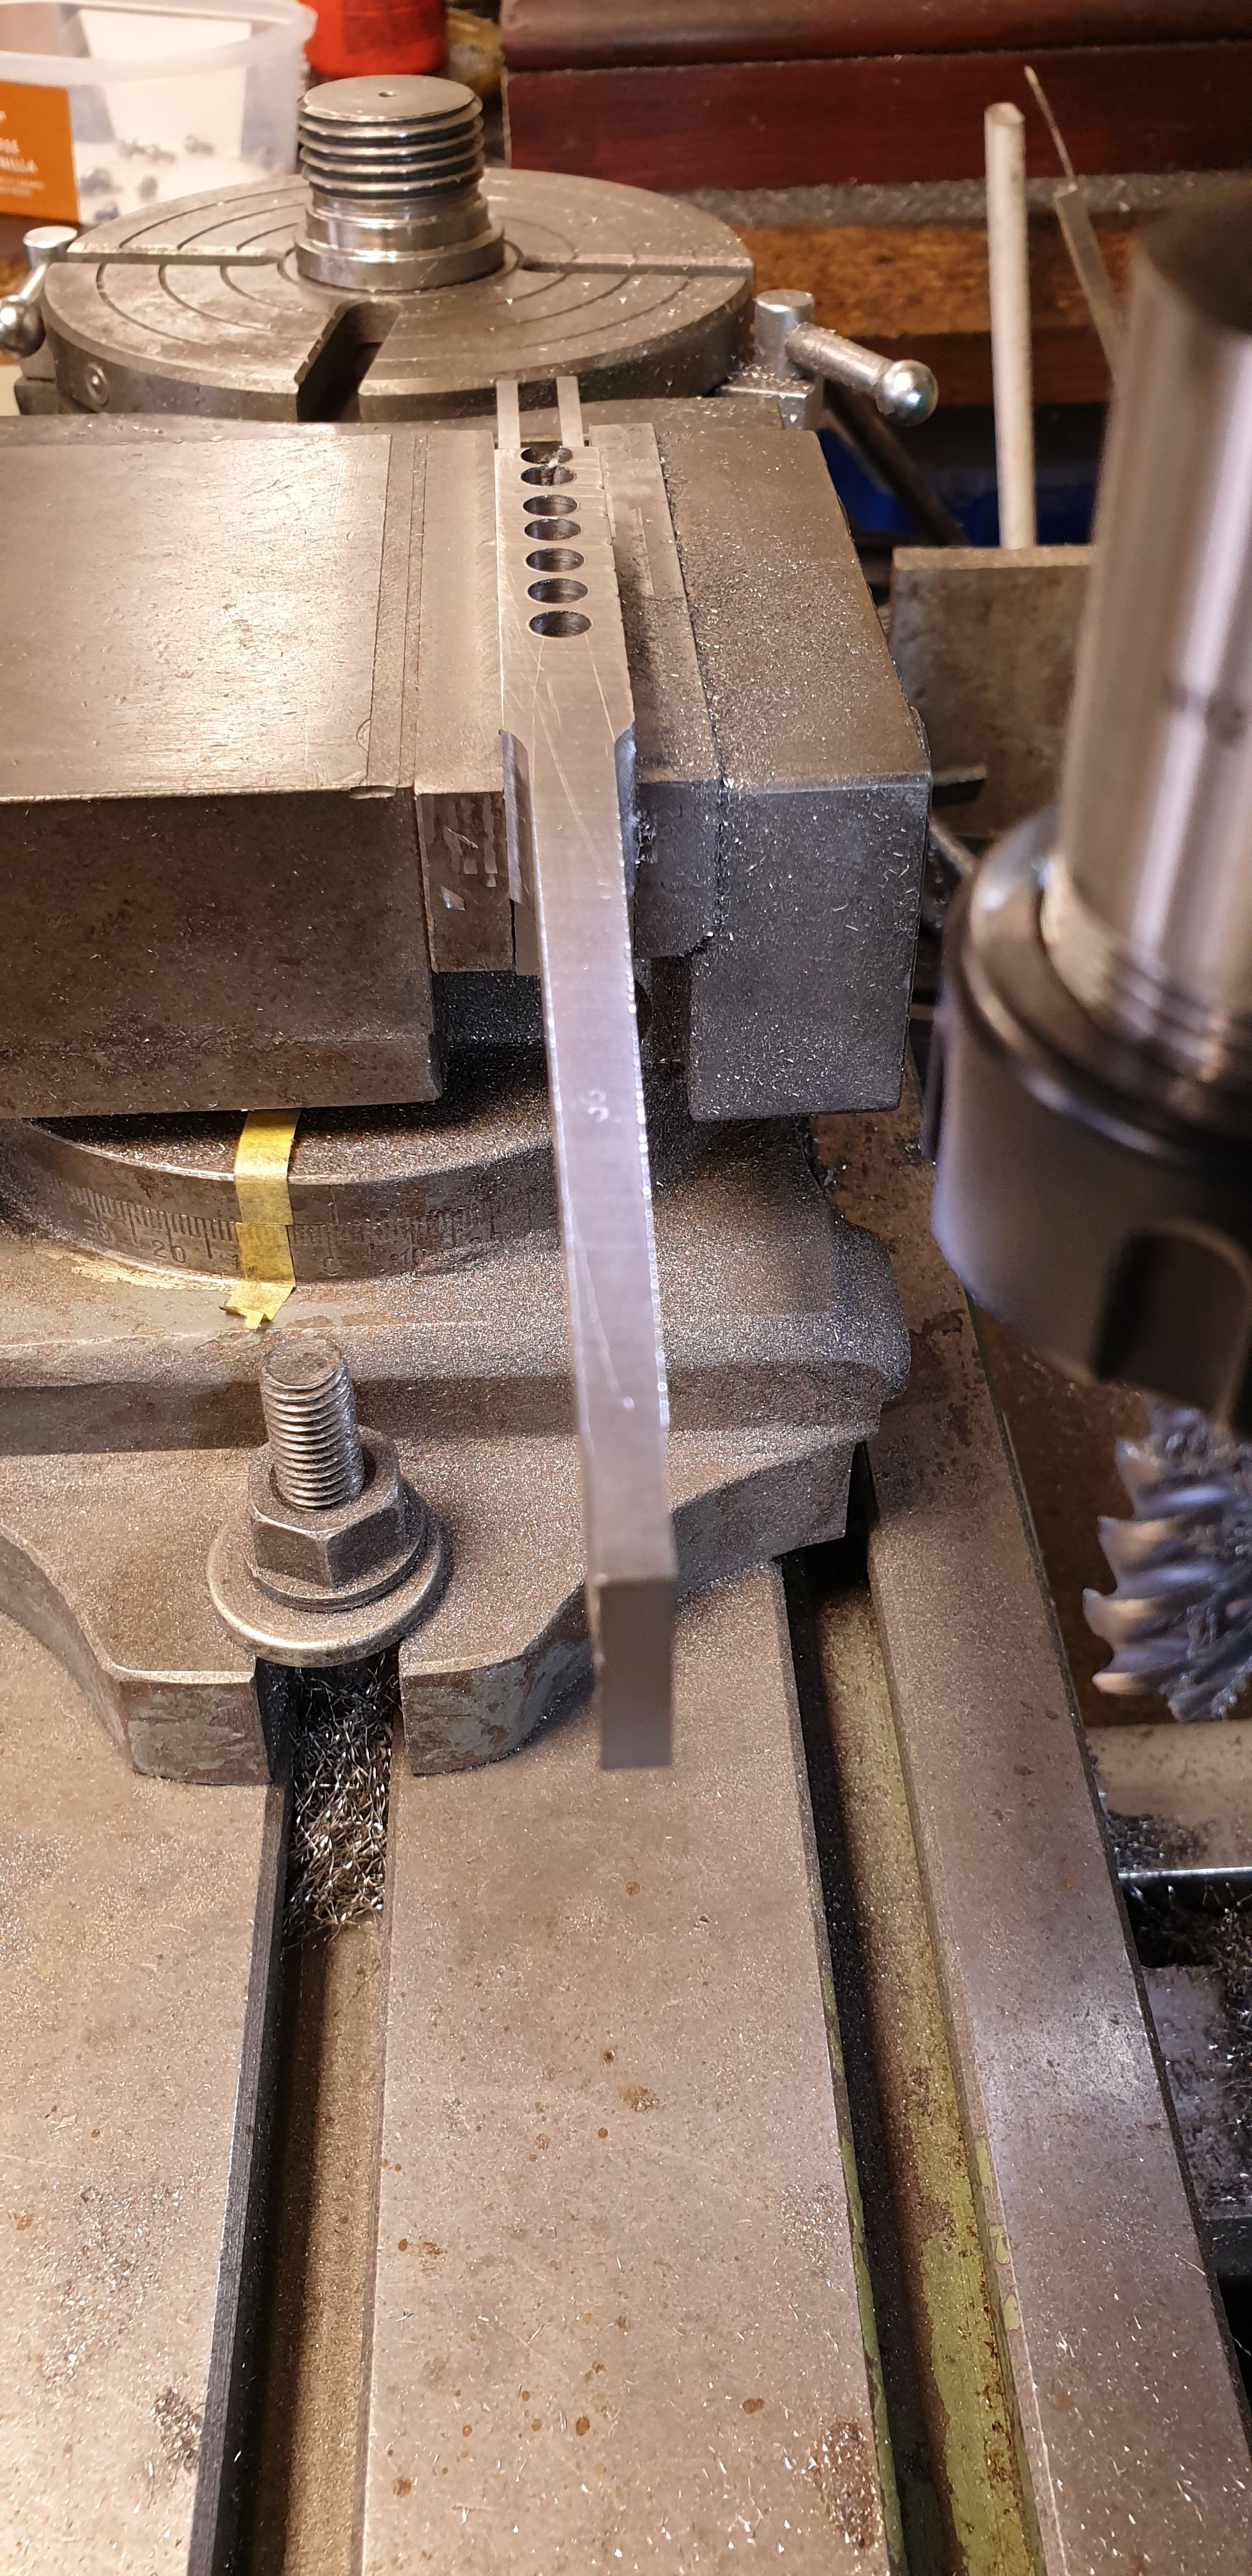
It was then time to tackle the 9/32 slot, actually the slot widens in the middle, I'll cover that later. I'll cover now why I didn't reduce the width of the fulcrum section at the same time as doing the 3/8th tongue. You can see some ascribed lines either side of the slot, the long lines are approx where the 9/32 has to be opened up for the valve connecting rod knuckle to fit. there are also a few cross lines, these are for where the slot widening starts/ends and also where the fulcrum 7/16 section ends, if I had machined the 7/16 part first I wouldn't have enough metal to securely hold the part for machining the slot. In fact the slot alone would be the only metal held which would be a disaster as the final cuts were made. Using a brand new 9/32 cutter I took a small cut to check that all was central, BTW, after machining the tapers and resetting I did check all was square with a clock before cutting metal. As the picture shows, we are on target.
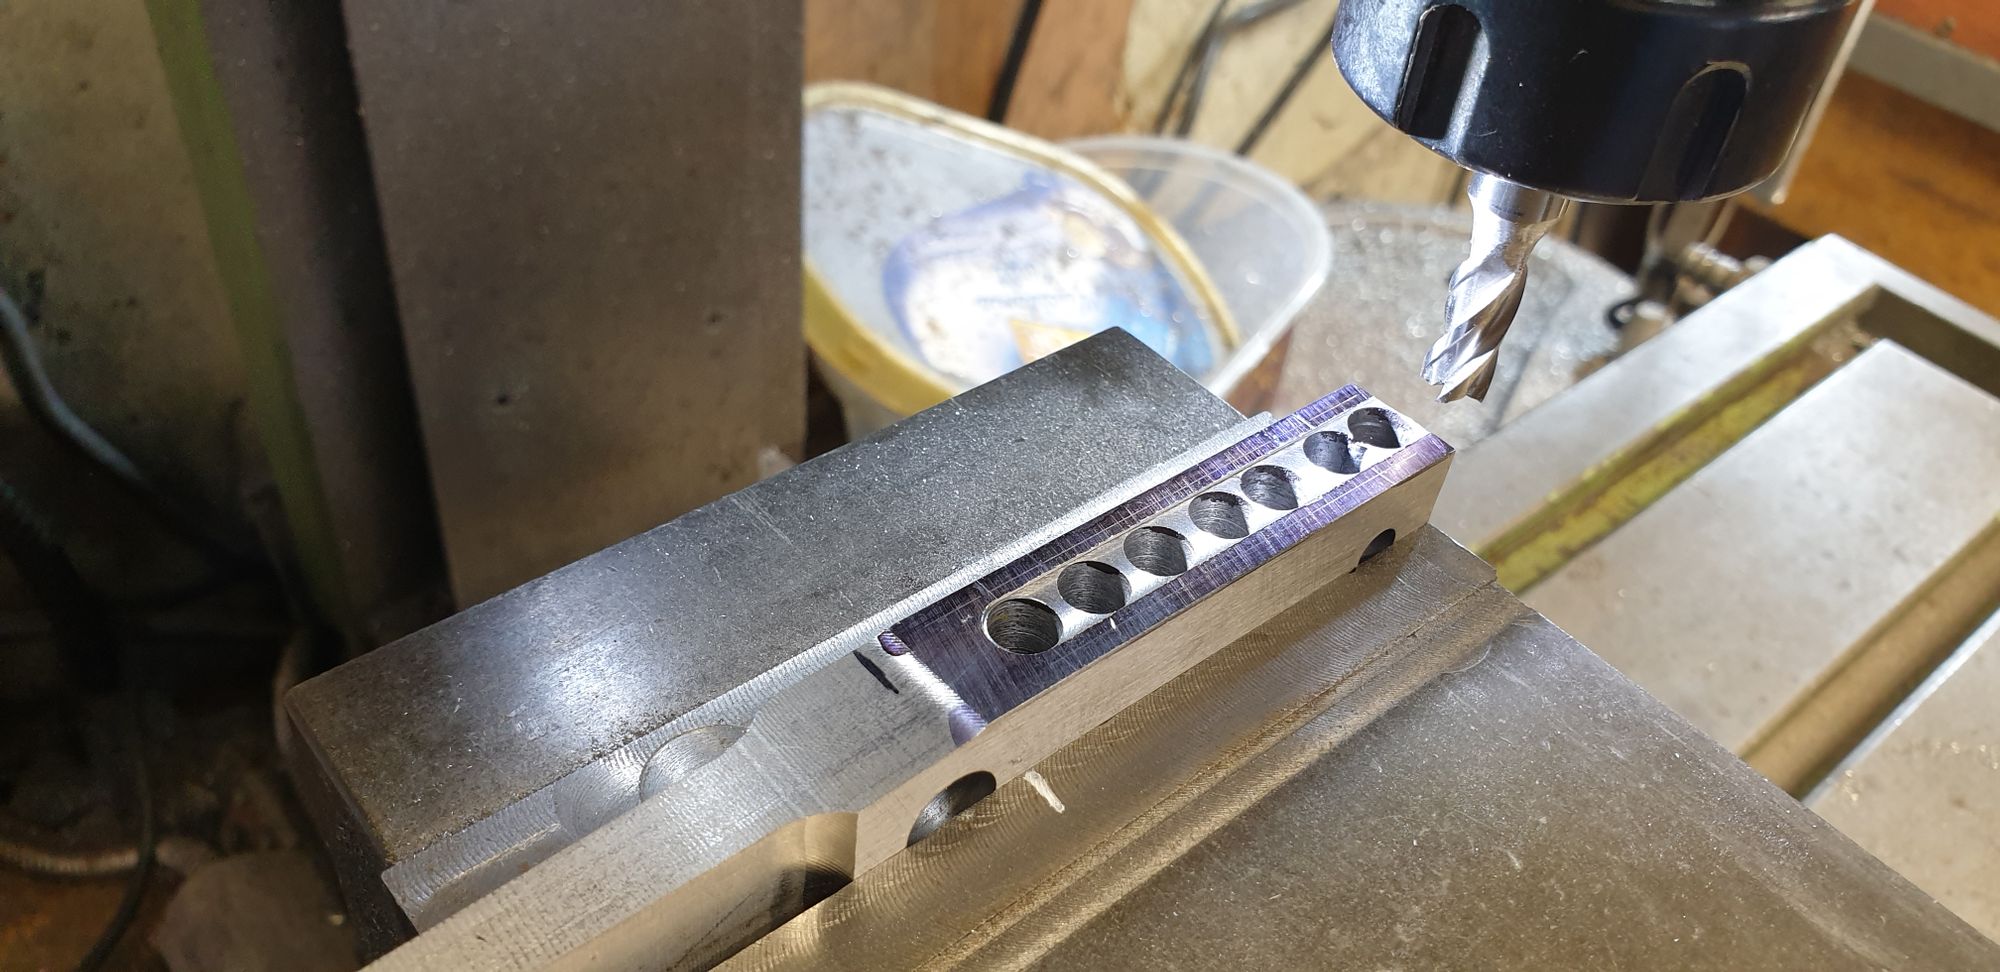
And the slot successfully machined, I began with making fine cuts with the 9/32 cutter but it was loosing it's edge before reaching half way, the cutter is new, I had ordered a cobalt cutter which after placing the order I was informed was now obsolete, seems some imperial cutters are getting harder to find? Anyway, the kind chap at the supplier phoned me to tell me of the problem and offered two HSS cutters in return. these were a little short for the job, however after a little grinding of the shank I had enough clearance. Going back to the machining, after reaching half way I changed tack, replaced the 9/32 with a 5 mm cutter and plunged down through the webs to get those out of the way, I then cleaned up the sides until I was just a few thou undersized. Re-chucked the 9/32 and cleaned up the slot, to play safe, I cut up a piece of wood and tapped it into the slot open end tightly. I then machined the access and for the last cut went much deeper through the wood, once the cutter had cleared the end I tapped another piece of timber into the opening to ensure it didn't try to close, again being gauge plate helped greatly.
The result so far

That's it for this entry, just to point out that I'm not saying that this is the best way of doing this, it's just what made most sense to me with little changes in setup and could be done with the tools to hand. In the next entry I'll hopefully finish the 2:1 lever and move on to the other gear associated with it.