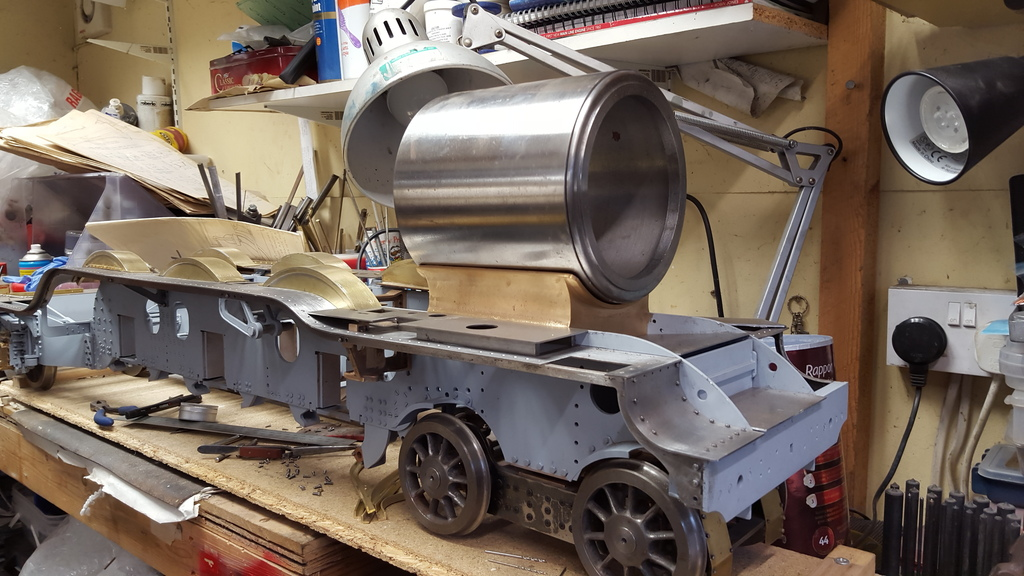
Ok so the 'Smokebox ring' , I'm lucky as my son had given me a few off cuts from his work, two of which were perfect for the smokebox ring so it would have been rude not to make use of one of these very heavy lumps of cast iron.
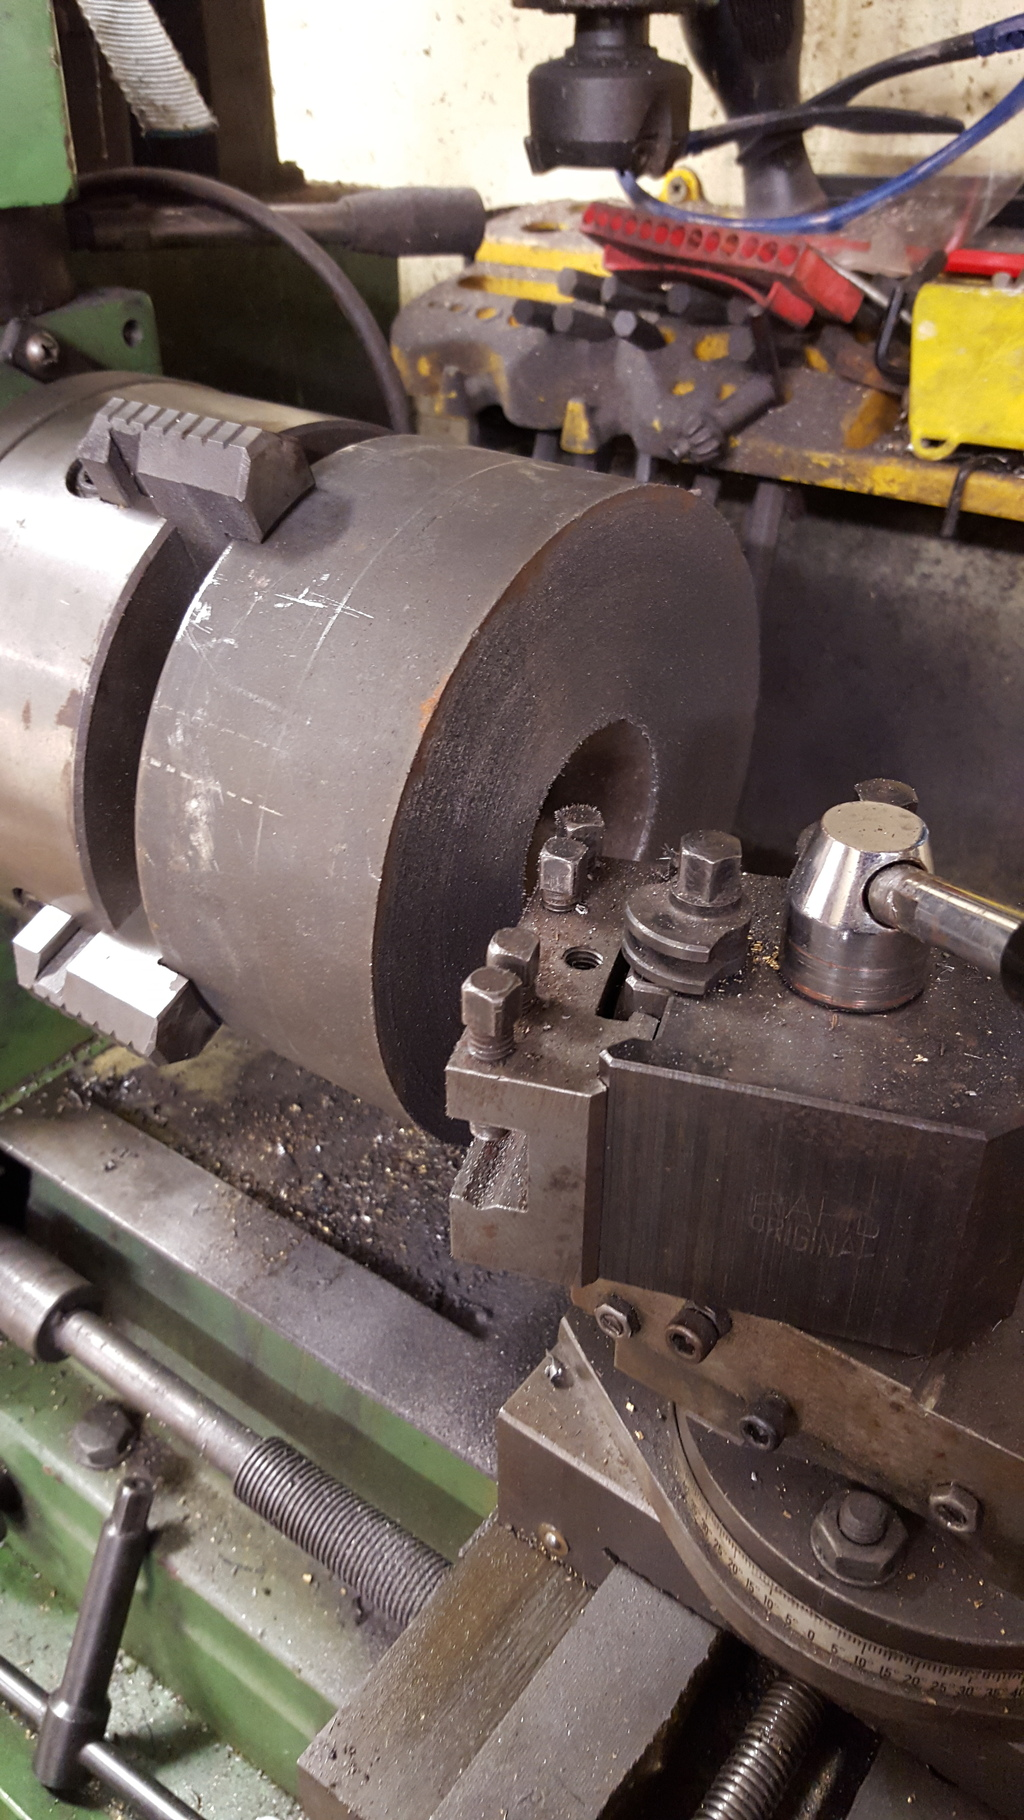
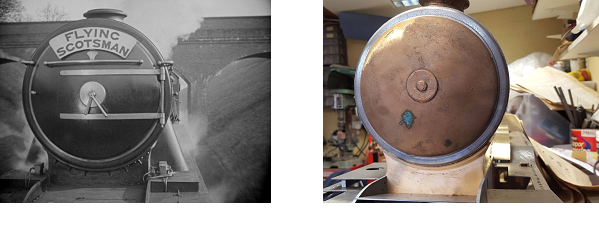
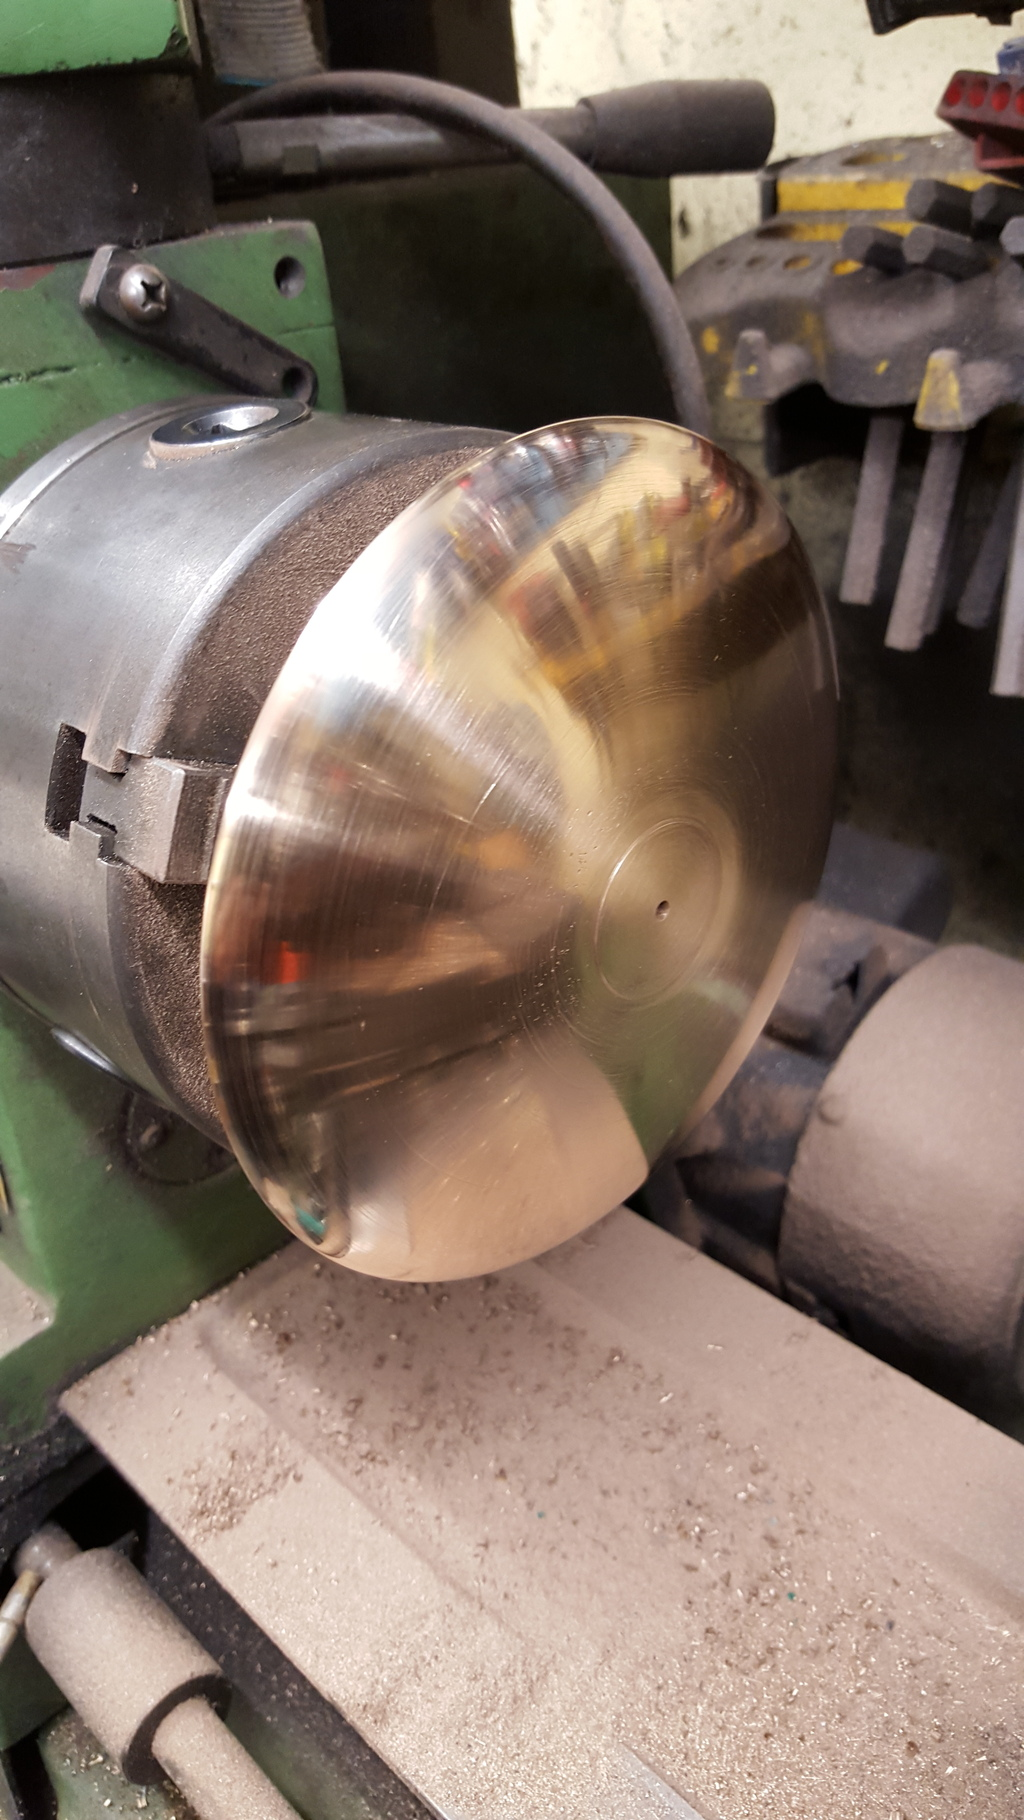
First picture shows the CI lump held in the 4 jaw having already been clocked for being concentric, this piece is only just large enough for the 6.250" required.In fact I machined the OD to a slighter larger size to match more closely what the photo's of 4472 show during the 20/30's, it's not a big difference but one that I thought worth making. A point to note is 4472's smokebox ring today looks different from her early career, today there's not much evidence of a radius to the outer ring where it meets the smokebox tube, looks fairly flat in today's photo's? Anyway Don had stipulated a 1/8th rad and that's what I have done, more on this later. The CI lump already had a centre recess in it for whatever reason when it was machined at my son's work, this recess was deep enough for me to machine the 5" bore from without needing to drill deeper, in hindsight perhaps I should have taken this deeper as it would have left me a piece nearly ready for machining for the inner ring at the rear of the smokebox to fit the boiler...oh well you live and learn...
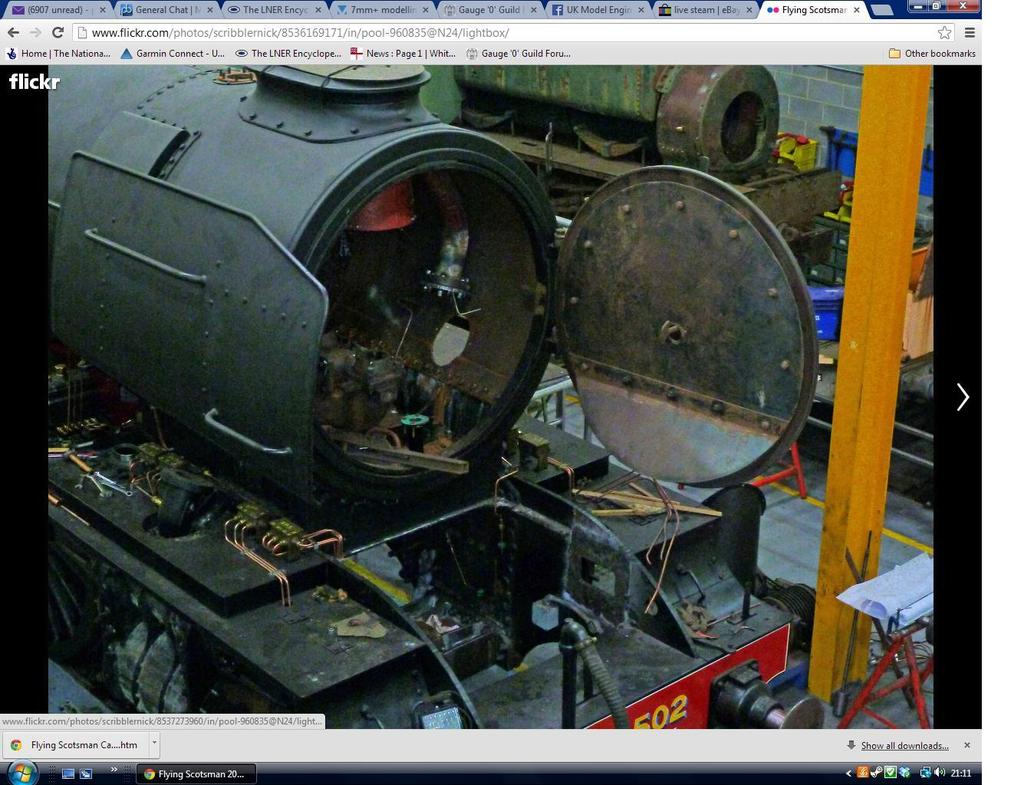
NB: I later discovered that FS had a new smoke made/fitted in the early 80's and it is significantly different to the original. The ring face is different and also there's a row of rivets along the joint to the boiler, no Gresley pacific had raised rivets around its smokebox, all being very smooth.
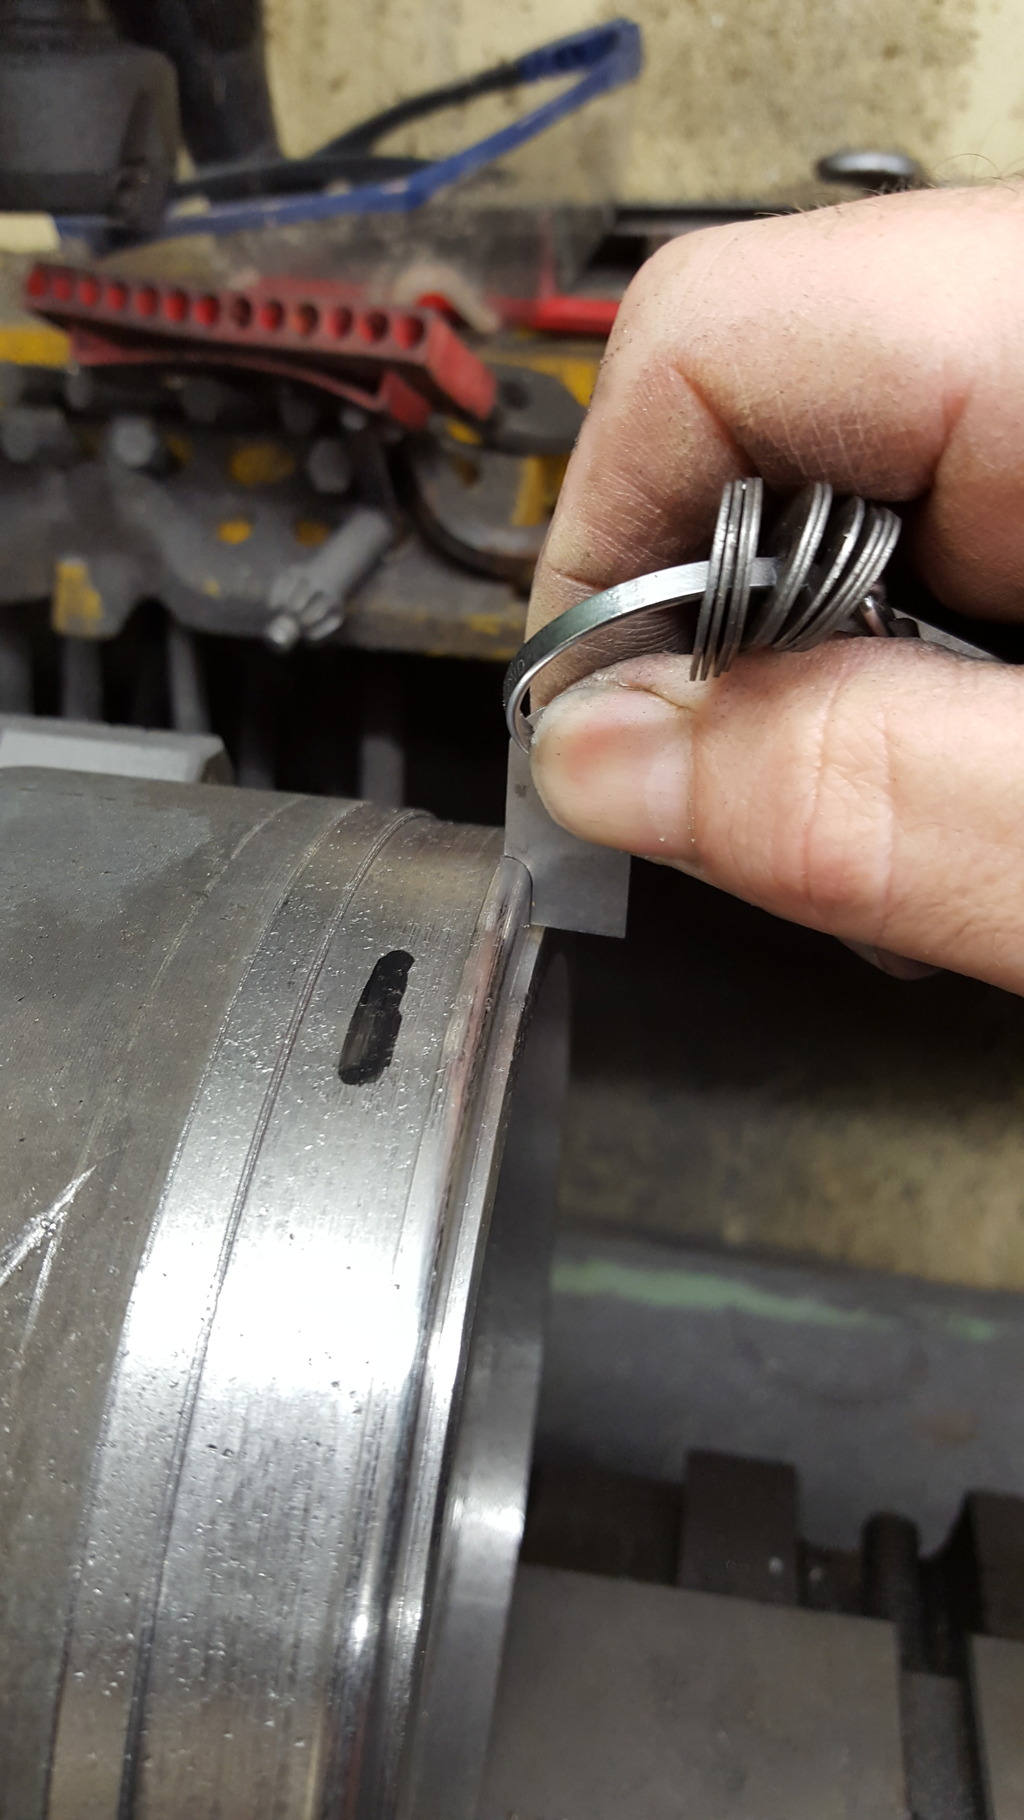
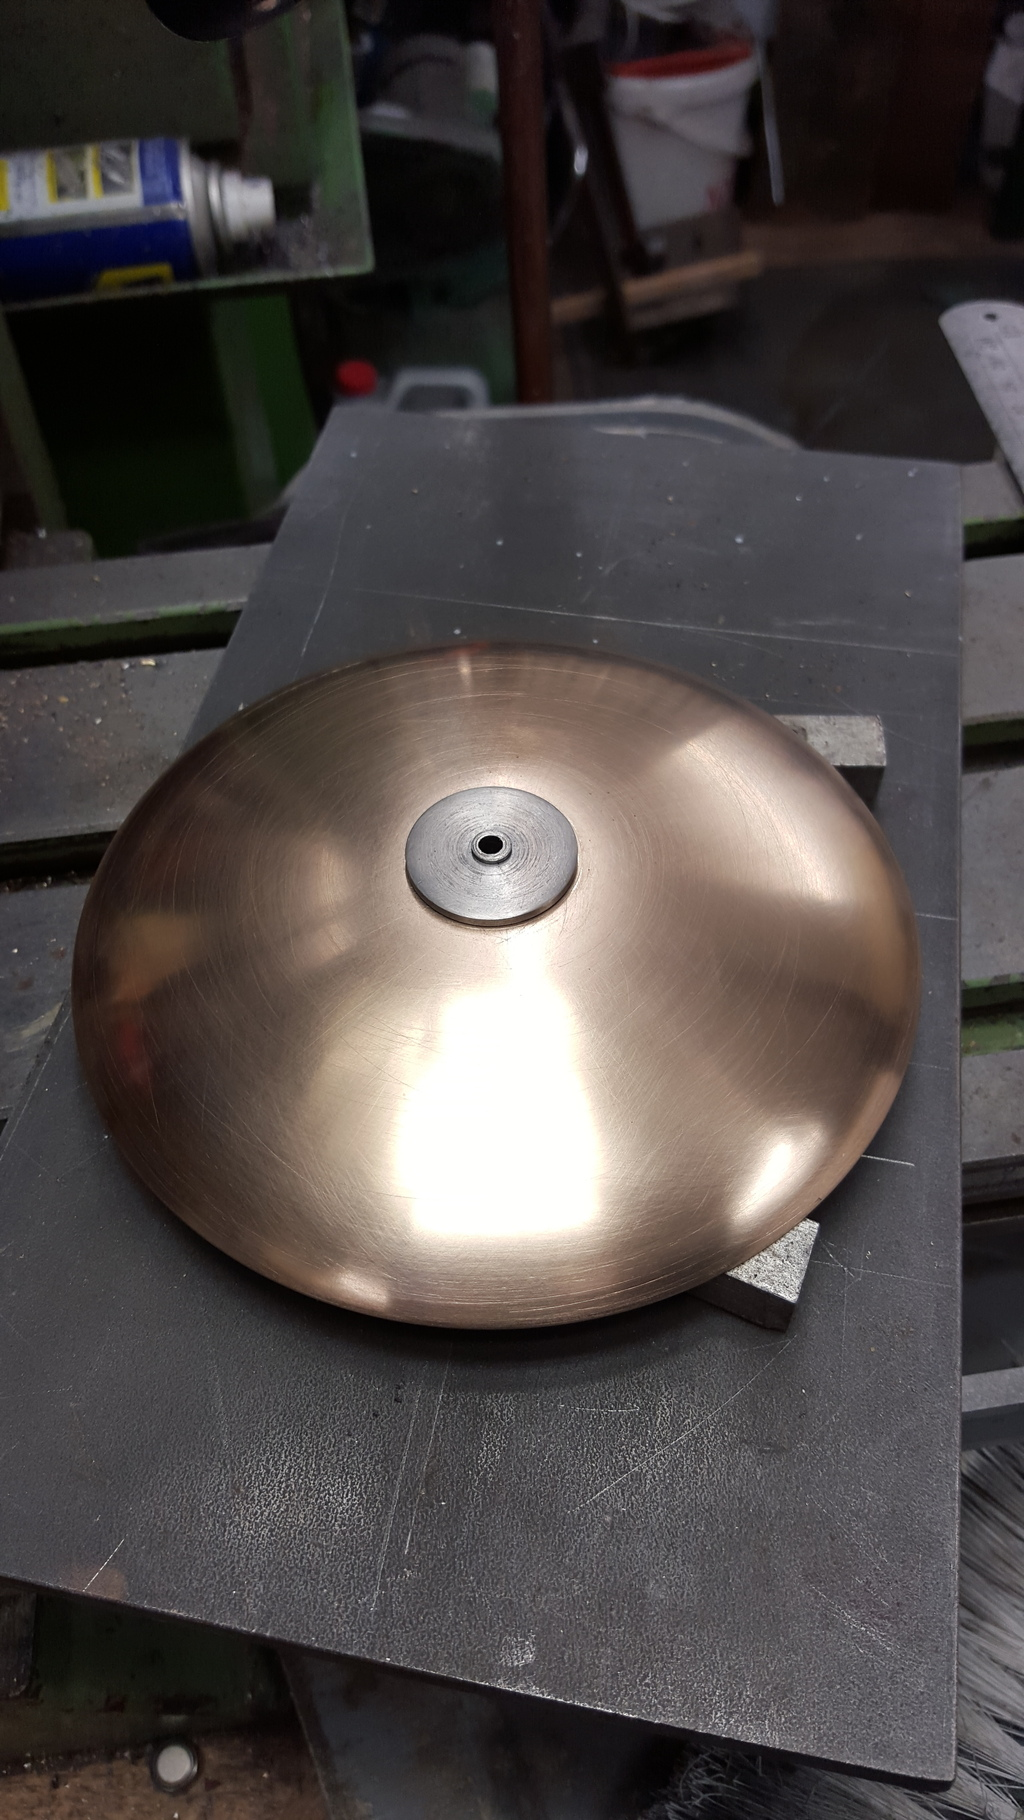
Next picture shows the bore near completion with about 40 thou left to go which I'll do once the outer face has been finished, the outer machining is also very close to final size, the CI lump was only just large enough, I tell you what it was a rather nervous time parting this thing as if it had come dislodged and fallen on my foot i think it would have broken a few toes at least...lol
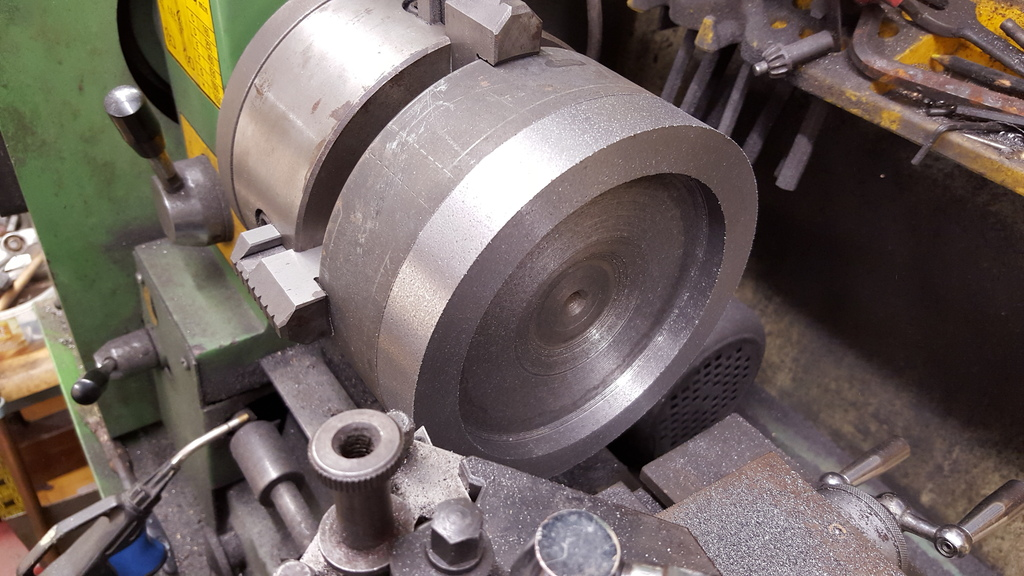
So here most of the machining for the 4 jaw has been completed and we are ready for parting, the black marker line is a guide for where I want to part off leaving the final machining to 3/8th width to be done while reversed in the 3 jaw. I will also finish machining the instep and test fit the smokebox tube while still held in the 3 jaw.
The 1/8th rad was filed by hand.....

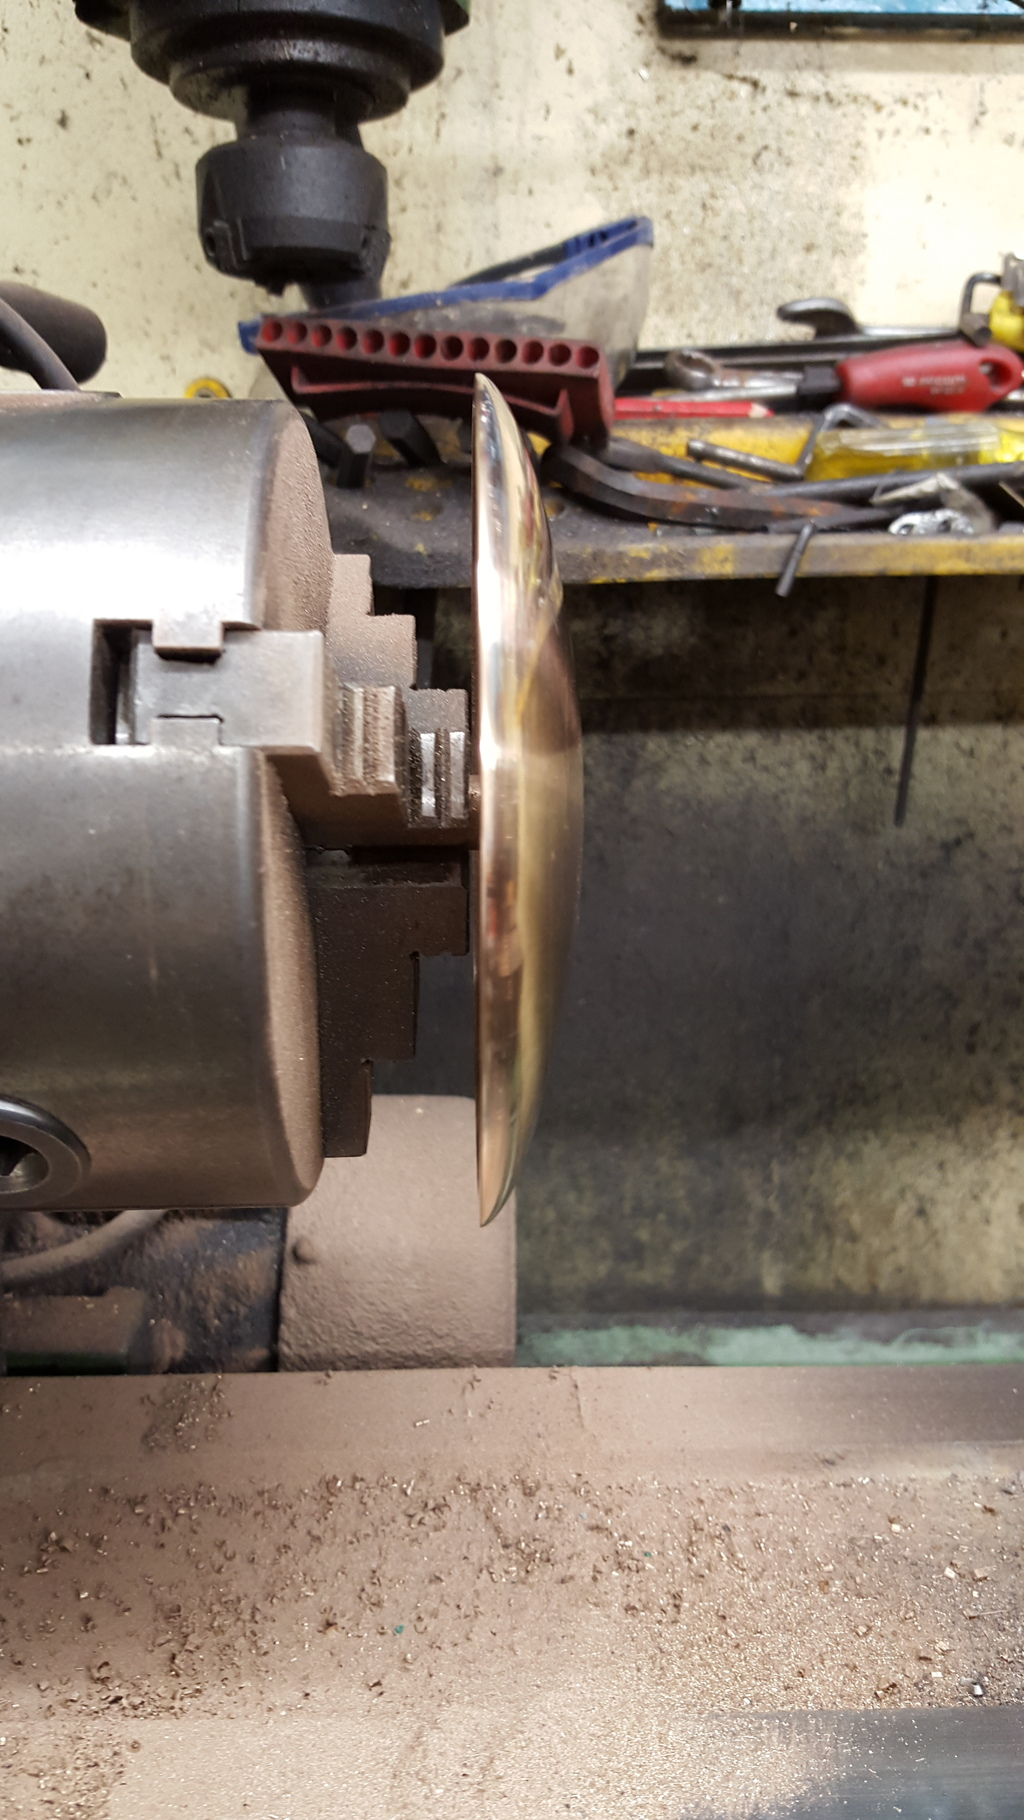
Parting off....once I was at the final cut stage I used a length of timber to catch the part as it parted, I also laid one of my sanding pads underneath just in case as I wanted to avoid any dinks...
Parting off
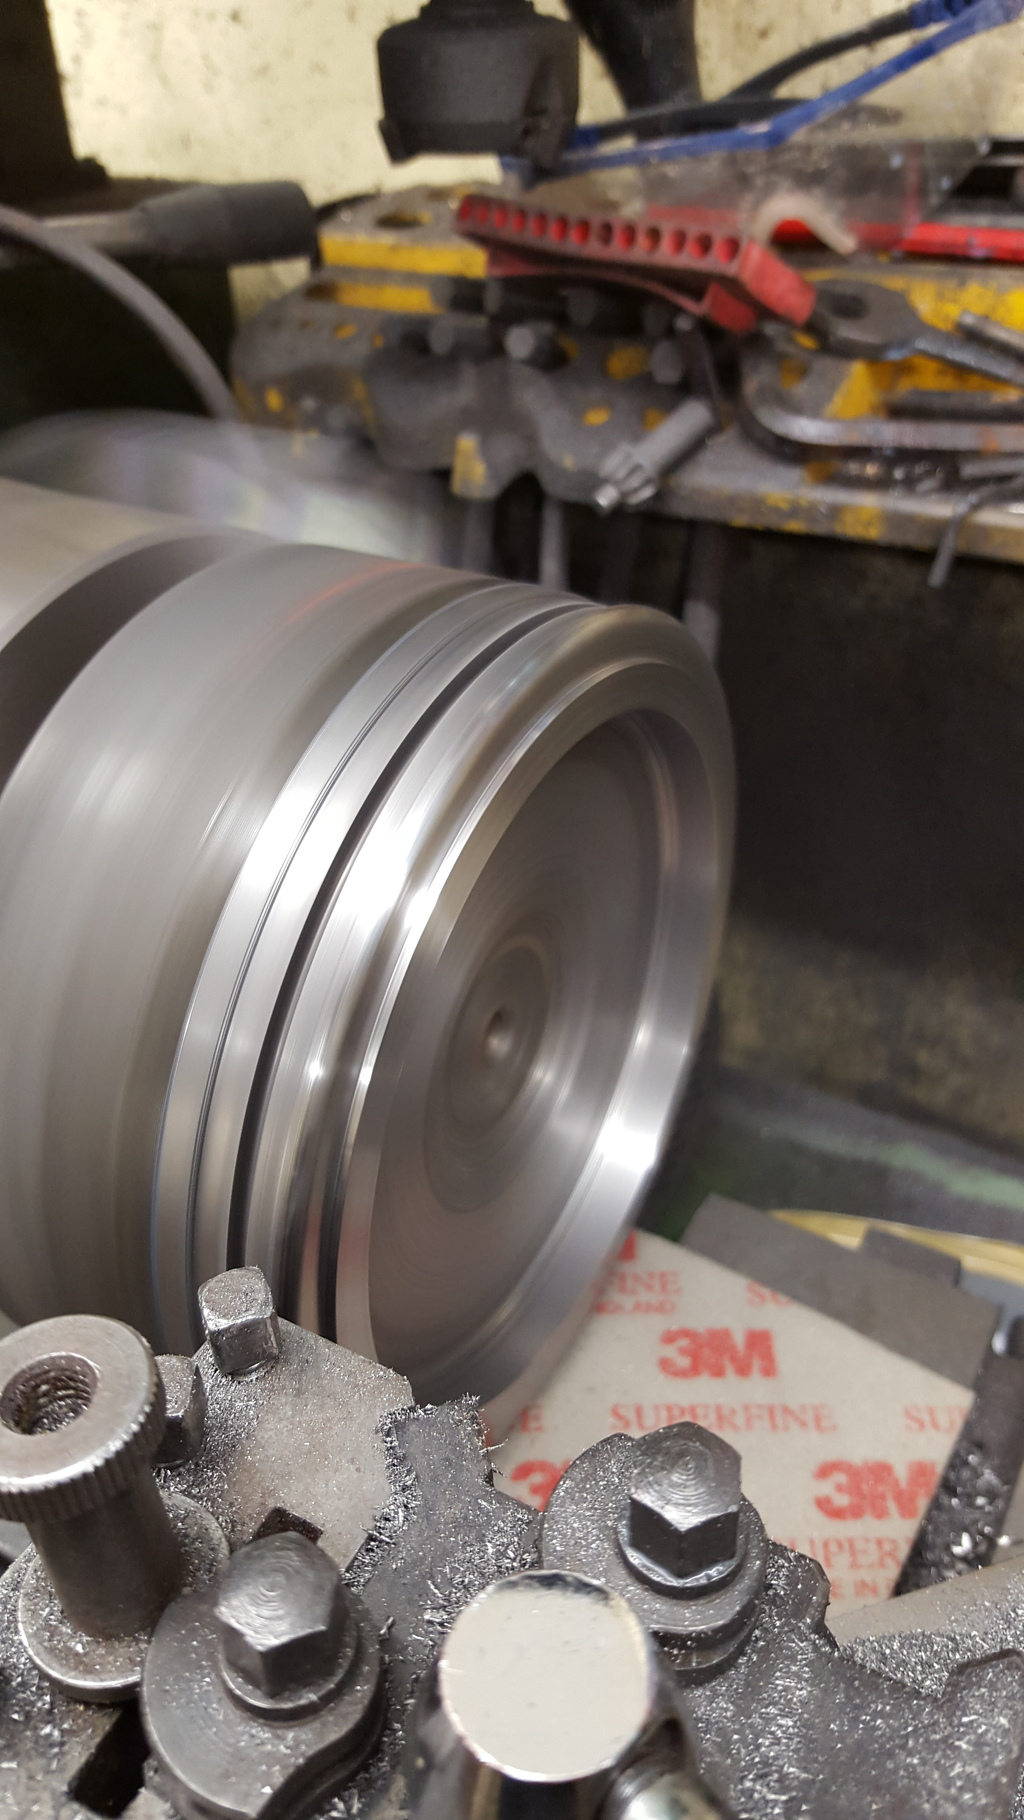
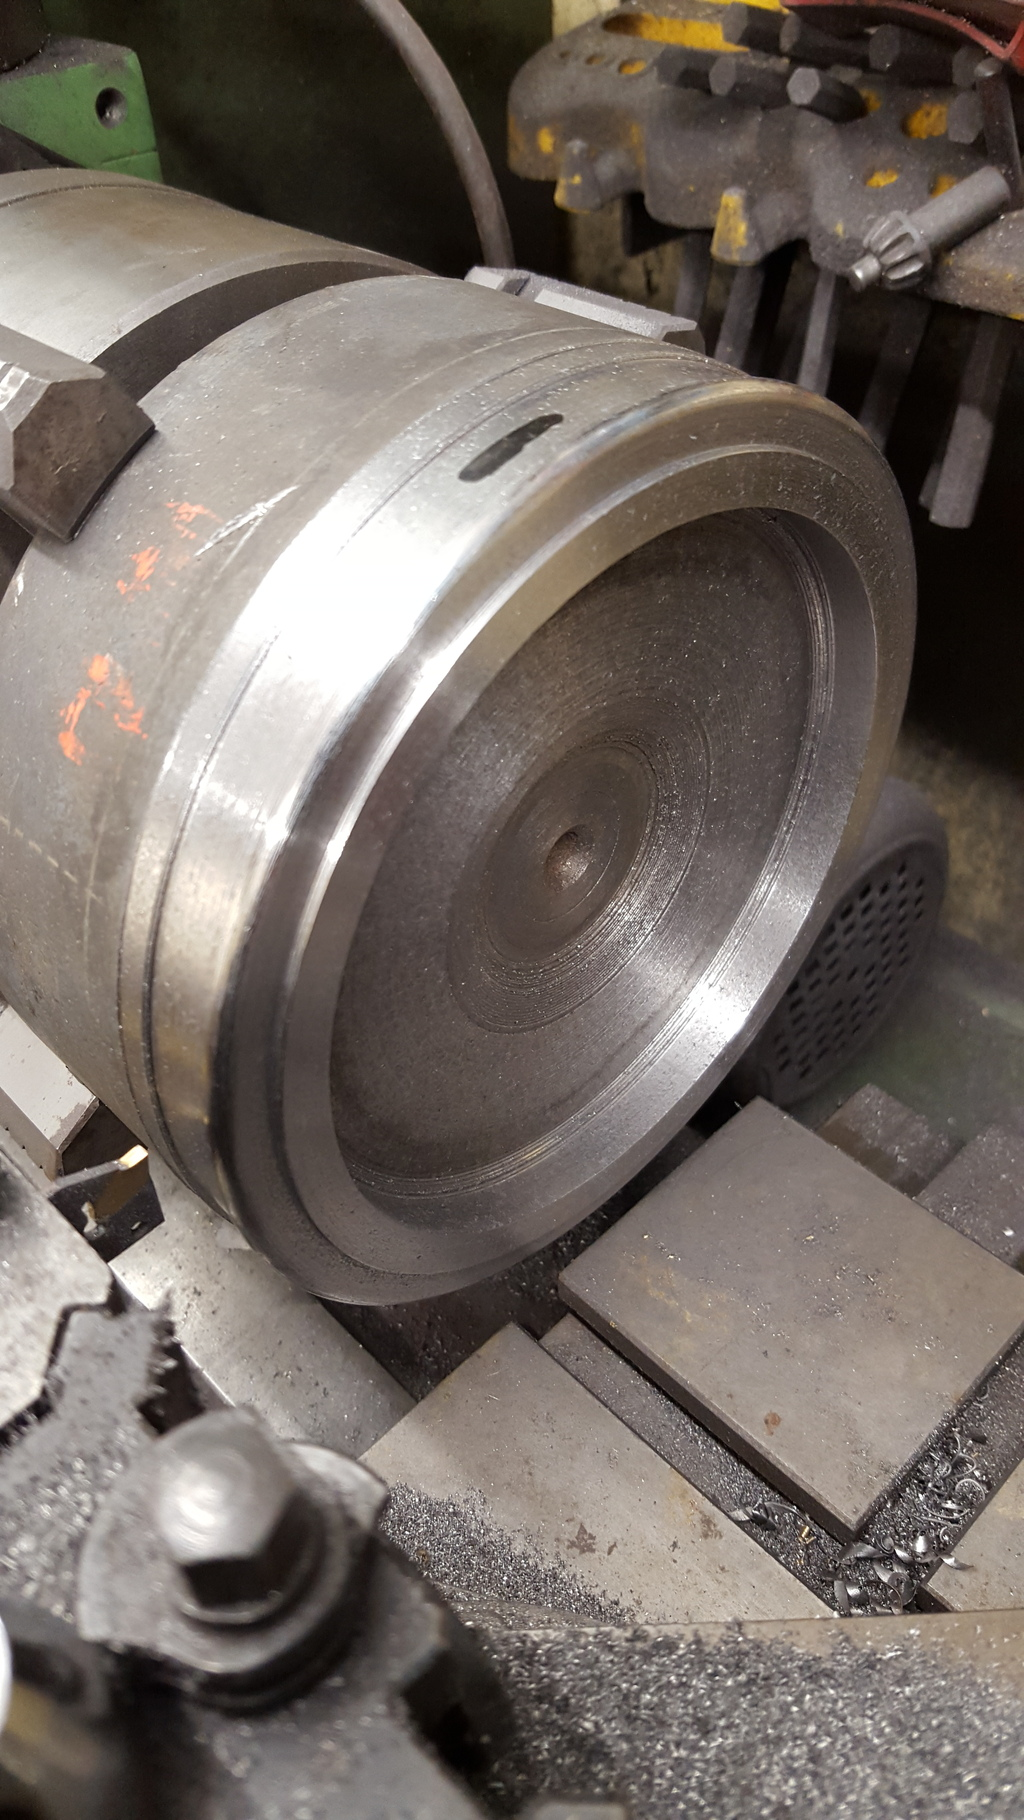
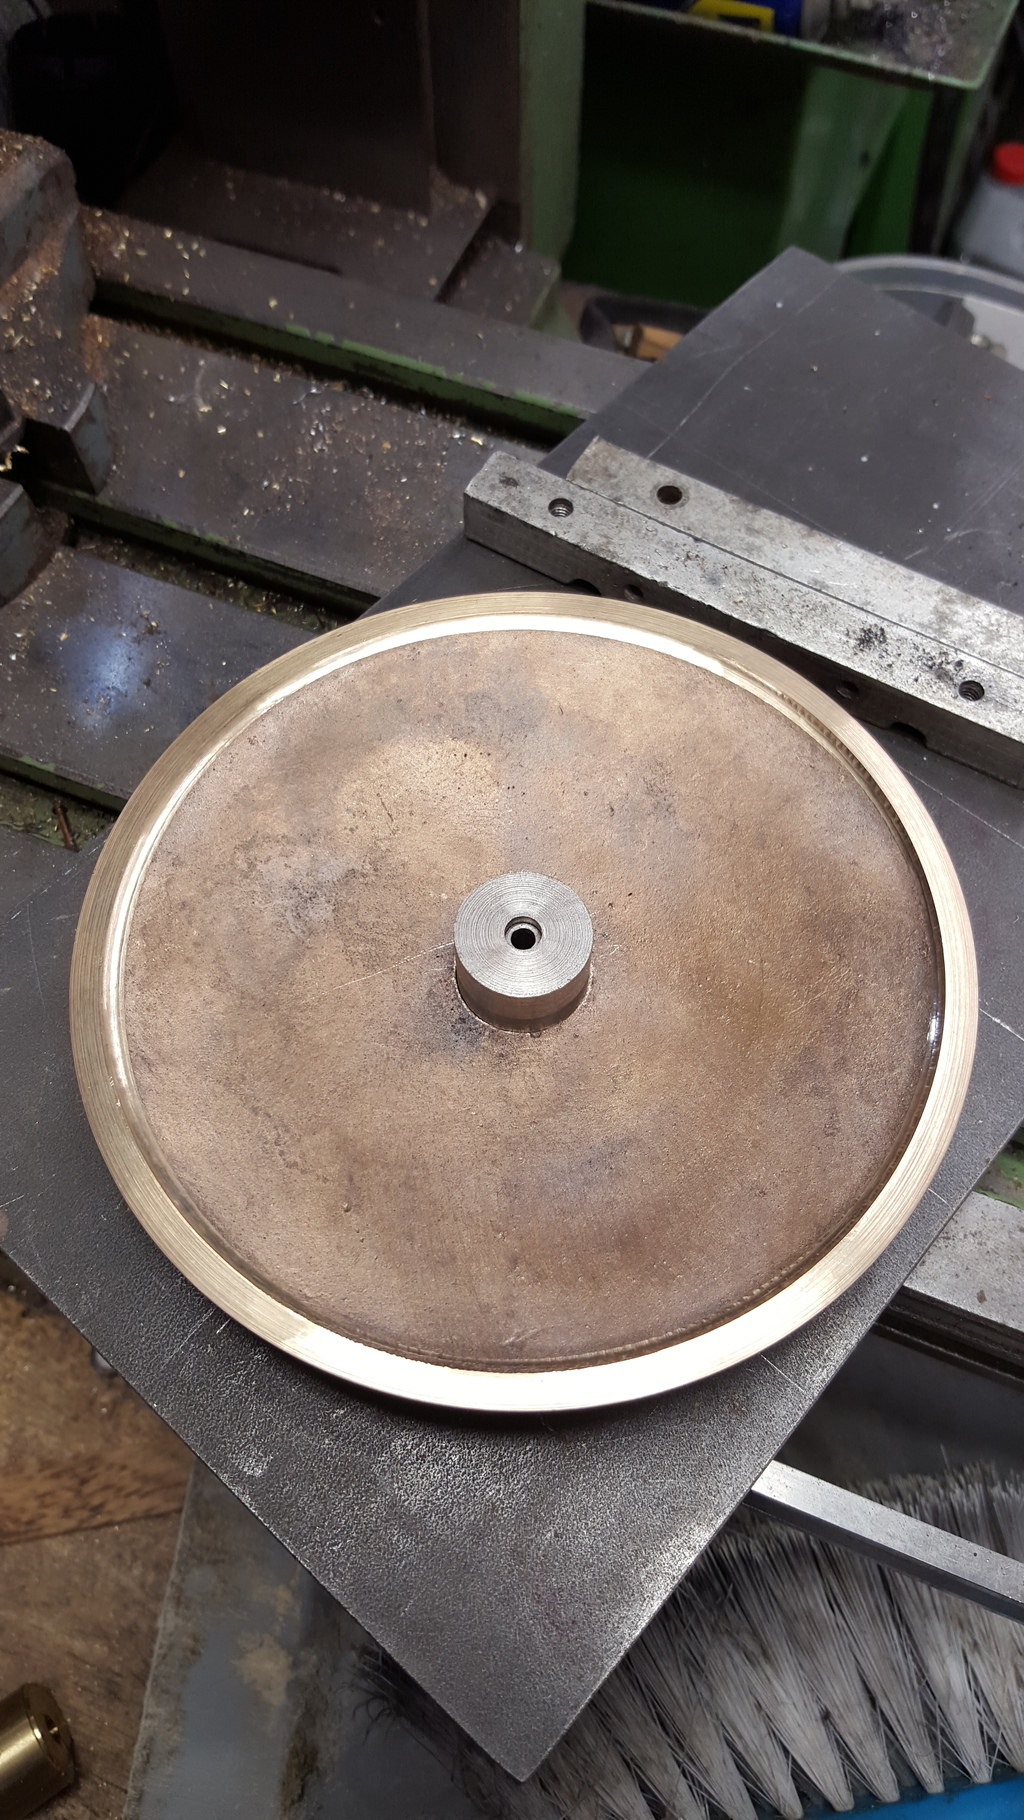
After a quick clean up of the copious amounts of iron filings left all over the lathe ( yes i did use the magnet in a bag trick) I refitted the 3 jaw, clocked the part and finished to size.. I know it looks a little precarious but great care was taken during this process.
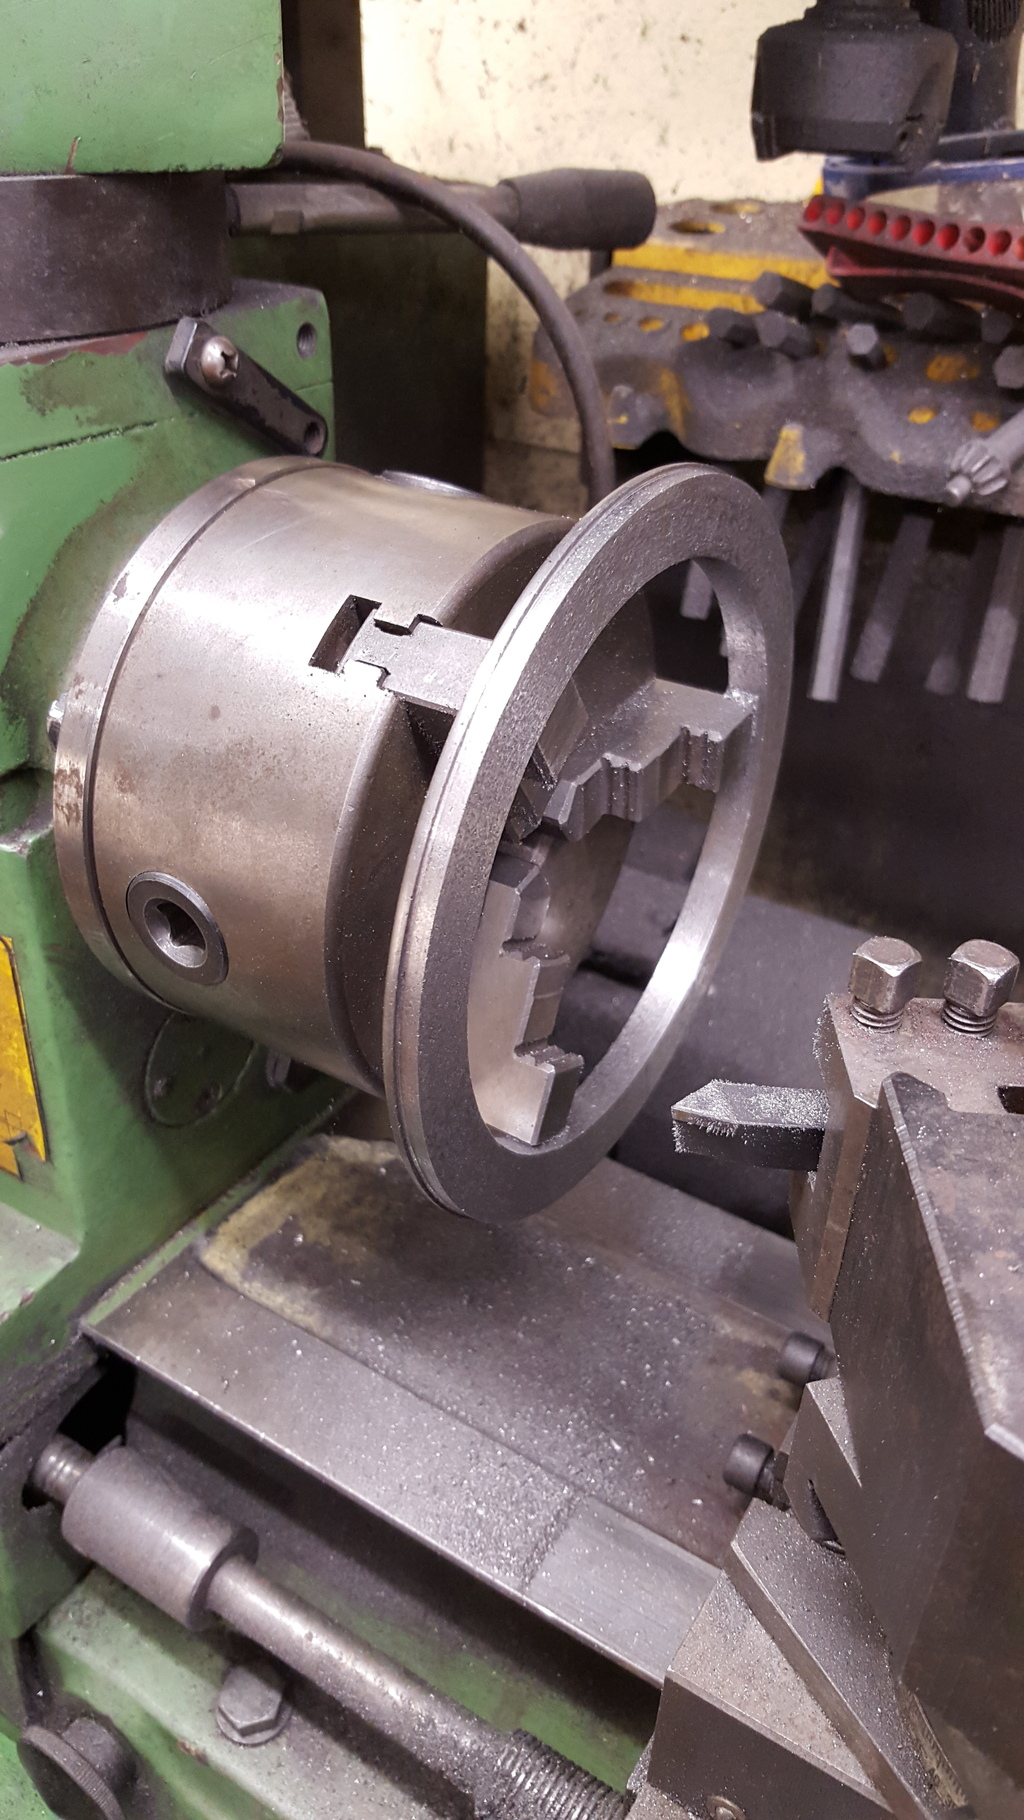
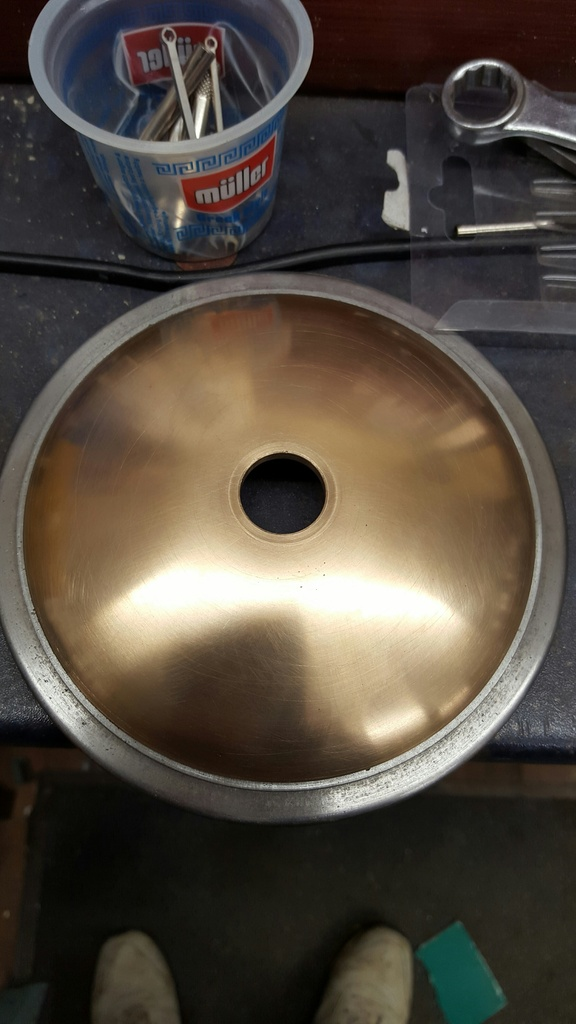
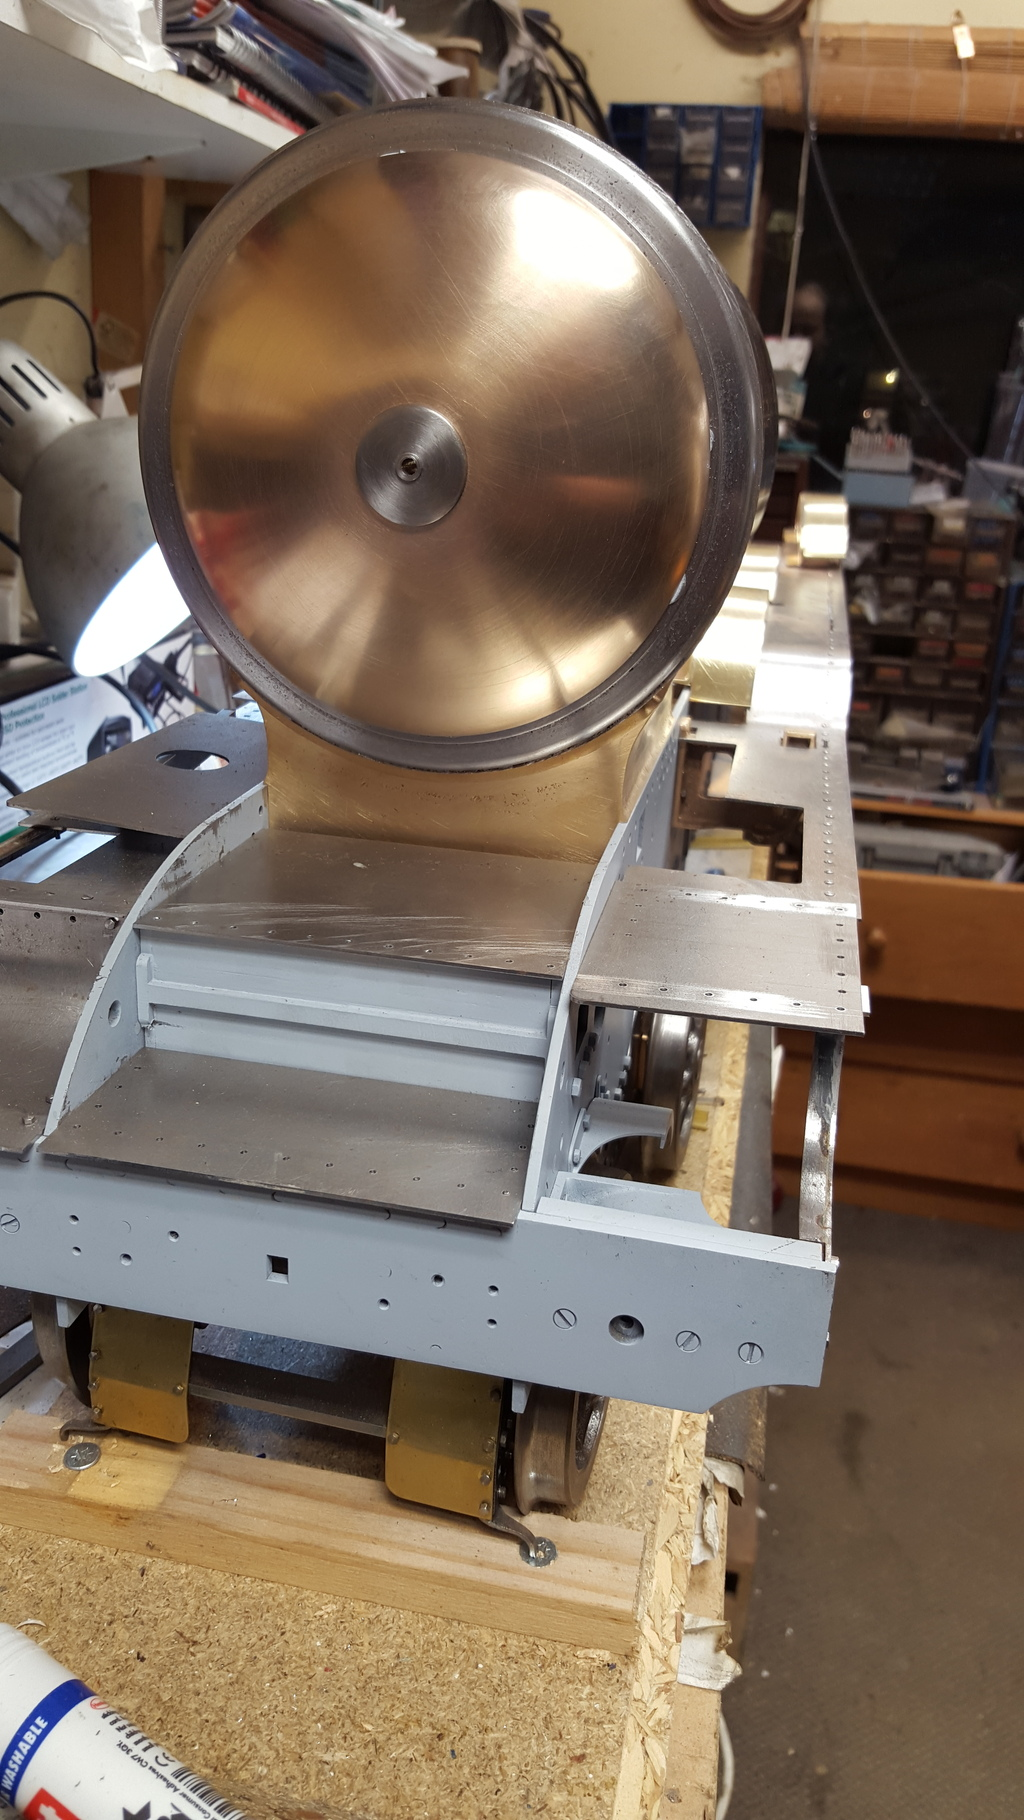
The finished part pushed into the smokebox tube to check fit...
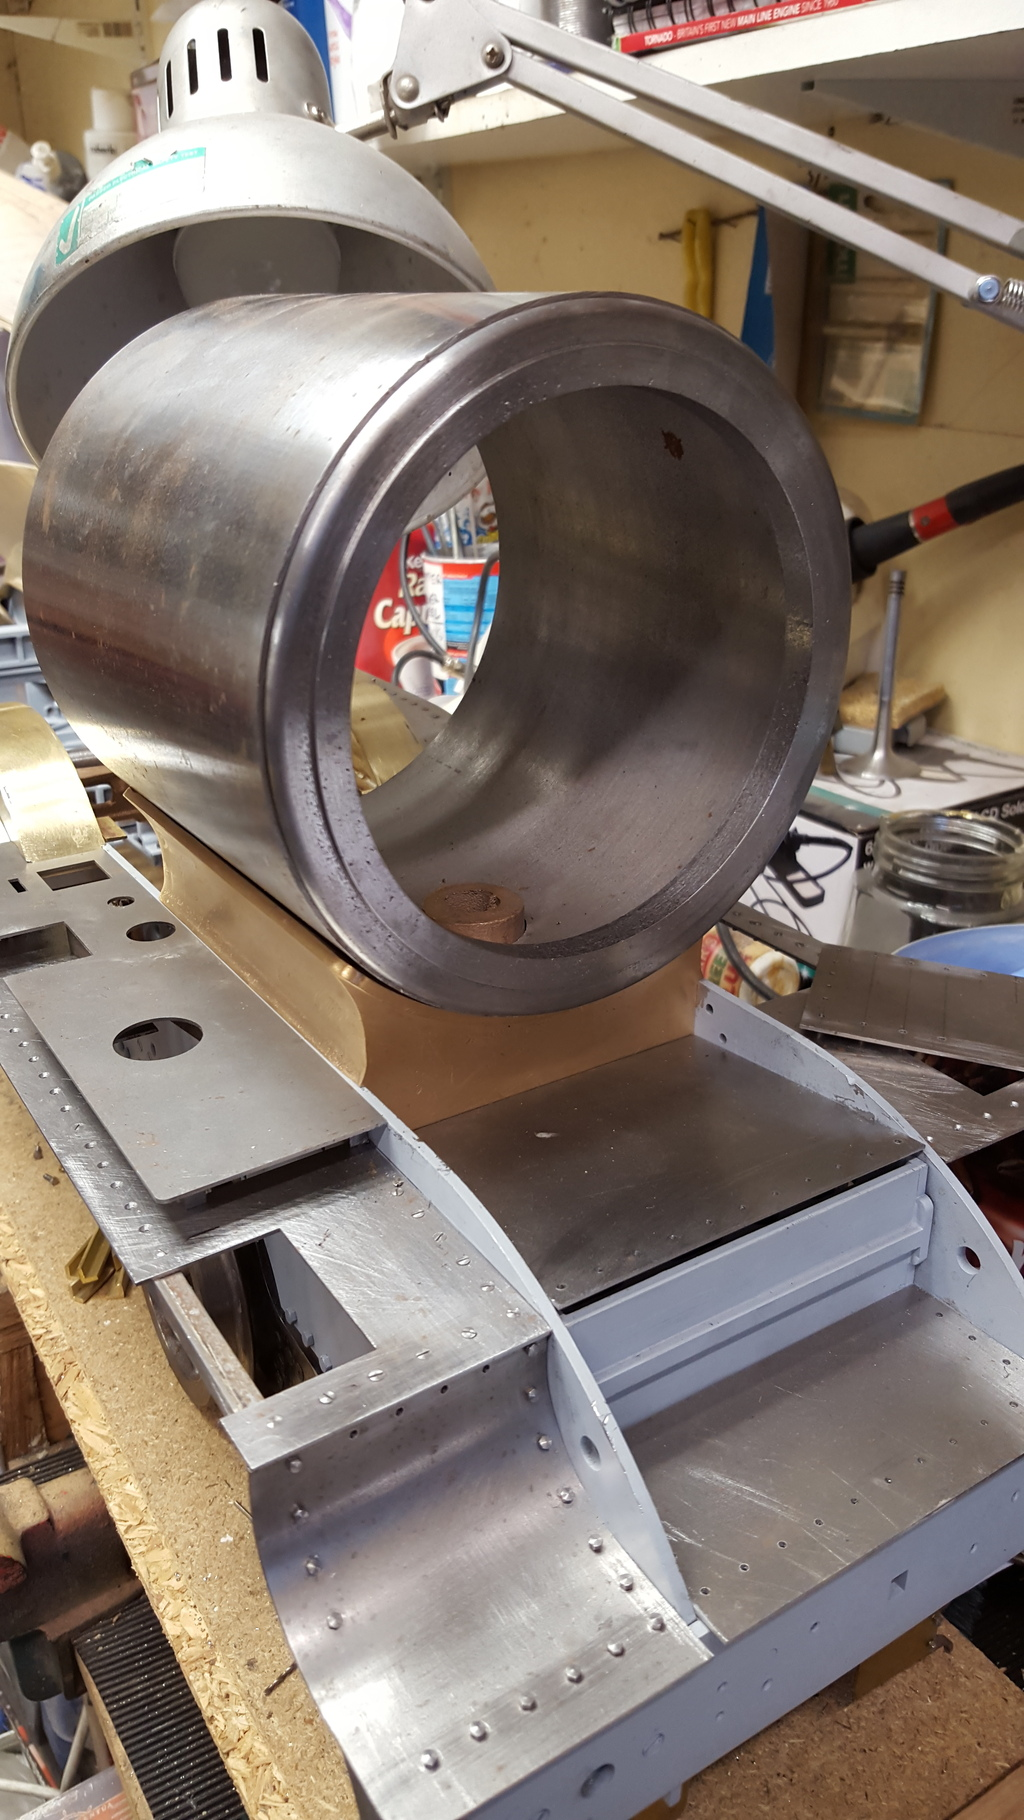
here we see it from a different angle, I tried to match one of the reference photo's but didn't have enough room in the workshop to get into the correct position... still it's close enough..
NB: I look back on some of these photos and think, wow, the workshop has changed so much, used to be a mix match of parts for the benches, not anymore..:)
Lastly the actual reference photo......this photo is also what I have as my desktop background on the PC... well it keeps my build in check as if I get something wrong hopefully I'll notice it when loading the computer...well that's my excuse.....I guess if the truth be known I'm just a 4472 anorak really.....
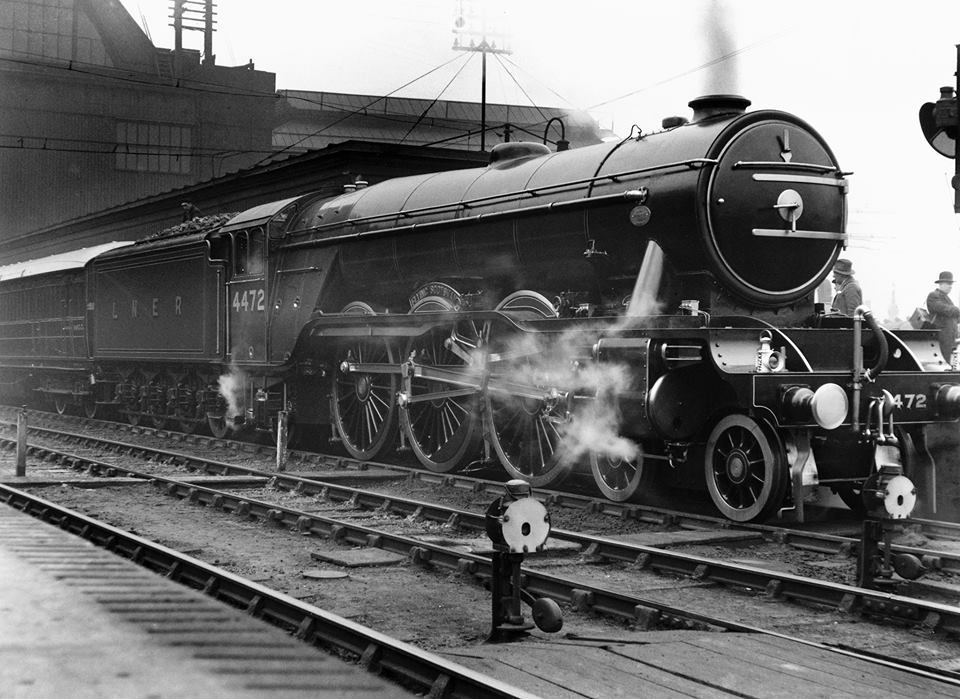
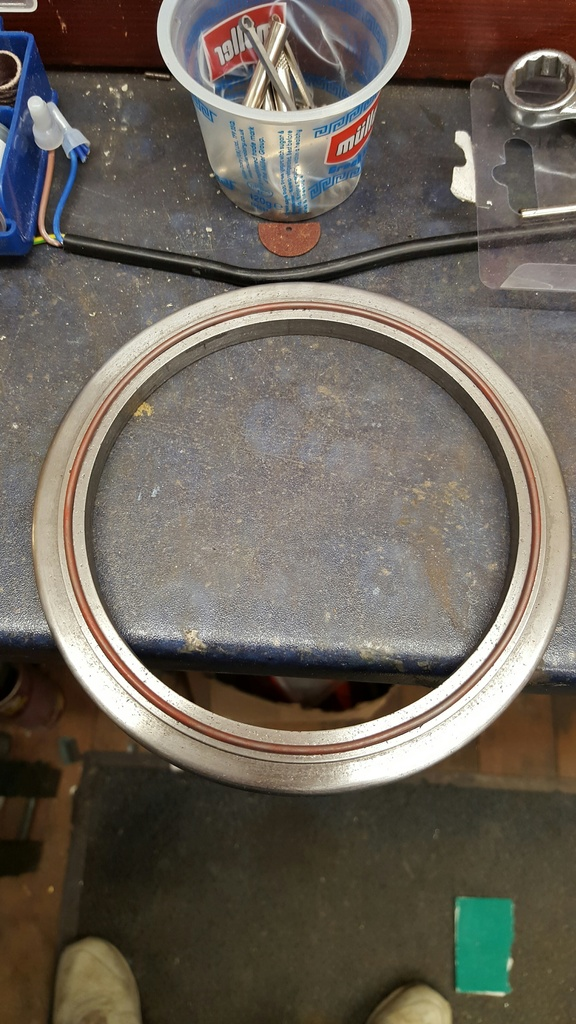
I then gave some thought to the sealing of the door to the ring, as can be seen in this photo of FS at York there is a groove cut around the ring for packing to seal the door. I decided that i would do the same, two reasons why, one it would give me the best seal and second the packing is visible around the door on full size, so in my wish to make as close a representation of the full size as possible, I had to follow suit.
NB: Note that this smokebox as fitted from the early 80's looks different to the original, much less rounded on the edges and of course those horrid rivets.
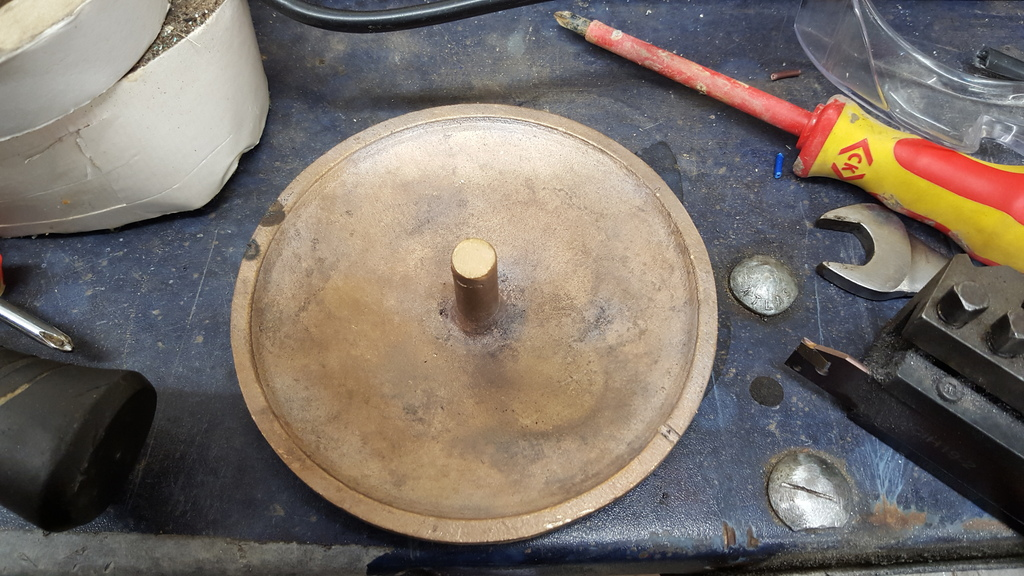
The back of the door casting is concave, very similar to the prototype with only around 3/16th lip of which around half will be lost when the door is turned to size, so I need to get the groove in its correct position to work.
Regarding comparisons between the original prototype and Don's drawing I thought that I'd have a little play...I took another photo as close to the 1929 image as I could fitting into the corner of the workshop...for a better perspective I placed the chimney and door castings....the chimney is clearly not sitting on top of the smokebox properly but it helps with scale...the door will be smaller once machined. I haven't checked what the drawing states for the centre disc where the dart goes through but will remove the cast part and open it out to take a stainless part as per prototype, well the prototype is burnished steel but the look is the same.
Smokebox door
I've made a start on the door and machined off the casting's centre disc/boss so that I can replace it with the correct material as in stainless steel, I ordered some 303 in various diameters for the disc, boss, hinge pin and handles, I couldn't find any 303 in flat bar so have gone with 304....not a nice material for machining I know but there isn't much to do so I will give it a try, it's basically for the hinge straps and blocks so ultra sharp tools, slow speed, not too light a cut and lots of coolant will be my approach, if it proves to be too tough I can always try 316 or perhaps machine down some 303 round bar, any difference in colour being the deciding factor as to what to use.
Anyway I spent a couple of hours on the lathe machining hand-filing/sanding/shaping the door as it's important to try and get this part right, I have left the centre except for a pilot hole until I have the stainless to hand. I may incorporate a 5/16" spigot on the reverse of the disc to fit a corresponding hole in the door, I can't go any larger as I need the casting spigot that's on the rear to hold the door with. Alternatively I could hold the door by it's outer edge?.... I will need to hold the door with the disc in situ as according to the drawing the front face of the disc follows the curvature of the door being proud by around 1/16", this will probably be best done while fitted to the door itself after all other dimensions have been machined. I doubt that I can hand shape the 303 so may need to do a similar setup as with the tender buffers.
First picture shows the door from the front, it needs a little more work to remove some small scratches but not much...i have deliberately left the centre where the disc was as a visual reference for later, I'll finish it off before fitting the disc.
A side profile...the door is currently a couple of thou oversize which i'll remove in the final stages, the radius on the edge will be 3/32, it's very close to that now, the rear is machined flat with a small curved recess ready for a planned 'O' ring seal that will be fitted as per prototype ( prototype using packing) I'll machine a groove into the smokebox ring face to accept the seal once i have obtained the various seals on order, the OD of which will be 135 mm, thickness to be tried probably 2.5 mm, door is just over 137 mm.
NB: I later changed the profile of the door as the dish wasn't flat enough when compared to full size photos
since the stainless steel bar turned up today I got on with the smokebox door, not received the flat bar yet so today was all about turning.
First picture shows the various parts associated with the door so far, note that I have done the centre boss in two parts..
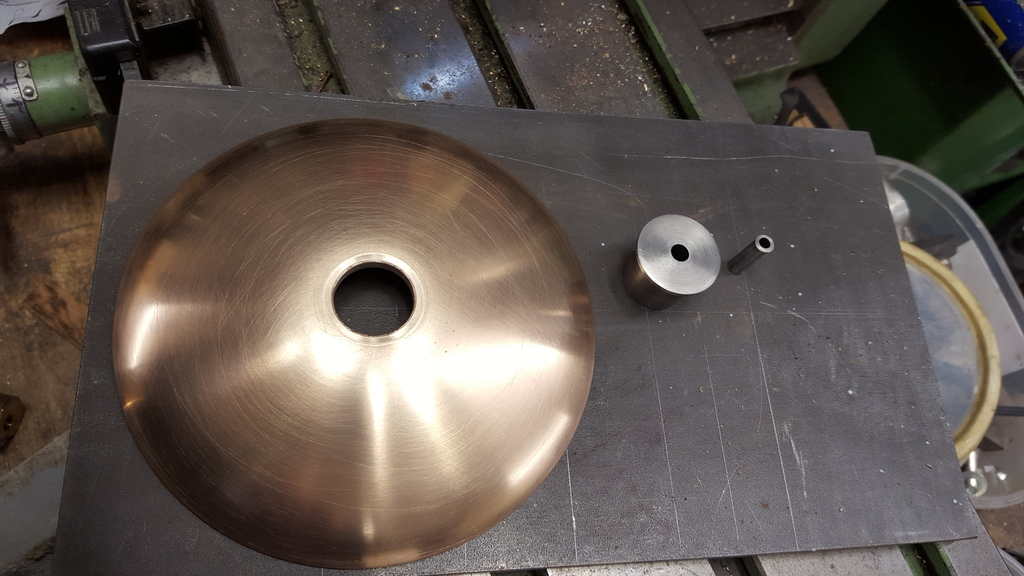
and here we have the parts assembled
The reverse....The centre boss is over length for now, I will machine up the baffle plate first and dry fit to match the prototype before machining the boss to length, I also need to plot, drill and tap 6 BA holes for bolts to hold the centre of the baffle plate to the boss( an extra to match full-size ) there will be other fasteners around the outside to do too.
Thanks to the wonders of 'blue tack' here we have the door sitting in place, well as close as I could get the blue tack to hold it being pretty heavy. I have also removed approx 1/32 from the back of the ring radius to match the prototype.
continuing with the door, today I received the silicone 'O' ring that had been ordered to hopefully seal the door in a more prototypical manner. I profiled a piece of tool steel to machine a suitable groove around the door ring face with a slightly smaller OD than the door itself, I have left the final depth of this groove until I have fabricated the dart etc to see how much the ring will compress as I would like to have the door up tight against the ring face with the seal doing it's job behind...hope that makes sense....
First picture to show the seal in it's groove, I have since made the groove deeper than shown here, this I did a few times testing how much I could compress the seal in it's groove, I stopped when I could nearly force the seal flat in one spot although of course doing the same around the whole seal pressing the door down was impossible.
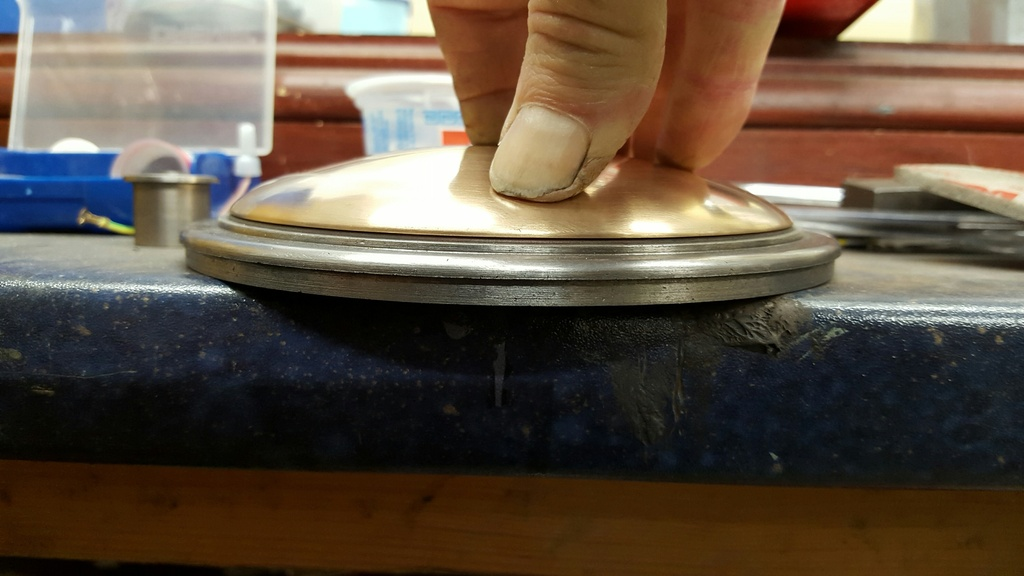
Now in hindsight I should probably have tried to source a very slightly smaller OD seal as it's a bit too close to the door OD when compressed for comfort, something I foolishly hadn't considered, Anyway here I'm pressing the door down as hard as I can by hand, as is clear the door needs to go down around 1mm further, I'll see how far down the door sits when the dart is made, I expect the dart to reduce the height by at least half but best to leave for now, especially as there's paint thickness to consider too.. looking ahead I may use some form of bonding to secure the seal in place, I'll look into the best way to do this later.
NB: i did change the 'O' ring but more for colour than anything else, changing to a black ring which didn't then stand out against the black. The door seal works perfectly.
One more picture just to show the door sitting in place on the seal..