
I wondered if the building of a new workshop for 4472 might be of interest to other Model Engineers? and since I can't progress any further with the model itself, until, that is, I have somewhere to actually build it, I thought that a description of the build might be of interest to others in a similar position. I will cover the materials used and also my approach to each part plus give the general layout. I'll also be using a lot of recycled materials in an effort to keep the costs down which in this current 'cost of living' crisis may be of some use to others.
When building the loco I used a lot of photos, I'll also share photos here as I feel seeing what's actually happening helps greatly when trying to describe something, and saves on the text.
A little background may be prudent, as pointed out I've had a few health issues, that and the fact that my wife and I had been telling ourselves for some years to sell up and do what we always wanted, to live in a village away from all the stress of the inner city. Now that all of the kids have moved on with their own families there was nothing left to hold us back and so we have now moved to a lovely village in Bedfordshire, my only regret is that we didn't do this decades ago.
Ok, so what canvas did I have for my new place of work? first of all, I now have easy access to the workshop, the old place had no rear or side access, a bit problematic when trying to get a heavy live steam loco through the house, especially as the years roll on with my aging body. With this in mind, I looked for a suitable property to fit my needs, my wife was amazing because she understood how important the workshop was to me and thus properties without the requisites required were quickly dismissed, no matter how nice they may have been.
Enough of that, let's get on to the area where the workshop is to be built.

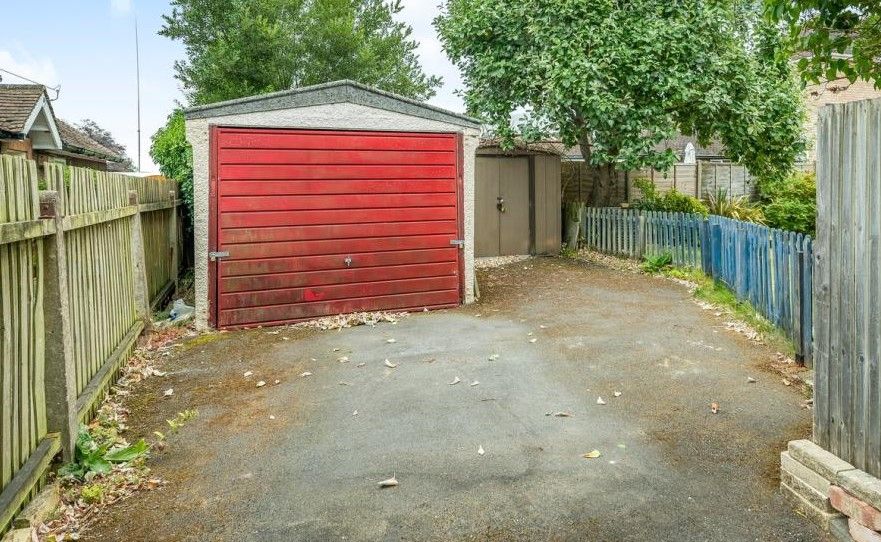
This picture is what the estate agent took, therefore before I have touched anything. We see a concrete garage, this is positioned at the bottom of the rear garden, a good-sized tarmac hard standing accessed through a double gate. Plus a metal shed and the picket fence to split the hard standing from the garden lawn, the metal shed will be disposed of but for now will be used to house non-perishable goods, the biggest headache for this exercise is trying to protect the workshop tools while building the new unit. I decided early on that I would keep the garage in its original position and extend it to the left side as seen here, basically where the metal shed sits. The asbestos roof had to go and the roof pitch would also be raised a little.
My very first workshop was of the same construction before later building another next to it in timber, what I had learned from those two units would be put to good practice here. Most important for the garage is to make it warm with good insulation and damp free, for this reason, the perfectly good asbestos roof had to go, more on that later.
The easiest and cheapest way to extend the concrete panels is to get more panels to add to them, these can be found surprisingly cheaply as I will show.
First I needed the panels, I searched a number of sites with prices ranging from £10 to £130 (new) per panel, you will also come across free panels as many are given away so keep an eye out if doing as I. I got lucky and spotted a complete garage on that well-known auction site with no reserve and better still the asbestos roof had already been disposed of properly, the only issue was the unit needed to be dismantled and taken away. After checking with family if they could help and arrange transport I put a cheeky bid in and waited for the auction to end, I did try to get the seller to tell me how much he wanted to make an offer but he wanted to let the auction run, fair enough, I often do the same.
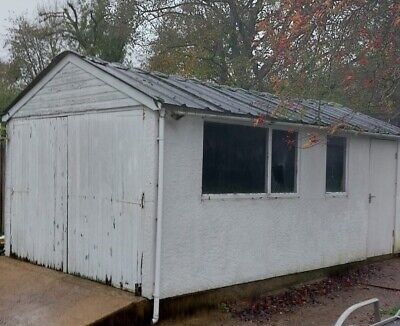
This is the garage that I won for the crazy price of 99p, I'm also glad that I didn't make an offer..You see the roof here but that was already off when my boys went to collect.
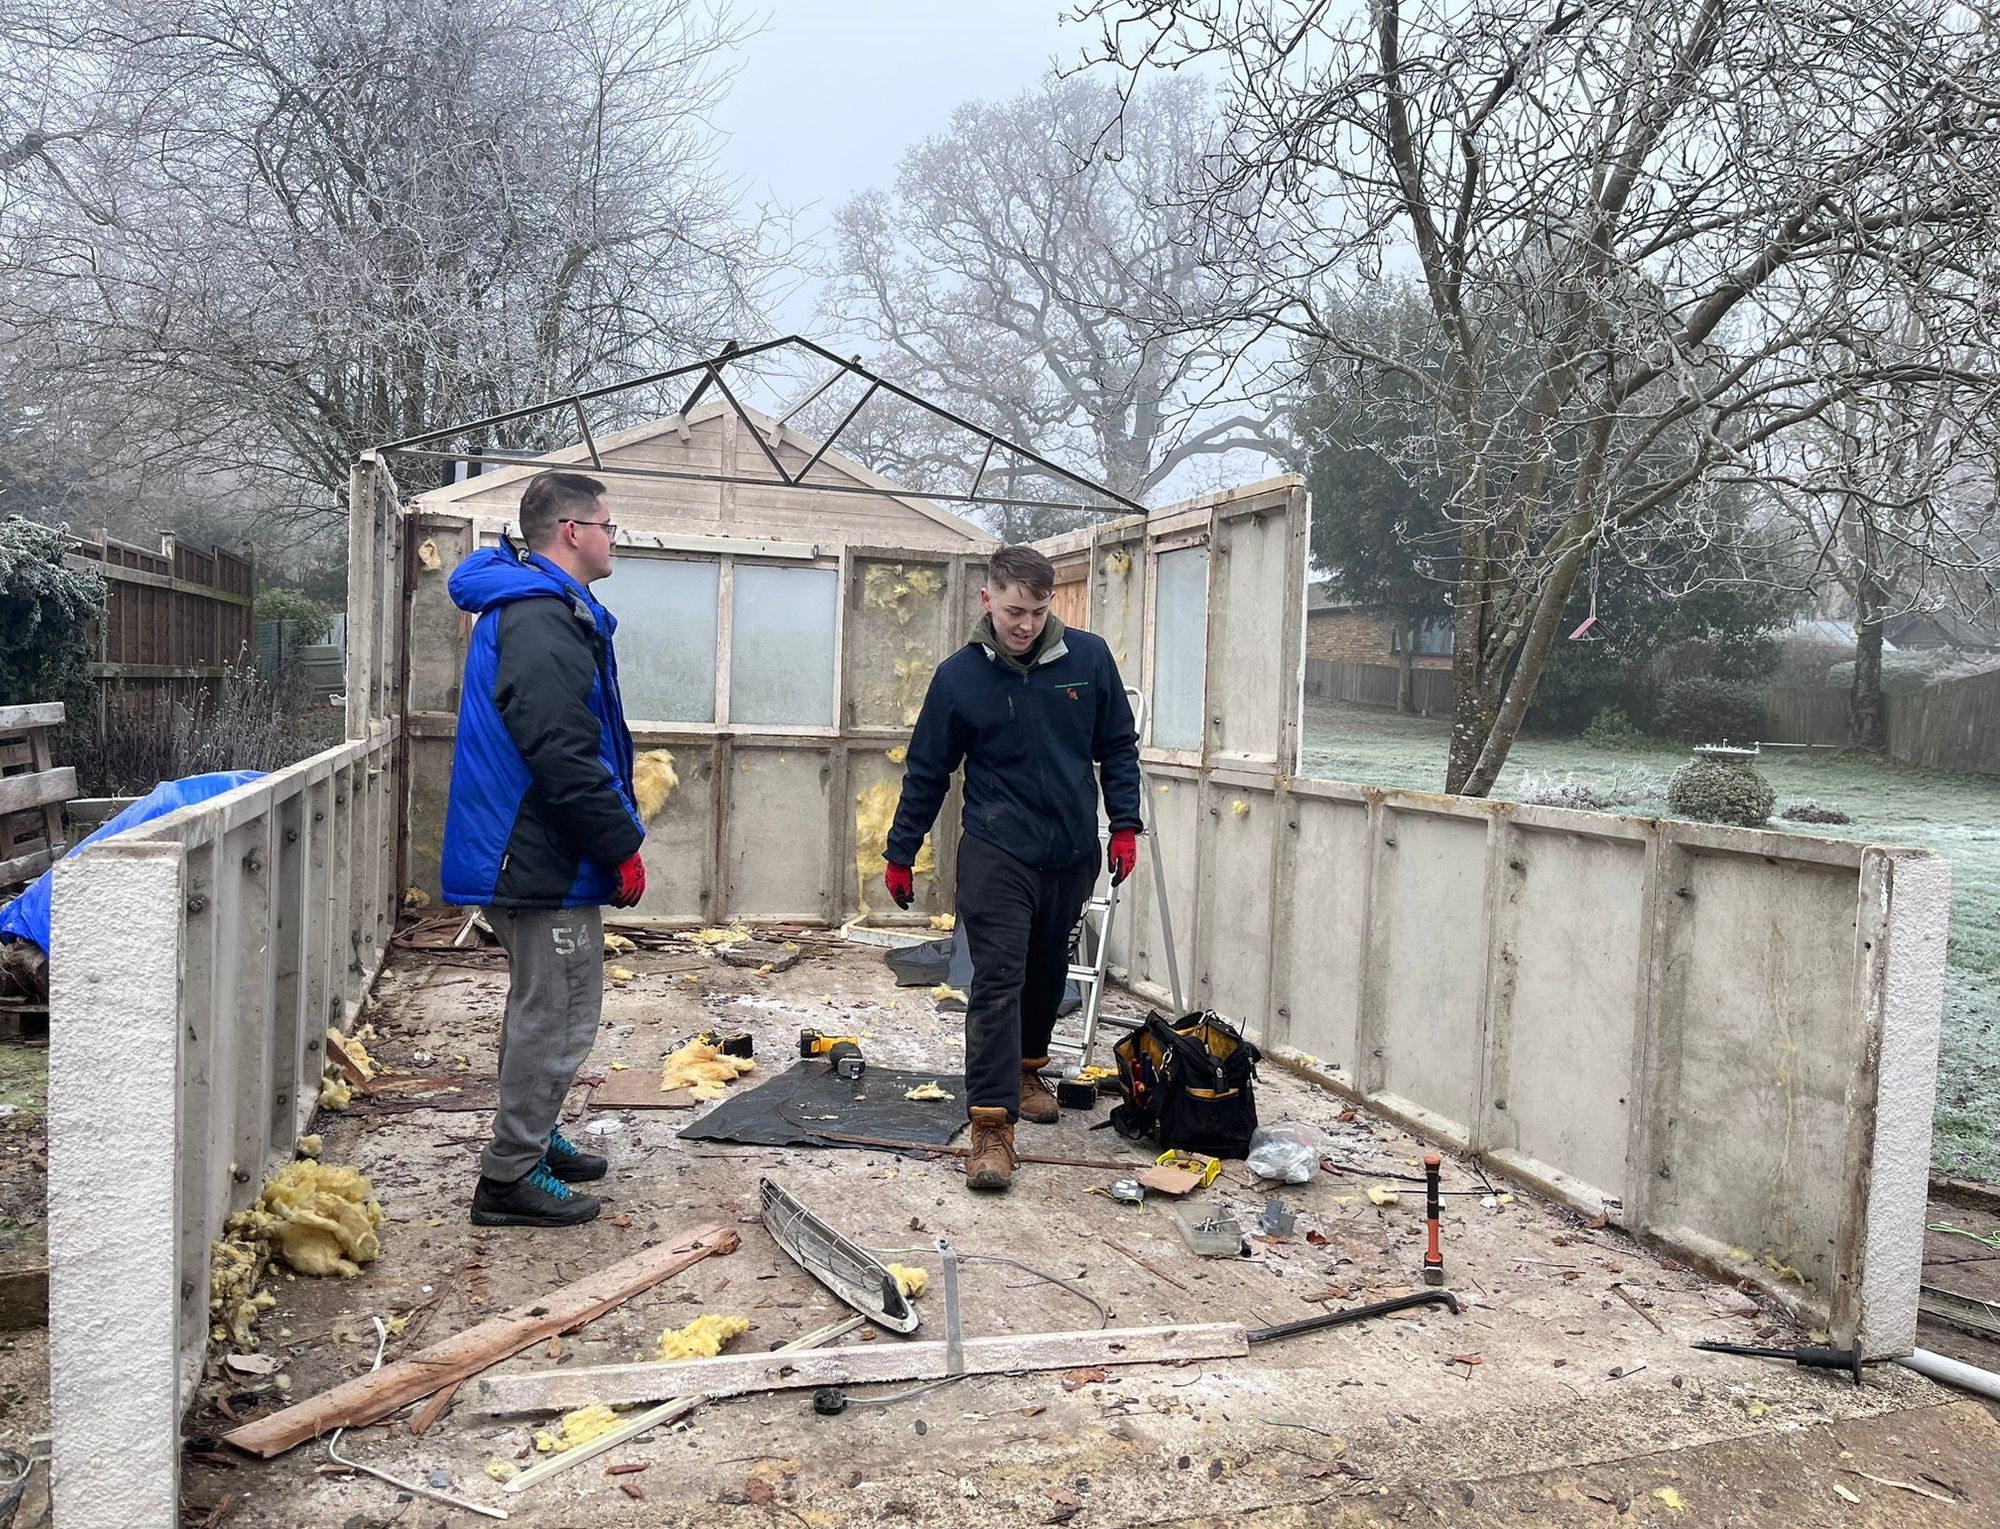
A snapshot of the lads in action, one son on the left, grandson on the right, and another son who took the picture. I couldn't help having had two bad falls during the move and thus confined to light duties. The panels themselves are in very good condition as are those in the garage at the new place, all boding well for the future.
In the next part, we'll get down to building the new extension.