
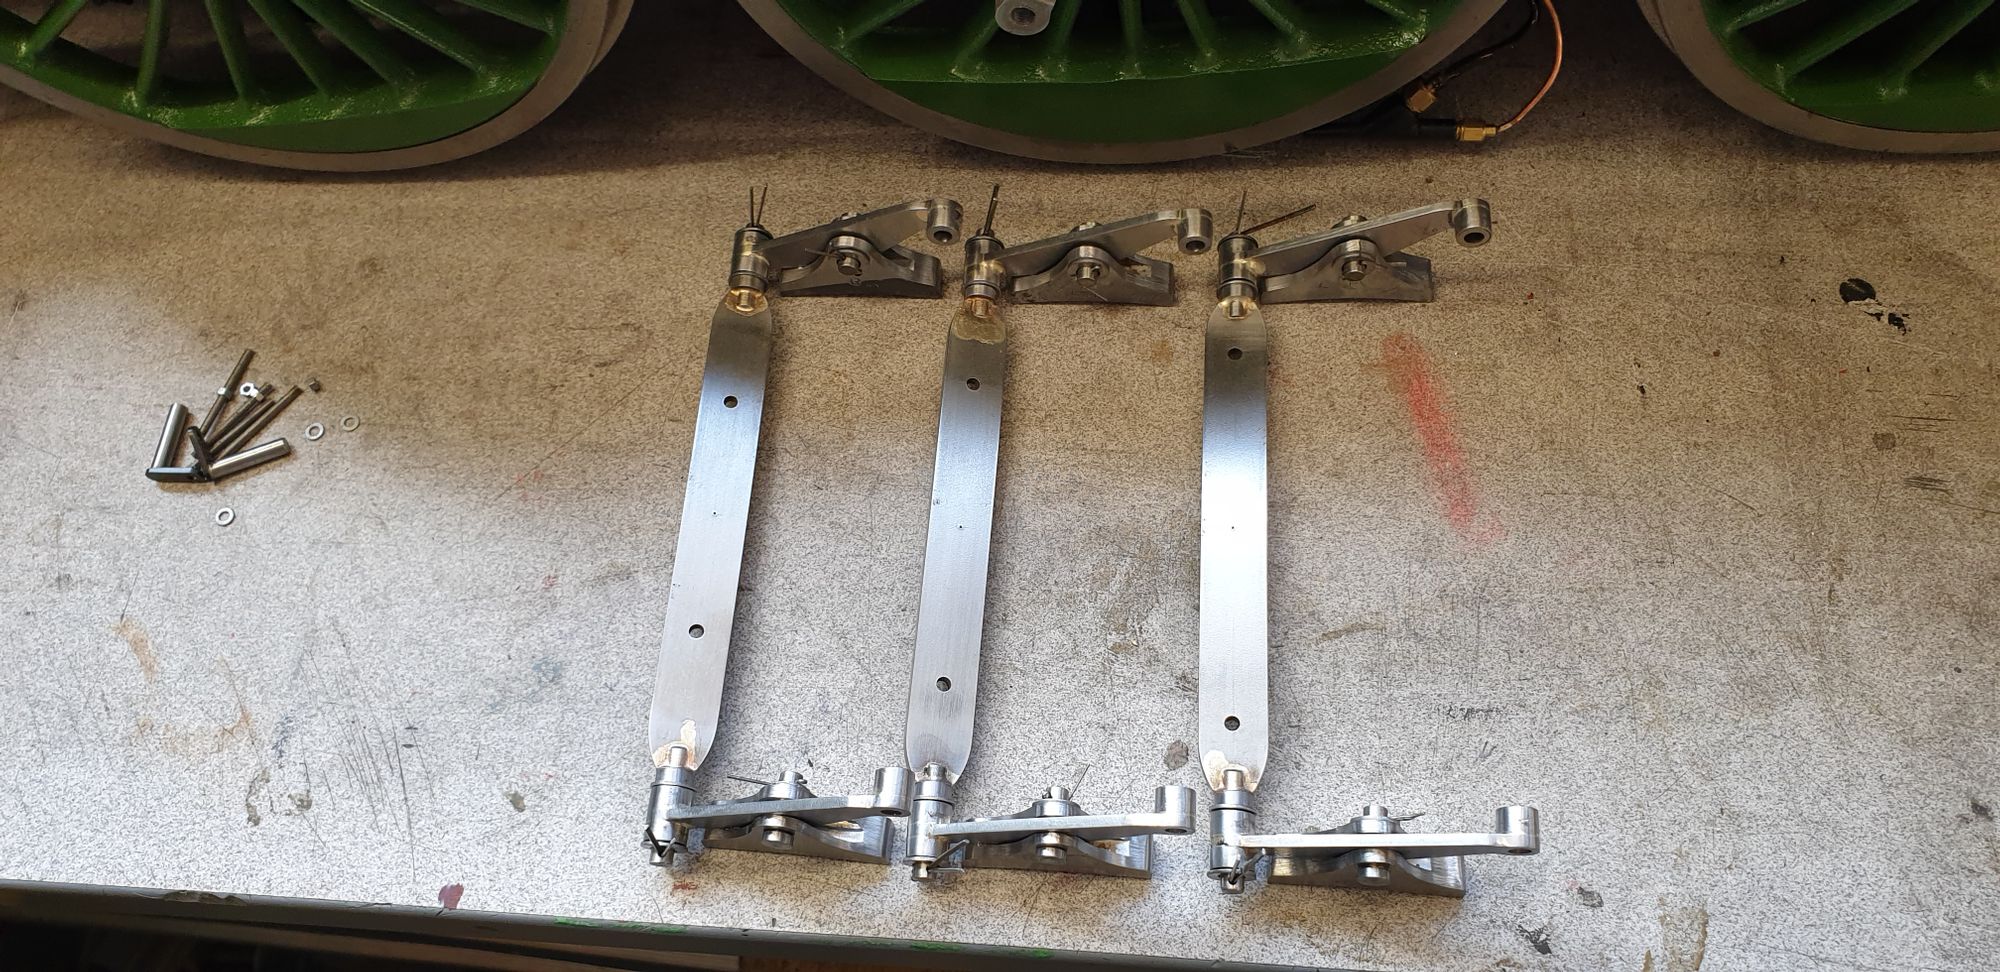
Brake beams
The next stage for the brakes was the brake beams, the beam flat sections were cut by Malcolm (MEL), the end pins needed to be machined. Using my normal method I did these in two parts which were then silver soldered together. To help keep them all the same without needing constant checking, I machined a small step on the inner end of the 3/16 pins for the larger 5/16 section to locate against. This step was 5/8 away from the outer end of the 3/16 pin. These sizes are important to give the correct length of each beam. The length of the flat section is 4 5/8, you then have the 5/16 dia sections which are 3/32 wide and finally the 3/16 pins at 5/8 long.
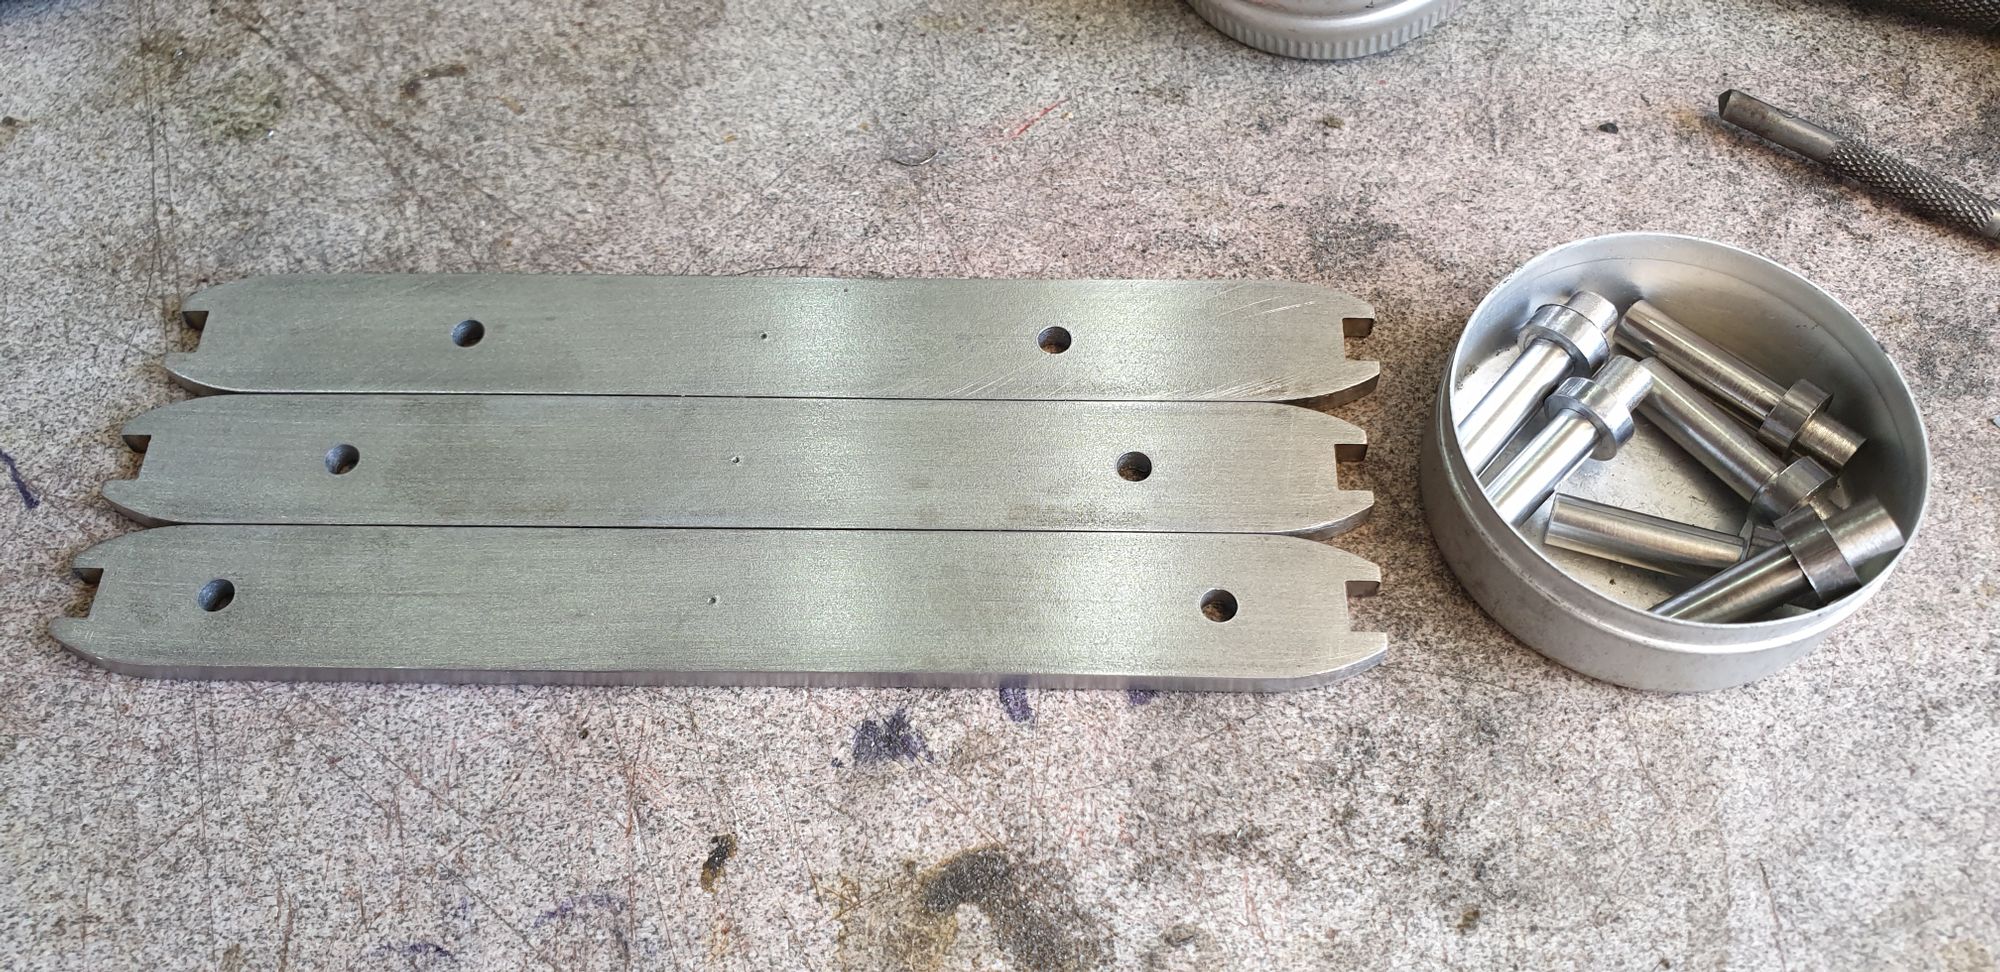
As can be seen Malcolm has cut out small sections for the 3/16 pins to locate into, that helps to centre the pins on one axis but not the other. To center the pins on both axis I have made the pins a little longer than the depth of Malcolm's cutouts, the extra length to have slots cut so that the pins will locate centrally on both axis, this will become clearer in the second photo. The first shown here is to show the various parts ready for silver soldering together. As can be seen I first plotted and drilled the holes for the pull rod pins to fit. Looking at the picture, the beam closest to the camera is for the leading wheel set, then the crank and lastly the trailing wheels, as can be seen the holes get closer to the centre on each beam, this will become clearer later when I make the rods.
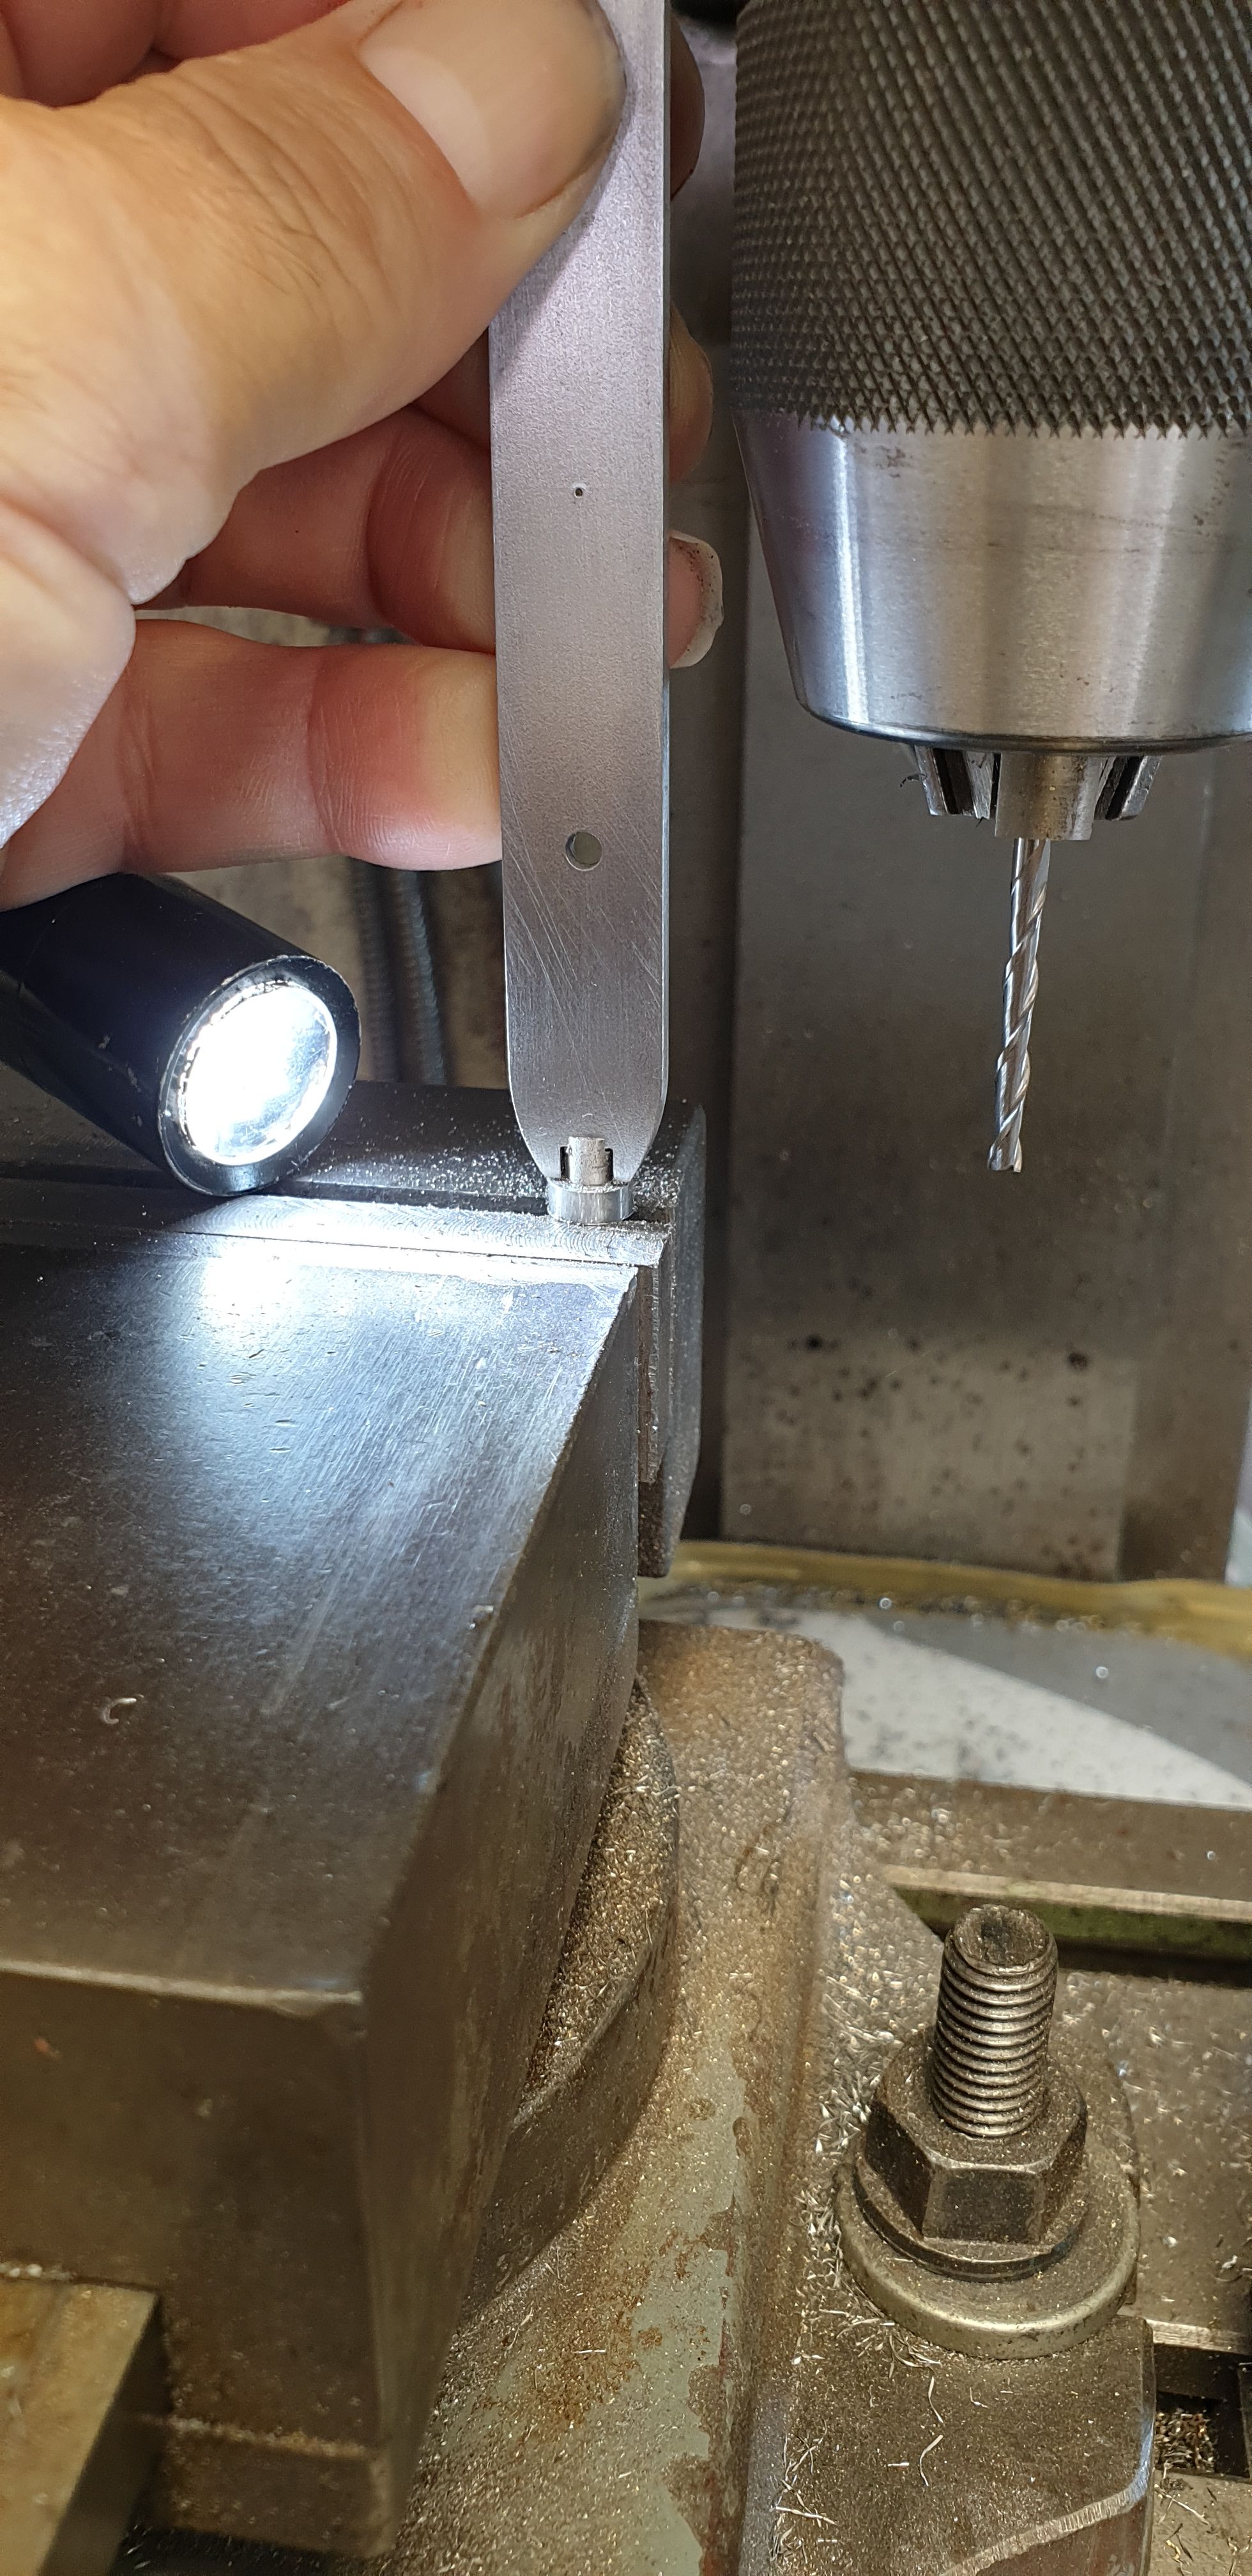
The next picture shows one of the slots being checked for depth, the small punch mark is the beam centre, used for plotting the pull rod holes.
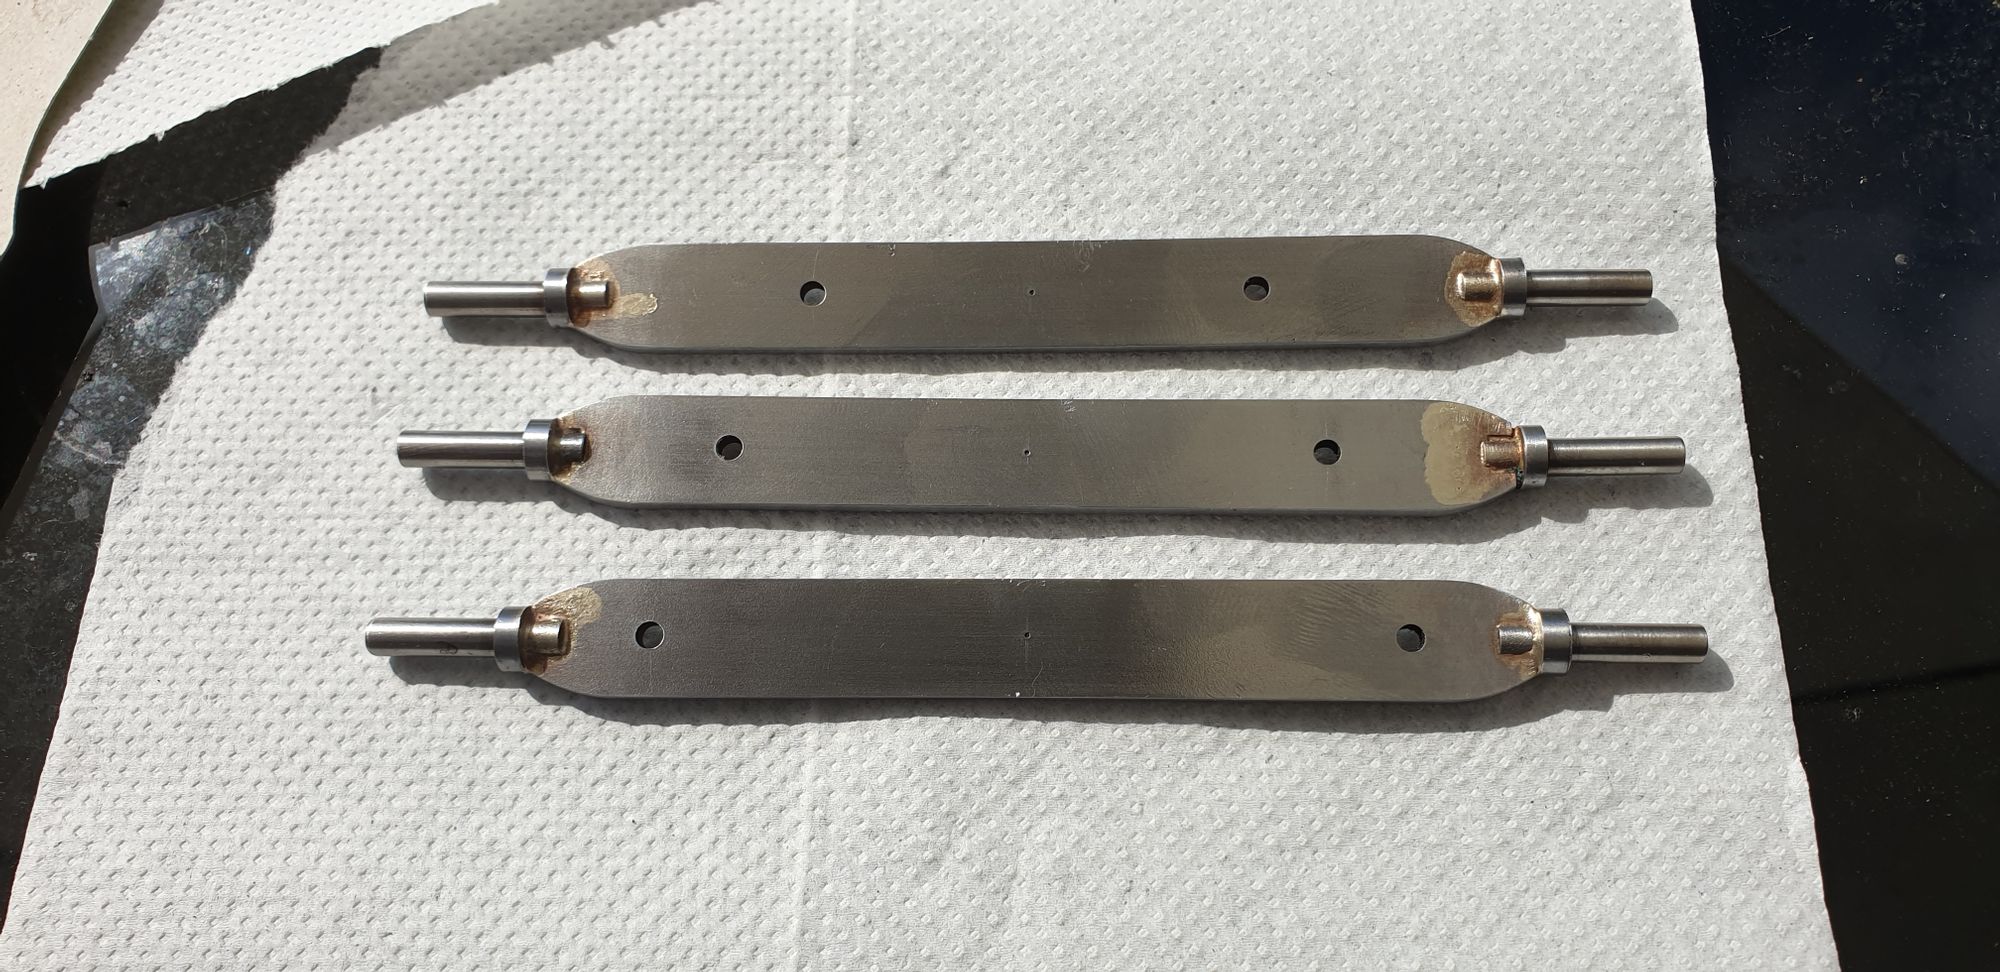
here we have all three beams ready to be silver soldered
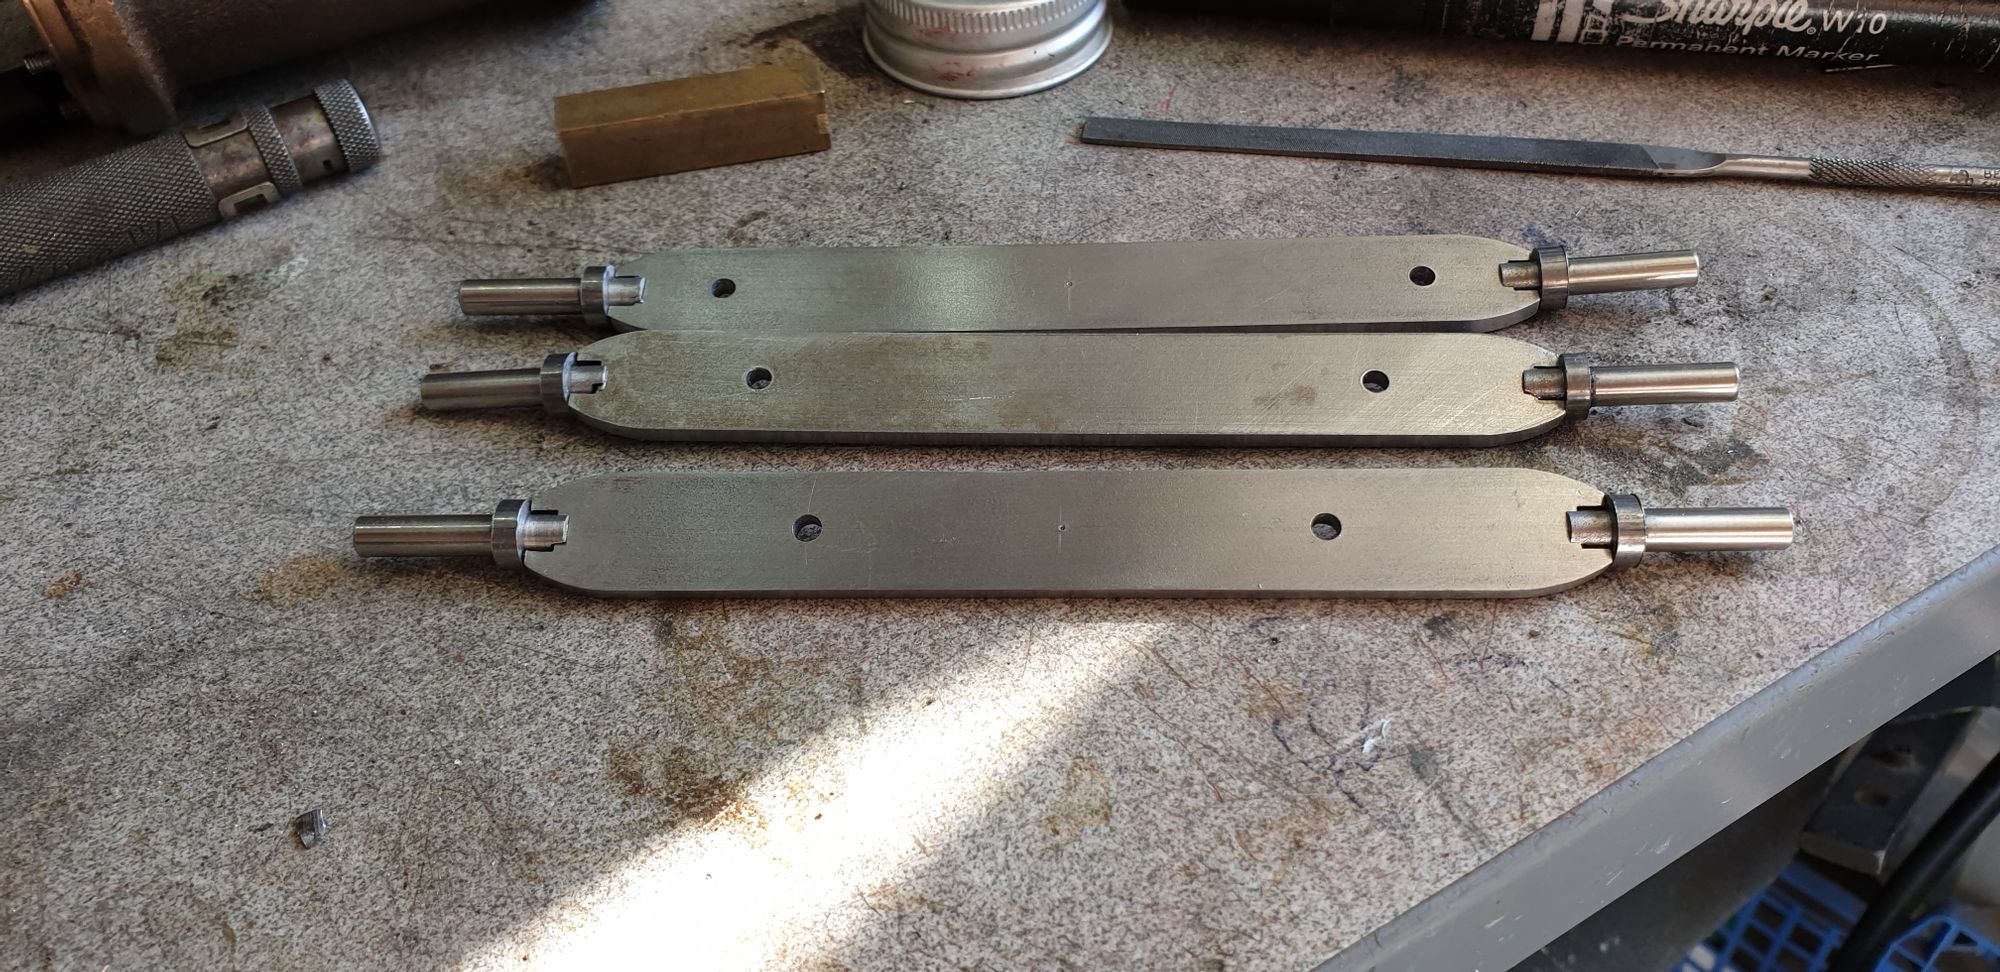
And now all three after being silver soldered, i did these one end at a time, using two magnets to hold everything square during the heating process
Next up was to drill the 1/16 holes in the brake beams, this was done by holding in the machine vice. Remembering to place a 3/16 washer in each case to space the hole correctly. I'm awaiting a delivery of smaller washers to fit the brake block pins.

The next job which will be seen in the next entry will be the pull rods and connecting links, once those are done I'll fit the various parts back onto the chassis and do a brake test. After that I'll strip all the parts down, take care of any final fettling and then paint/chemical black the appropiate parts before reassembly.